Tumblers: Diode, CO2 or Fiber Laser? Which Is The Best Laser Engraver for Tumblers?
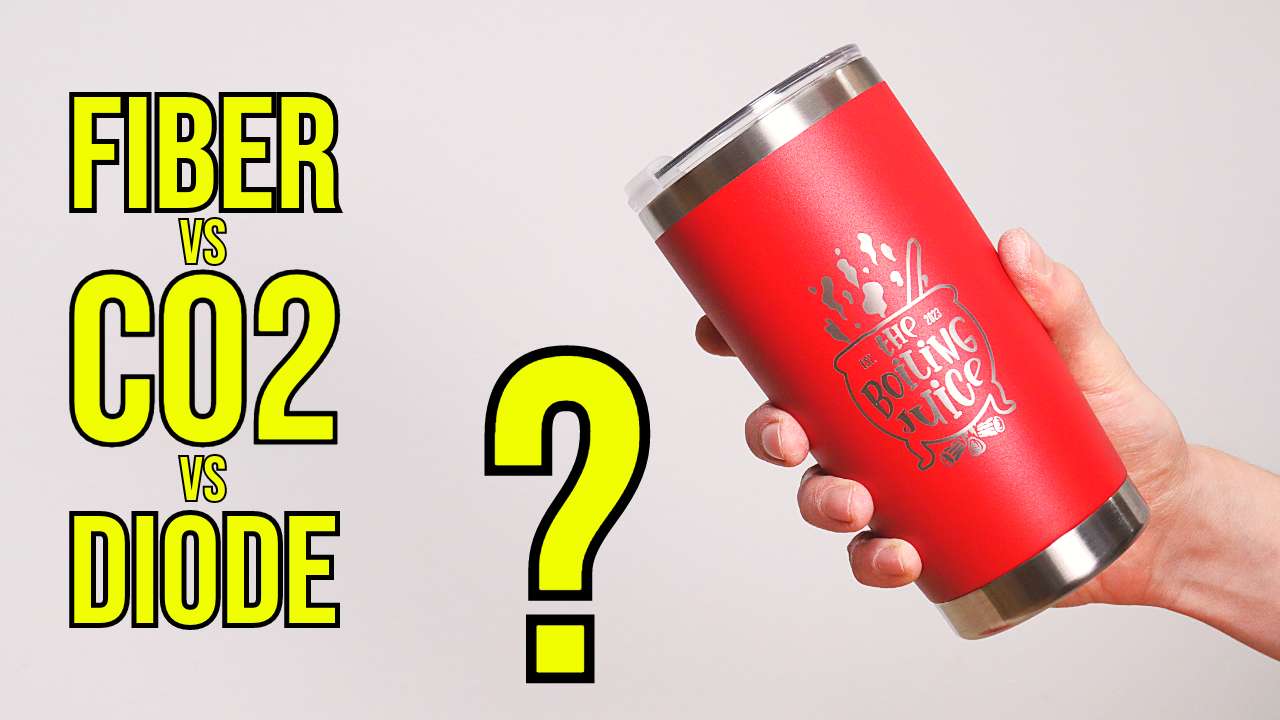
If you’re looking to create stunning, personalized drinkware, laser engraving tumblers is the way to go. Stainless steel tumblers are versatile, practical, and make for memorable gifts or promotional items. But with so many laser engraving machines on the market, how do you choose the right one for the job? In this blog post, we’ll explore the different types of laser engravers, essential accessories, and top recommendations for tumbler engraving using a laser engraver. Let’s unlock the secrets to perfect laser engraved tumblers!
*The links on this website can be affiliate links. I earn a small commission at no extra cost to you. When you buy through these links you will support this website, which helps me to run this website(which cost money and a TON of time) and provide all these extensive reviews and information to you for free, without any paid membership.
Key Takeaways
Different types of laser engravers, such as diode, CO2 and fiber lasers should be considered to ensure the best fit for one’s requirements and budget when engraving tumblers.
Essential accessories include rotary attachments which allow 360 degree engravings with improved stability.
The best laser engraver for tumbler engagement depends on individual needs, budget and desired outcome. We used all 4 types of lasers and engraved tumblers with them to compare the results.
We have highlighted pros and cons of each type of laser.
Types of Laser Engravers for Tumblers
When it comes to tumbler engraving, laser engraving machines mainly come in three types: diode laser, CO2 laser and fiber laser. All of them have their respective advantages and drawbacks, so the choice should be made based on your needs and budget. It is essential to know the specifics about each type for efficient operation with a maximum result.
Diode Laser Engraver
For a relatively low cost, diode laser engravers are becoming increasingly popular for DIY projects because they’re affordable, lightweight and easy to use. They emit blue laser light in 450nm light spectrum. Their output power is currently in a range between 5W and 45W. Despite their lower power output, which may cause time-consuming multiple passes when trying to laser cut harder materials, these machines are still the best choice if you’re on a budget.
They can cut wood and colored plastics, and engrave anodized aluminum, stone and many more materials. Some people find them suitable enough for smaller volume production or beginner usage. more powerful diode lasers can directly engrave stainless steel which needs to be considered when trying to use them for removing coating from tumblers. Diode laser engravers have laser spot size typically ranging from 0.1mm to 0.15mm (0.004″ to 0.006″).
CO2 Laser Cutter
Laser engraving with a CO2 laser comes with a cost, but they are more versatile and powerful than diode lasers. With their 10-micrometer wavelength useful for cutting wood, plastic (also transparent) or paper materials, it makes them suitable for any kind of project.
When considering engraving stainless steel tumblers, CO2 laser engraving is an attractive option due to the fact that CO2 laser can’t mark stainless steel directly like diode or fiber lasers can. This makes it easy to dial in the setting for removing the tumbler coatings without worrying that it will mark the stainless steel below.
CO2 lasers typically have a focus spot size ranging from 0.15mm to 0.2mm in diameter (around 0.006″ to 0.008″).
Fiber Laser Engraver
When engraving tumblers, fiber laser engraving machines are the top option for highest quality and accuracy, although they come with a slightly higher cost. These laser engravers can achieve amazing results on metal, plastic and coated and uncoated stainless steel tumbler surfaces. Because they can also engrave plastics with high contrast, you can use them for engraving plastic tumblers and cups too which does not produce so great results with other two types of lasers. Be aware that fiber lasers can’t mark wood or similar materials.

Fiber lasers have incredibly small laser spot (0.03mm diameter or 0.001″). because of that they can engrave very intricate designs with high detail. Due to their high power output they can engrave tumblers very quickly, making them good for large volume production.
Essential Accessories for Tumbler Engraving
When it comes to tumbler engraving, the appropriate accessories such as rotary attachments are essential for obtaining excellent results. This attachment assists in producing 360-degree engravings and ensures stability when crafting each design.
Without the rotary attachment, you can only engrave very small designs on tumblers, as the curvature of the surface makes it impossible to ideally focus the laser beam, which results in uneven engraving quality across the design.
Two varieties of this particular accessory exist: chuck rotary and roller rotary. Thus, taking into the account their benefits and drawbacks is important before making a decision on which one suits best. Both devices can help achieve great results with your tumbler etching task although one is more superior than the other.
Rotary Roller Attachment
The rotary roller method is a cost-effective solution for those with limited resources and interests in engraving tumblers. The attachment consists of two rubber rollers that are used to spin the tumbler or any other cylindrical shaped object. Read our review of the Sculpfun roller attachment if you want to learn what it can do!

While the tumbler is slowly rotated by the rollers, a laser beam will pass from left to right, moving across the surface of the tumbler as it is rotated one full rotation – similar to an inkjet printer’s function.
Despite being relatively inexpensive, this system may present issues such as imperfect friction between the rollers and tumbler which can lead to slipping while trying to attain perfect 360 degree engravings. Also the object needs to spin in only one direction and a maximum of one rotation. Vector designs or multiple passes are not possible with this technique either. Because the cylinder will always slip a little bit and the second pass will never be perfectly aligned with the previous one.

Chuck Style Rotary Attachment
Rotary attachments with a chuck-style design are more costly than roller options. The tumbler is clamped in its jaws which are similar to the ones we find on a lathe. They ensure greater stability and zero slippage for superior outcomes. They can securely hold items in the shape of cylinders enabling precise and consistent engraving on every side.

The xTool RA2 Pro (read our full review here) is an ideal rotary attachment suitable to pair with different laser machines. It fits all xTool diode machines like the xTool D1 Pro, xTool F1, xTool S1 and the xTool P2 55W CO2 laser. But it also fits other diode engravers like Sculpfun, Atomstack and other brands of open laser engravers. You can read more about 33W engravers and 20W engravers if you want to learn more about them.
This attachment allows you to accomplish regular or irregular engraved cylindrical objects, spheres and tumblers swiftly and accurately, making it worth investing into, if accurate results on various kinds of tumblers and cylindrical objects are your end goal.

Finding The Best Laser Engraver for Tumblers
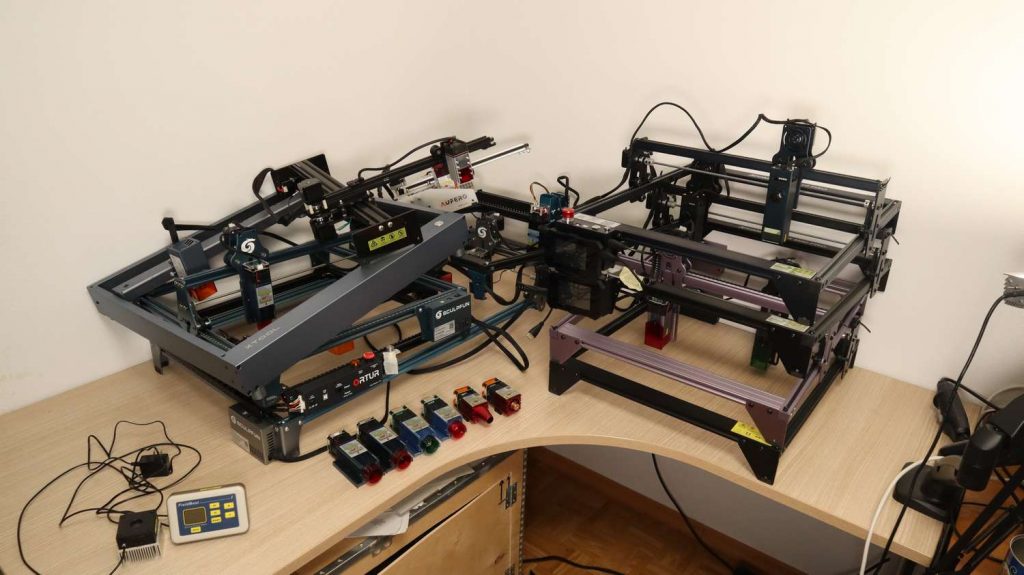
Finding the perfect laser engraver for tumblers is no easy task, so we have tried to engrave some tumblers with different types of laser engravers to see how each type performs comparing some real life examples.
We designed a simple, yet cool looking design in just a few minutes using Kittl.com online designer and engraved in on tumblers with a diode, CO2 and fiber laser and we also engraved another tumbler with a more special type of laser.
Engraving Tumblers with a Diode Laser Engraver
Diode laser engravers were represented by the all new xTool S1, fully enclosed laser engraver with a riser base which we have reviewed recently. Although you can get similar results with the xTool D1 Pro or any other similar diode laser, the xTool S1 is more practical to use because of the enclosed design and has additional safety features.
xTool sells a lot of materials for laser engraving and I got high quality tumblers directly from them. I used the xTool RA2 chuck style rotary attachment which offers great precision. Tumblers have a cone shape, and you need to level the attachment for the best results. Setting up rotary engravings with the xTool S1 is very easy. First you need to set the diameter of the tumbler and then you need to position the laser module in the center of the tumbler. Then the machine uses a mechanical probe to measure and adjust the focus. Use the framing function to check the correct placement of the design before you start engraving.
Powerful diode lasers can directly mark stainless steel , because of that the power setting needs to be carefully selected, if you want to leave the underlying stainless steel as shiny as possible. The settings we used settings are not ideal and can be improved. We have seen people produce perfect and shiny surface of the steel by tweaking settings a bit more that we did.
Engraving was completed in 13 minutes. This time can be optimized with better settings. The engravings have a lot of charring which needs to be cleaned off using soap, rubbing alcohol and light abrasive dish cleaning sponge. The result looks good, but we will further compare all the results at the end of the article.

Laser Engraving Tumblers With a CO2 Laser Cutter
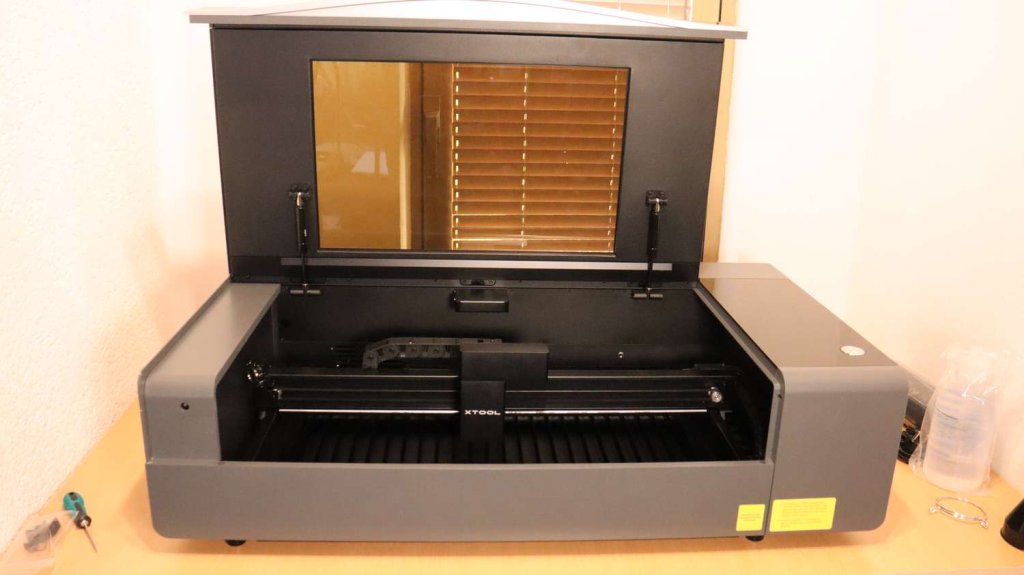
Then we went to engrave it with the xTool P2, a 55-watt CO2 laser cutter (read our full review here) with a riser base. If you want to use rotary, you need to remove the slats and lower the tray.

Engraving tumblers with the xTool P2 is easy thanks to its intuitive software, auto focusing and the dual camera system. You can see the setup process in our YouTube video.
The great thing about CO2 laser engravers is that they can’t mark stainless steel directly, therefore adjusting the settings perfectly is not so critical. Although not much power is needed to burn through the coating. We used 18% power, 100mm/s and 260 lines per cm.
Again, the charring needs to be cleaned off using soap, rubbing alcohol or light abrasive dish cleaning sponge. The result looks good, I will later compare it with other lasers.

A CO2 laser is very good at removing coating from tumblers as it does not mark stainless steel below it, leaving a nice shiny surface without having to spend a ton of time fine tuning the settings.
The xTool P2 55W CO2 Laser is ideal for those who want an engraving tool capable of engraving powder coated metal, anodized aluminum alloy as well as being a very capable laser cutter for wood, leather, and acrylic. Read our full review if you want to see more stuff that the xTool P2 is capable of engraving and cutting.
It also supports curved surface engraving, which allows it to engrave medium sized designs even without using a rotary, because it can adjust the focus height of the laser head in real time. But in our test, we have used the RA2 Pro rotary attachment for maximum convenience.

Engraving Tumblers With Fiber Laser Engraver
Next, we went to engrave a tumbler using a true fiber laser which was represented by the ComMarker B4 20W Fiber Laser Engraver (full review here). Fiber laser is the perfect machine for those looking to engrave in bulk. Its fiber laser source produces incredibly precise results that are sure to be appreciated. It is ideal for businesses requiring a quick turnaround, since it can rapidly etch large amounts of products with high detail due to its smallest laser spot size.

The rotary we have is meant for smaller stuff and I had to improvise a bit to make the tumbler fit. ComMarker also sells larger rotary attachments, but this is the one we had, and we were able to make it work too. This machine supports Lightburn which offers a lot of adjustments of the rotary settings.
With more settings that a fiber laser brings to the table, you need to do a bit more testing to find the correct settings as they also have a frequency parameter and de-focusing also has a big effect on the outcome.
We have set a relatively low speed, low frequency, medium power, and a very fine line interval. You also need to set the rotary settings. I have left these settings as they were and for the additional settings, we have set a very small split size and some overlap. You can find the settings we used in our YouTube video.

Fiber laser can easily remove the coating, but this type of laser can also mark stainless steel very easily, and because of that you need to spend a bit more time finding the perfect settings. The result looks good and there is very little cleanup needed afterwards. If we would spend more time fine tuning the settings and had a bigger rotary tool, we could use multiple passes and achieve even better results.
Due to having the smallest focus spot size, the ComMarker B4 has produced the most detailed engraving. The difference is most noticeable on the logs under the cauldron.
Engraving Tumblers With Galvo Dual Beam Diode Laser(Blue and Infrared Diode)
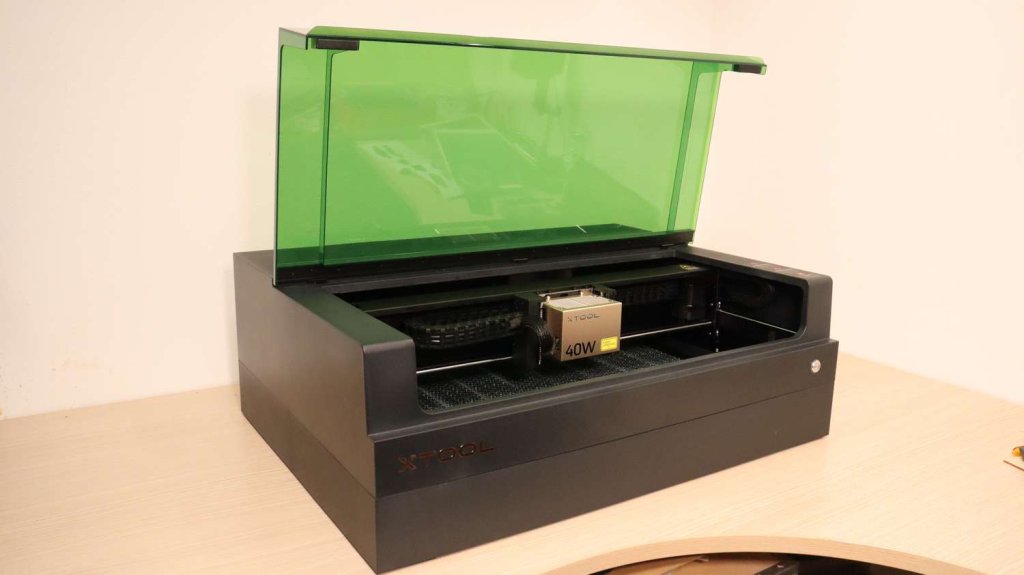
Lastly, we have engraved the tumbler with a very special laser, the xTool F1, galvo dual beam diode laser engraver (Full review here). This engraver features 10W blue laser diode, great for wood and plastics and a 2W infrared laser module which is similar to fiber lasers and is great for metals. We took advantage of this system and used both laser beams for my tumbler.

Like with all xTool machines, engraving tumblers with the xTool F1 is very straight forward and easy to set up. First, a blue laser was used for removing the coating. The blue laser produces a similar result to the one we have seen with the xTool S1 a few chapters higher where we have seen that the surface of the engraved metal under the powder coating becomes a bit darker.
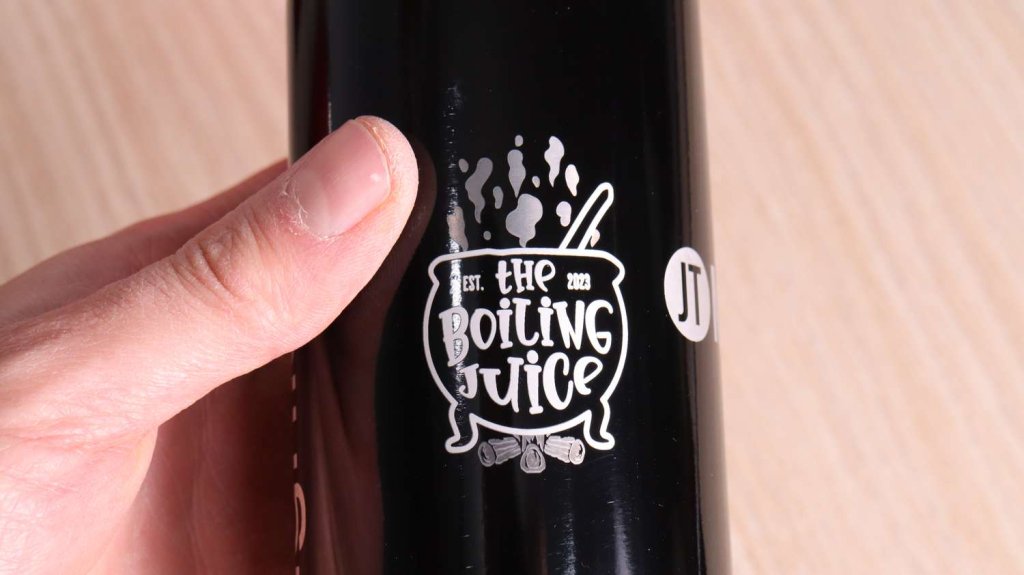
To mitigate this issue, we took advantage of the chuck style rotary system which has zero slippage and made another cleaning pass with infrared laser using low power for a part of the design(the cauldron and the text). This setting cleans and polishes the metal surface, leaving a perfect finish which needs no cleanup at all. You can see how much brighter are the parts which were cleaned with the infrared laser.

Here is another type of painted metal bottle where we used the same settings and here the polishing effect is much more pronounced. This is a great feature, but it requires the use of chuck style rotary tool, otherwise the second pass is never fully aligned with the previous one.

Tips for Successful Tumbler Engraving
Design Preparation
When crafting a design for laser engraving tumblers, the curvature of the surface should be taken into account. You might have to tweak your design in order to fit it right and keep its readability on that curved structure.
Material and Machine Setup
For successful laser engraving on a stainless steel tumbler, ensure your machine is correctly set up and the rotary attachment is in place. The diode laser should be aligned with the tumbler by adjusting the Y gantry accordingly.
In order to achieve the best engraving results for stainless steel tumblers with a fiber laser, one must experiment with various power, speed and frequency settings until they find their optimal configuration. Slightly de-focusing the beam of said laser can create more consistent outcomes on this type of material. Adjusting your machine accordingly is necessary in attaining great results through engravings on any kind of surface or object using a laser!
So, Which Laser Engraver Is the Best for Engraving Tumblers?
When deciding which laser engraver to use for tumbler engraving, it is important to look at the advantages and disadvantages of each type. Diode lasers offer a budget-friendly option but require more post-engraving finishing work if higher quality of engravings are desired, CO2 laser cutters require less work for dialing in the ideal settings, but they come with a costlier price tag. Fiber laser engravers guarantee fast and precise results even though their settings may take some getting used to. The dual beam xTool F1 has produced amazing results, but it is not as fast as fiber lasers. Ultimately, the best pick will depend on individual needs and preferences in terms of time frame and expected outcome versus budgetary constraints.
And check out our list of detailed machine reviews to learn more about each individual laser machine!
By using the appropriate laser engraving tools, as well as accessories and techniques to create unique designs on tumblers for a lasting impression, even small businesses or individuals can take advantage of this profitable craft. Knowing how to work with different types of lasers is key in developing truly one-of-a-kind tumbler design that stands out from the competition.
Expanding Your Engraving Business
Once you have attained proficiency in tumbler engraving, it could be a wise move to broaden your repertoire and etch other types of drinkware. Doing so will provide you with more opportunities for sales growth and business expansion as the potential customers increase significantly.
Other Drinkware Items
Laser engraving can be used for more than just tumblers. With the help of a laser engraver, you have an array of items to choose from like wine glasses, pint glasses and mugs. Even coasters! If you opt for CO2 or diode laser, you can also make some custom laser cut wooden gift boxes for the drinkware. This makes your business very versatile when it comes to creating drinkware with personalized touches. Laser-engraved products are popular among customers and offer endless possibilities when customizing each one individually in order to satisfy customer needs. But you should always check it a certain type of laser can work on the materials you want to engrave.
Frequently Asked Questions
What type of tumblers can you laser engrave?
Personalizing products with engraving is popular, and one such product are tumblers made from materials like powder-coated stainless steel. Using a fiber laser you can engrave plastic tumblers too. Diode and CO2 lasers can also engrave plastic but the results are superior using a fiber laser.
Can YETI Tumblers and Cups and Mugs Be Laser Engraved?
Using a diode laser, CO2 laser or fiber laser engraving machine, Yeti products such as tumblers, cups and mugs can be engraved with these lasers. Jugs also qualify for the same method of marking.
Can a Glowforge engrave a YETI tumbler?
It is unfortunately impossible to engrave a true YETI tumbler with the Glowforge due to its maximum depth of 2 inches for etching. This is why the xTool P2 is our to-go CO2 laser engraver for tumblers and a bunch of other stuff. You can read our review of the xTool P2 if you want to learn more about what it can do.
How much can I charge to laser engrave a cup?
The price for laser engraving a cup depends on factors like material cost, design complexity, time, and overhead. Consider these factors, research local market rates, and set a competitive price that covers costs and provides a reasonable profit margin.
Here are some factors to consider when determining how much to charge for laser engraving a cup:
- Material Cost:
- Consider the cost of the cup itself. Higher-quality or specialty cups may cost more.
- Time and Labor:
- How much time will it take to set up and complete the engraving? Factor in the labor involved in preparing the design, securing the cup in the engraving machine, and monitoring the process.
- Design Complexity:
- More intricate designs may require more time and precision, impacting the overall cost.
- Machine Depreciation and Maintenance:
- Consider the cost of maintaining and depreciating your laser engraving machine. This includes electricity, maintenance, and eventual replacement.
- Overhead Costs:
- Account for any other business overhead costs, such as rent, utilities, insurance, and other expenses associated with running your business.
- Market Rates:
- Research the pricing of similar services in your local area. This will give you an idea of what customers are willing to pay and help you stay competitive.
- Profit Margin:
- Determine what profit margin you want to achieve. This will depend on your business goals and the perceived value of your services.
- Volume Discounts:
- Consider offering discounts for larger orders or repeat customers.

This post was written by JT Makes It.
JT Makes It is an engineer, hobbyist, and DIY-er armed with a Master’s degree in Electrical Engineering and over a decade of professional experience in the industry. From an early age, JT Makes It was pushed by an insatiable curiosity, spending countless hours disassembling, understanding, improving, and creating various gadgets and products. This lifelong passion led to a broad spectrum of technical expertise ranging from electronics, woodworking, metalworking, and CNC machinery, with a particular focus on laser engravers.
For the past 9 years, he has shared his expertise through engaging videos on his YouTube channel. With the last three years dedicated to scrutinizing and testing laser engravers, he also created this website and emerged as a recognized authority in the field. His expertise extends across the spectrum of laser technologies, ranging from diode lasers, CO2 lasers, and fiber lasers, paying attention to details and providing practical insights.
With JT Makes It, expect a blend of technical expertise, backed with hands-on experience, and a genuine passion for innovation and creation, making him a trusted source in the realm of DIY and laser engraving enthusiasts alike.