
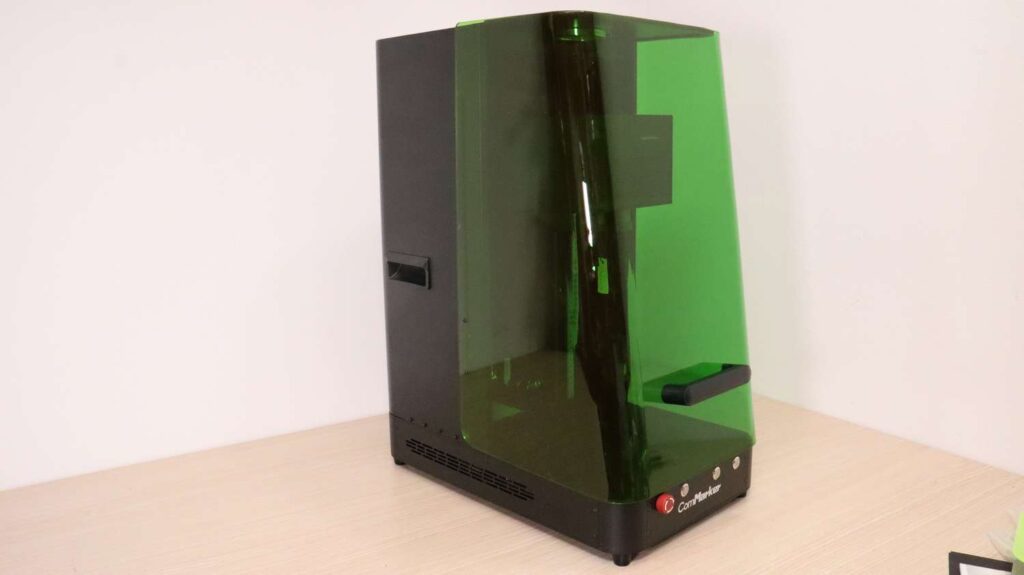
Looking to upgrade your ComMarker Omni X UV laser for more power, speed, and precision? In this in-depth test, I put the ComMarker Omni X 12W upgrade module through real-world challenges — including deep stone engraving, thick wood cutting, glass cutting, stainless steel marking, and advanced 3D embedded inner glass engraving.
Is the jump from 5W to 12W worth it? Here are the real performance results, side-by-side comparisons, and what demanding users can expect from this powerful UV laser upgrade.
Table of Contents
*The links on this website can be affiliate links. I earn a small commission at no extra cost to you. When you buy through these links you will support this website, which helps me to run this website(which cost money and a TON of time) and provide all these extensive reviews and information to you for free, without any paid membership.
ComMarker Omni X 12W Upgrade Overview
Today, we’re taking a detailed look at the 12W upgrade kit for the ComMarker Omni X UV laser. This upgrade allows you to:
- Engrave faster
- Achieve greater engraving depth
- Process more challenging materials
- Cut thicker materials
- Create stunning embedded 3D glass engravings faster than ever
For demanding users, this is a significant performance boost.

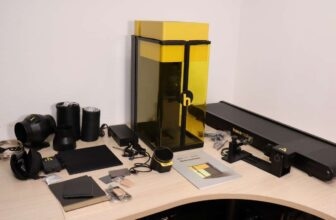
6W vs 12W ComMarker Omni X Module Differences
Here we can see the 6W module on the left and the 12W module on the right.
The lower-powered module uses 70 mm and 150 mm lenses, while the 12W module includes a 250 mm lens and a 70 mm lens.
Key differences:
- The upgraded module uses physically larger lenses
- Both lenses use the same 52 mm thread size
- The lenses appear to be interchangeable, meaning you could potentially have three lens sizes after upgrading
- The 12W module uses a different focus distance sensor
I’m not sure whether this difference is due to my weaker module being an early production version, or if all modules differ in this way.


The upgrade process itself was quick and straightforward, and I was engraving again in no time.

250mm Lens Test – Surface Engraving Performance
Let’s begin with the 250 mm lens, which is designed for surface engraving and larger working areas.
Deep Stone Engraving Test
I wanted to see how well the 12W module handles deep stone engraving.
Although it has double the power, the larger lens also reduces power density due to the increased beam area.
After running the test for a few minutes, the results were impressive:
- Crisp engraving
- Approximately 1.25 mm (0.05”) deep
- Extremely clean detail
The result exceeded my expectations.

UV Laser Wood Cutting Test
9 mm Paulownia Wood Cutting
Next, I tested 9 mm thick Paulownia wood at medium speed and maximum power.
I set the machine for 70 passes, but halfway through, the beam was already visible on the other side.
Results:
- Extremely clean cut
- No burn marks
- Minimal kerf
- Parts almost friction-fit together
The cutting precision of UV lasers continues to impress me. No other laser type can achieve this level of fine detail without thermal damage.


15 mm Wood Cutting Attempt
I also tested 15 mm thick wood, but it was too thick.
The beam became too defocused, and instead of ablating the material, it began to char the wood.

Hard Oak Cutting – Real-Time Test
Since Paulownia is soft, I tested 5 mm thick oak wood using the same settings.
In just:
- 25 passes
- 20 seconds of cutting time
The laser cut completely through.
The results were:
- Incredibly tight cuts
- Almost invisible kerf
- Clean edges with no visible heat damage
I was genuinely blown away.


Ultra-Thin Wood Cutting
Because UV lasers don’t rely on heat in the same way as CO₂ or fiber lasers, they can cut extremely thin material sections without burning.
I cut two puzzle pieces, and what remained between them was an incredibly thin slice of wood — something that would normally burn away with other laser types.

The real-time cutting footage in the video on the top of this article clearly shows just how fast this machine processes wood.
Glass Cutting & Engraving Test
Next, I tested glass cutting using a wine glass.
Process:
- Engraved my logo.
- Ran multiple passes using a regular fill pattern.
- Allowed dust particles to escape through the cavity instead of cutting just the outline.
After a few minutes, the result was:
- Crisp and clean cut
- Clean edges
- Approximately 1 mm thick glass section
When filled with water, the cut produces a waterfall fountain effect — a very unique visual result.


Focus Range Comparison – 6W vs 12W ComMarker Omni X
To test usable focus range, I repeated the experiment from my original review.
Settings used:
- 150 mm/s
- 40 kHz
- 1 ns pulse
- Full power
The 12W module clearly provides a larger usable focus range compared to the weaker module.

Lowering the Z-axis slightly would increase the usable range even further, but I kept the focus on the top of the glass for consistent repeatability.
Stainless Steel Engraving Performance
I also tested stainless steel engraving.
Using medium speed and adjusting only the interval, I achieved:
- Smooth light engravings
- Dark contrast engravings
- Deep etched durable markings
The 12W module delivers strong and versatile metal marking performance.


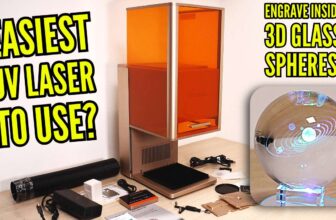
3D Embedded Inner Glass Engraving – Advanced Mode Test
Now for the main feature of the 12W ComMarker Omni X:
3D Embedded Inner Glass Engraving
This test used the advanced engraving mode in ComMarker Studio software, which also imports OBJ file format models.
Unlike STL files, OBJ files include texture data, allowing:
- Variable texture shading
- Different dwell times
- Varying transparency levels
- Increased contrast and realism
The machine builds the design layer by layer, similar to a 3D printer.

This engraving took approximately 1.5 hours to complete.
The result?
- Unmatched detail
- Clearly visible shading depth
- Stunning internal 3D structure
The camera truly doesn’t do this piece justice.


This type of work opens the door to building a profitable custom gift business, especially for personalized keepsakes and special occasions. Below is the engraved model illuminated from the bottom. You can see how it looks from the front — and from the back — showcasing the depth, clarity, and internal detail of the 3D structure.


Final Verdict – Is the 12W ComMarker Omni X Upgrade Worth It?
– Demanding users
– Those needing maximum speed
– Deeper engraving capability
– Thicker material cutting
– Larger effective working area
– Faster processing of glass and metals
The additional power makes a noticeable difference in performance and productivity.
That said, the 5W/6W version of the ComMarker Omni X remains a very capable and impressive UV laser machine. It delivers excellent results and is a strong option if you don’t require maximum power.
If you want to see how the 5W model performs in detail, make sure to read my original review of the 5W ComMarker Omni X, where I cover its real-world capabilities.
And use my discount code “jtmakesit” for 5% OFF as a thank you for visiting this site!
And if you want to stay in touch with our latest reviews, subscribe to our mailing list to get notified when we release new review articles!

This post was written by JT Makes It.
JT Makes It is an engineer, hobbyist, and DIY-er armed with a Master’s degree in Electrical Engineering and over a decade of professional experience in the industry. From an early age, JT Makes It was pushed by an insatiable curiosity, spending countless hours disassembling, understanding, improving, and creating various gadgets and products. This lifelong passion led to a broad spectrum of technical expertise ranging from electronics, woodworking, metalworking, and CNC machinery, with a particular focus on laser engravers.
For the past 9 years, he has shared his expertise through engaging videos on his YouTube channel. With the last three years dedicated to scrutinizing and testing laser engravers, he also created this website and emerged as a recognized authority in the field. His expertise extends across the spectrum of laser technologies, ranging from diode lasers, CO2 lasers, and fiber lasers, paying attention to details and providing practical insights.
With JT Makes It, expect a blend of technical expertise, backed with hands-on experience, and a genuine passion for innovation and creation, making him a trusted source in the realm of DIY and laser engraving enthusiasts alike.
*The links on this website can be affiliate links. I earn a small commission at no extra cost to you. When you buy through these links you will support this website, which helps me to run this website(which cost money and a TON of time) and provide all these extensive reviews and information to you for free, without any paid membership.


Leave a Reply