
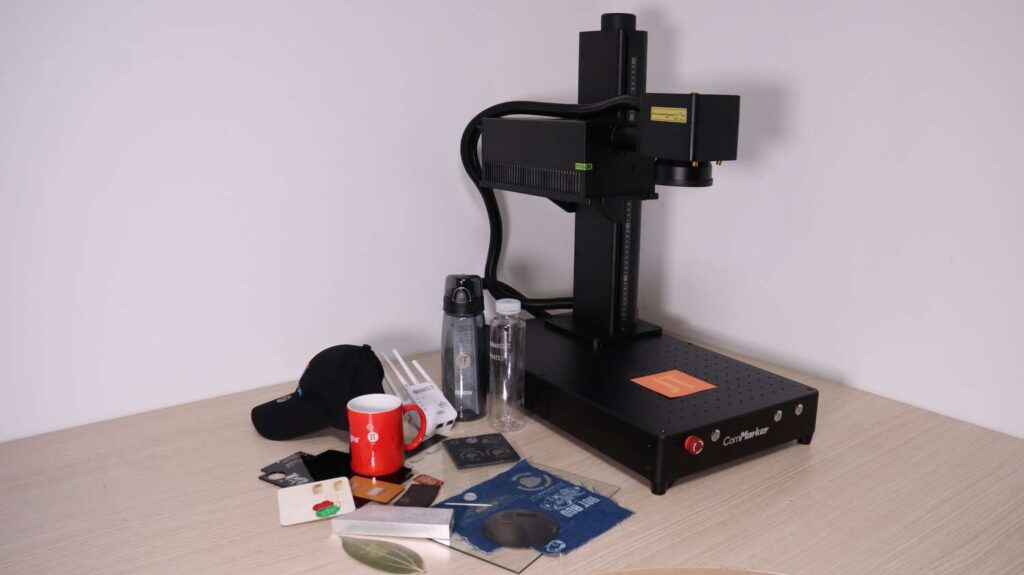
In this review article, we’ll be taking a look at the 10W version of the ComMarker Omni 1 laser engraver. This is a highly capable UV laser engraver that can engrave nearly all types of materials—something no other laser type can achieve. Now, you might remember that I reviewed the 5W version a while ago. This 10W model is basically its bigger and more powerful sibling, and in this article we are going to put it through some of the more demanding tasks to see what it is really capable of.
(Results might surprise you!)
Table of Contents
*The links on this website can be affiliate links. I earn a small commission at no extra cost to you. When you buy through these links you will support this website, which helps me to run this website(which cost money and a TON of time) and provide all these extensive reviews and information to you for free, without any paid membership.
5W vs 10W ComMarker Omni 1
First, I need to mention that everything that I engraved with the 5W version of the ComMarker Omni 1 in my previous review can also be done with the 10W version. That’s why I won’t repeat the same information—instead, in this article I’ll focus primarily on the tasks where the 10W ComMarker Omni 1 performs significantly better than the 5W version. But you should definitely read the article where I reviewed the 5W ComMarker Omni 1.
If you are further questioning the laser engraving performance between 5W and 10W ComMarker Omni 1, then you should also read our article where we compared the engraving performance differences between 5W and 10W ComMarker Omni 1 on more difficult to engrave materials.
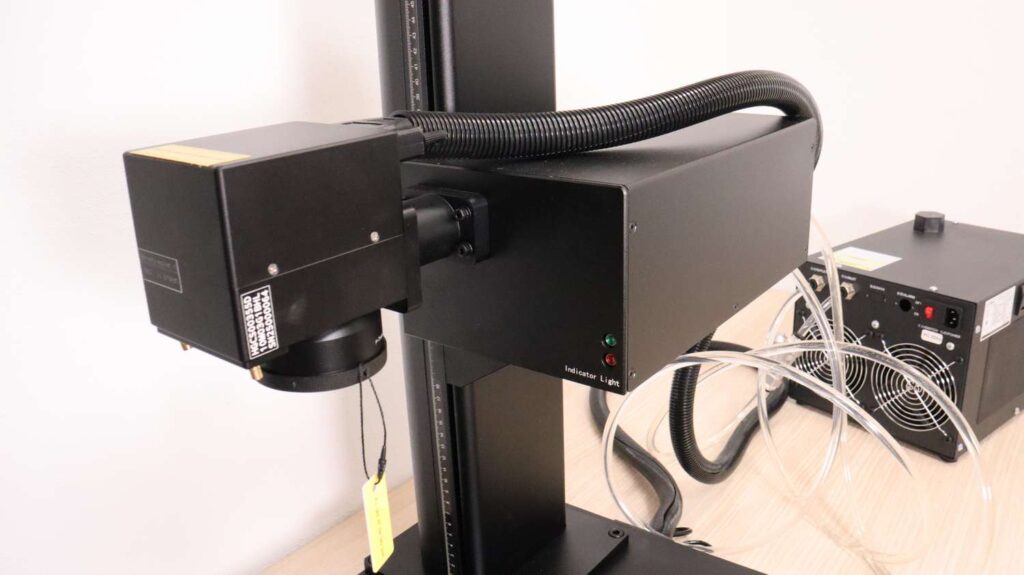
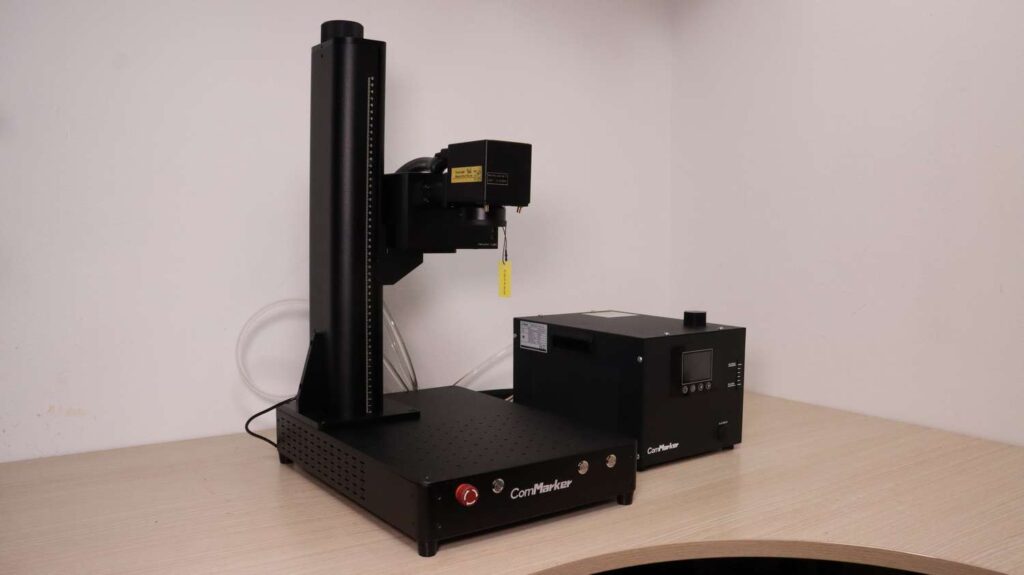
The main difference between the two models is that the 5W ComMarker Omni is air-cooled and the 10W version is water-cooled. The cooling system of the 10W ComMarker Omni 1 consists of a separate chiller unit that connects to the laser source via a set of water hoses.
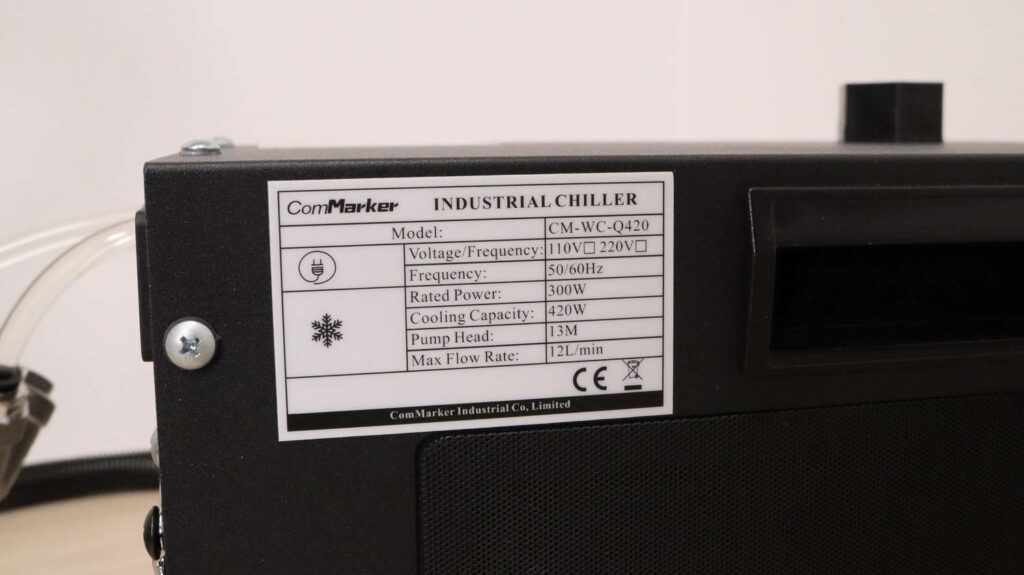
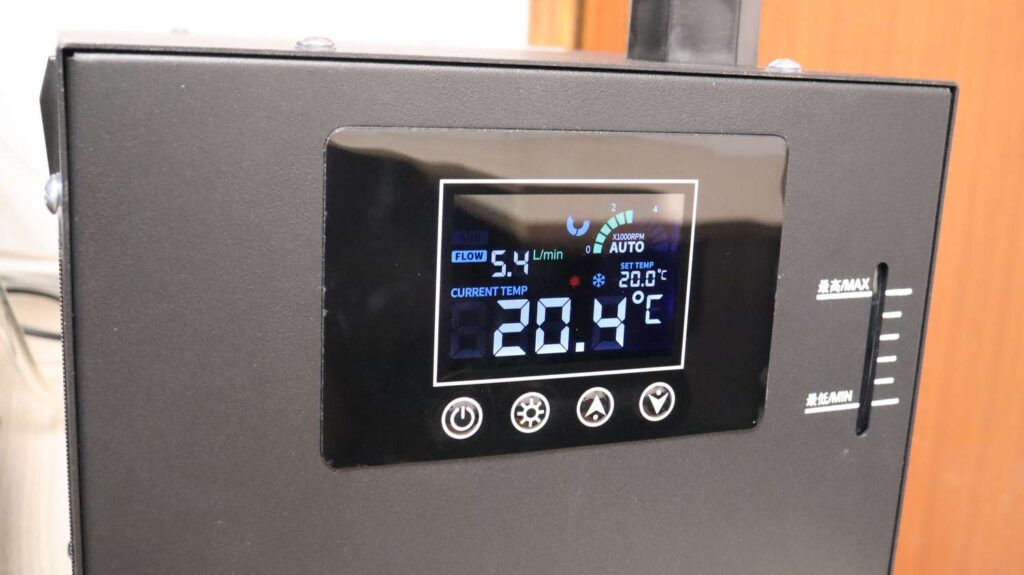
The chiller includes a compressor and a radiator and functions similarly to a refrigerator, maintaining a stable water temperature. It has a cooling capacity of 420 watts and can either heat or cool the water depending on the ambient conditions. I appreciate that it runs fairly quietly, as it can adjust the speed of the fans and compressor which is a big plus.
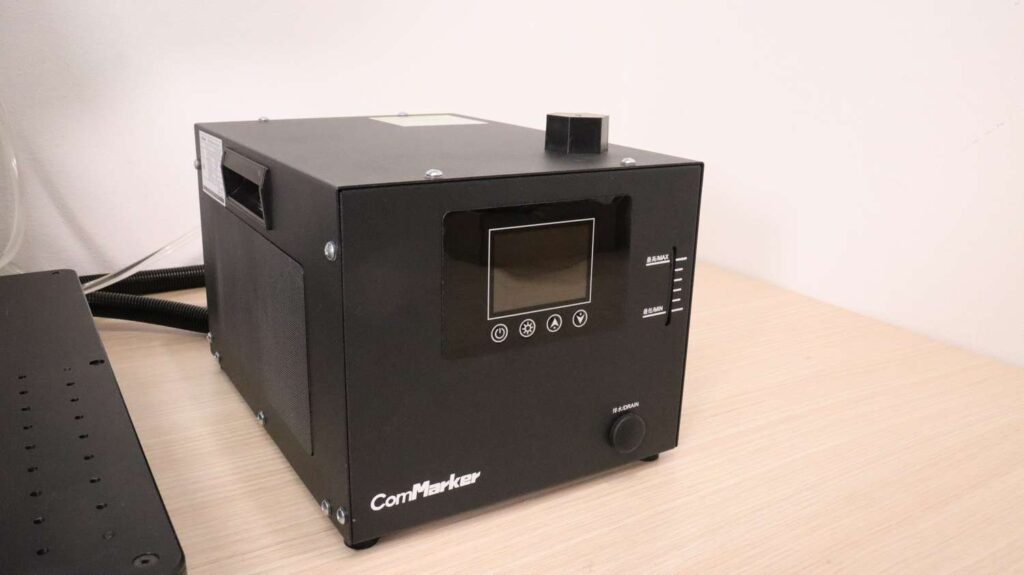
It’s also compact enough to fit neatly on the laser bed, making it convenient for both storage and portability—something I really like.
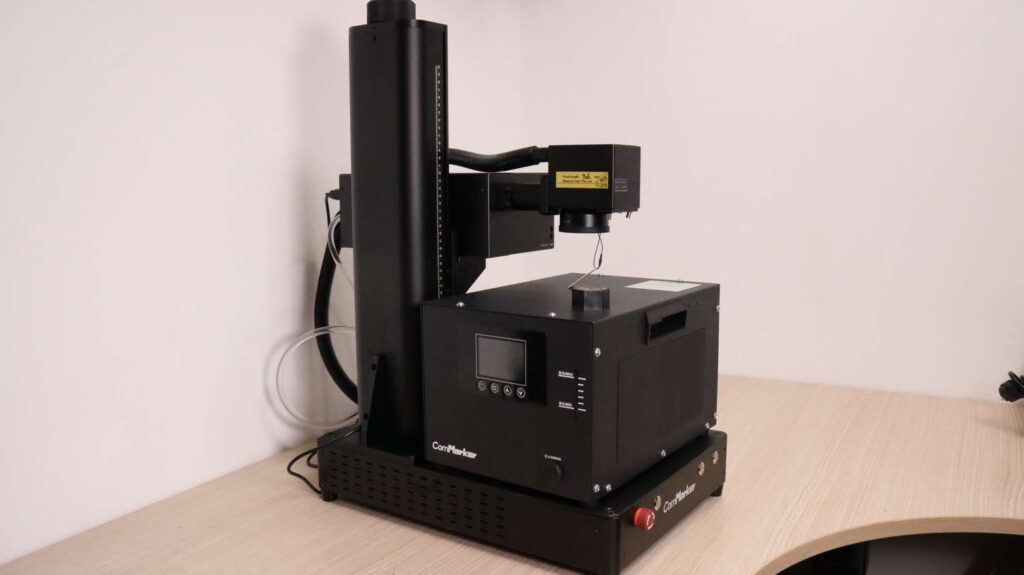
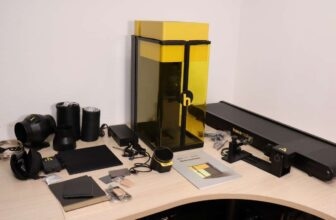
Physically, the 10W ComMarker Omni 1 has slightly less depth than the 5W version, so it needs a shallower desk, but otherwise the construction is very similar—aside from the 5W Omni being air-cooled and this one being liquid cooled. Another key difference is that the 10W version features a smaller galvo head enclosed in a metal casing, whereas the 5W Omni uses a plastic cover. Additionally, the 10W ComMarker Omni laser engraver uses a physically smaller lens size, meaning the lenses are not interchangeable between the two models.


Both machines, however, come with lenses that share the same optical parameters—one for a 150mm working area and one for a 70mm working area. In this article, I’ll be using the 150mm lens for all demonstrations unless I specifically mention switching to the 70mm lens.
Testing the 10W ComMarker Omni 1 UV Laser Engraver
Below you will see the results I was able to achieve with the 10W ComMarker Omni 1. I focused mainly on the materials that are otherwise more difficult to engrave, or take more time with the 5W ComMarker Omni. You definitely must read our review of the 5W ComMarker Omni 1, where we explored many different materials. And remember that EVERYTHING that can be done with the 5W can also be done with the 10W ComMarker Omni 1, but not vice-versa.
Also, if you can’t decide if you should get a UV laser or a Fiber laser, you can read our review where we compared the engraving performance of the 5W UV Laser to fiber lasers on many different materials to see which type of laser is best suited for certain work.
Engraving Aluminum
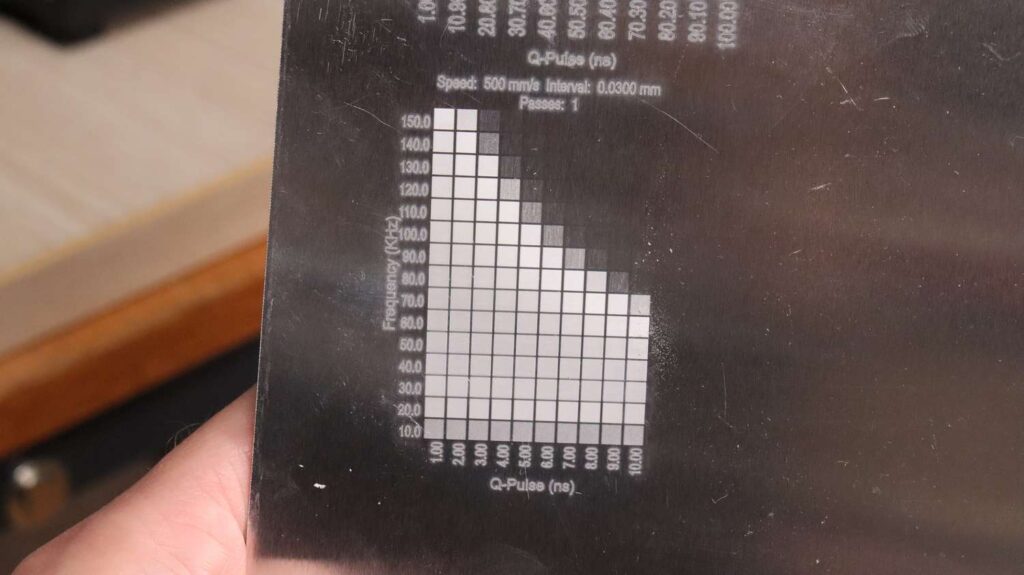
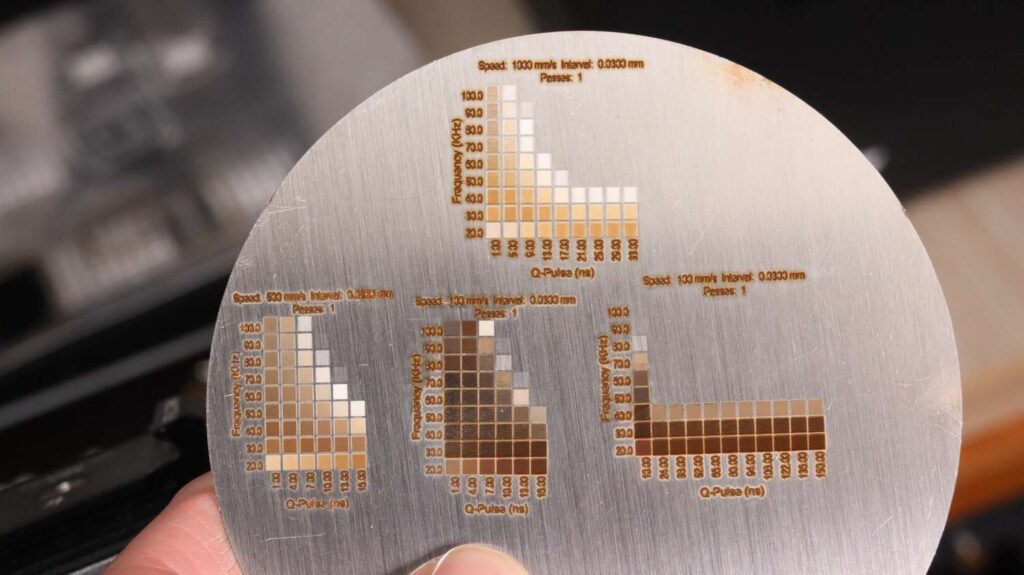
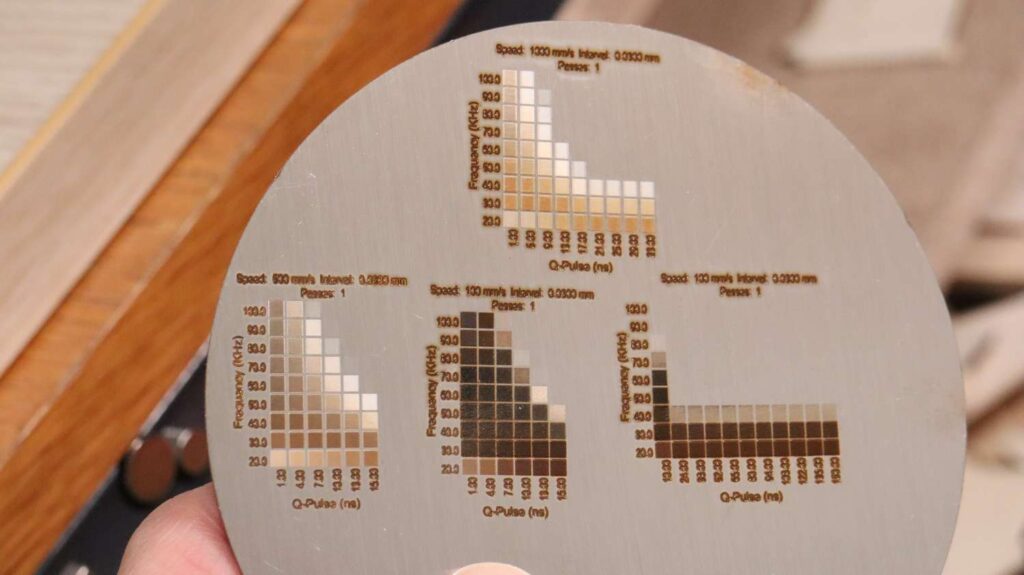
Although you can use the machine with free EZCAD2 software, I am using Lightburn software for controlling the machine as it is my preferred software for laser engravers. First, I adjusted the frequency range of the machine in settings, which, according to the manual, can operate from 20 to 150kHz. It’s important to note that the higher the frequency, the lower the maximum pulse width you can set.
This effect was clearly visible when I engraved a test pattern on raw aluminum. At higher frequencies, there was little to no effect at larger Q-pulse settings. Overall, the engravings looked great—some settings produced dark, deep engravings, while others created shallow, bright white marks.

I also did a quick test on anodized aluminum and I was easily able to make perfect white engravings at many different parameters which means that this laser has a lot of power available. I also tried a crosshatching mode, and the result was even better.
Plywood engraving with UV laser
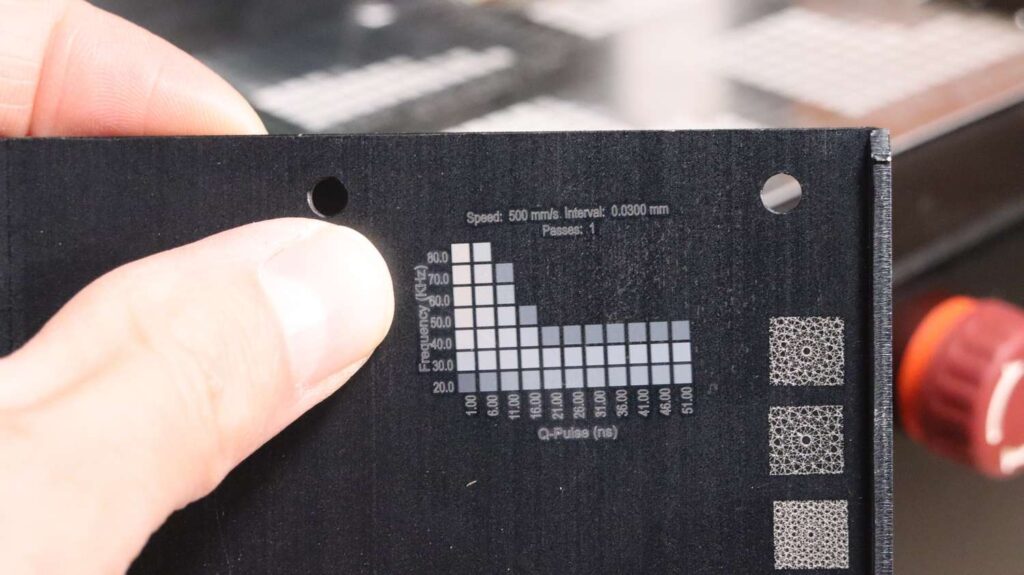
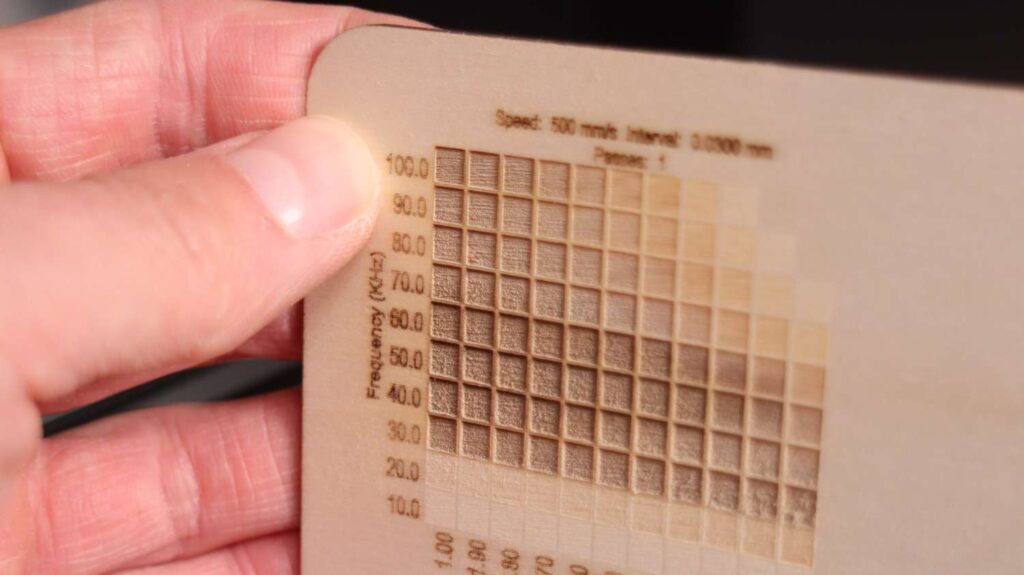
Next, I tested how well the 10W ComMarker Omni 1 performs at engraving plywood. I engraved a simple test pattern which varies the frequency and the Q-pulse width which is in my opinion the best test pattern for UV lasers. It appears that the 40–60kHz frequency range delivers the deepest engravings. At higher frequencies, the engraved areas become smoother, which is visually appealing, especially for deep engraving work.

Cutting wood with 10W ComMarker Omni 1
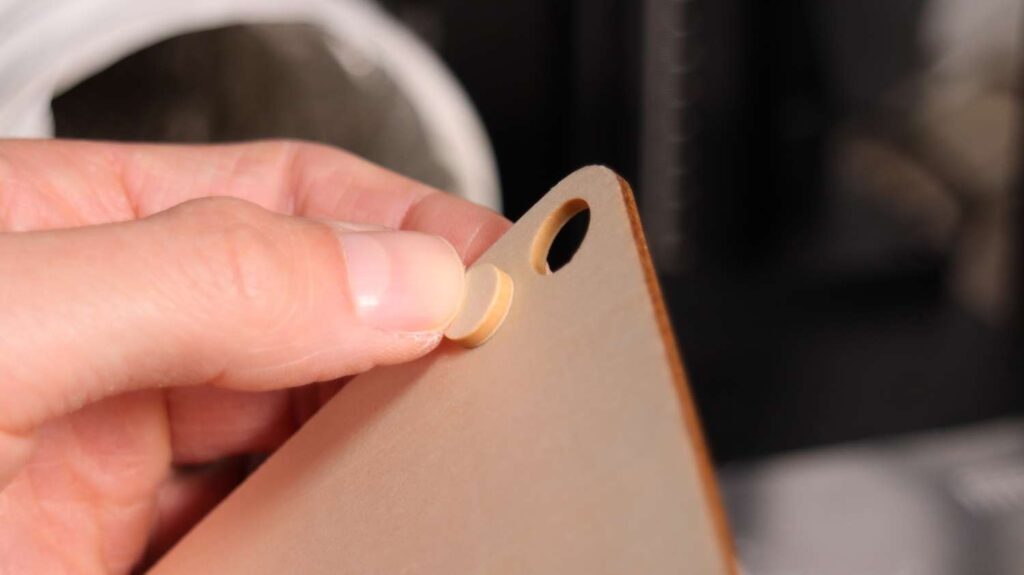
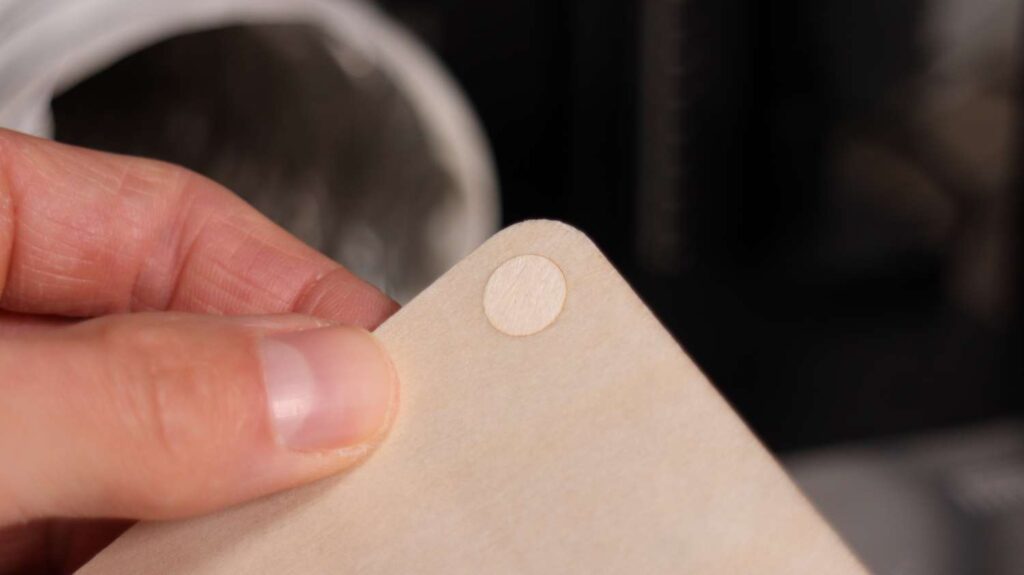
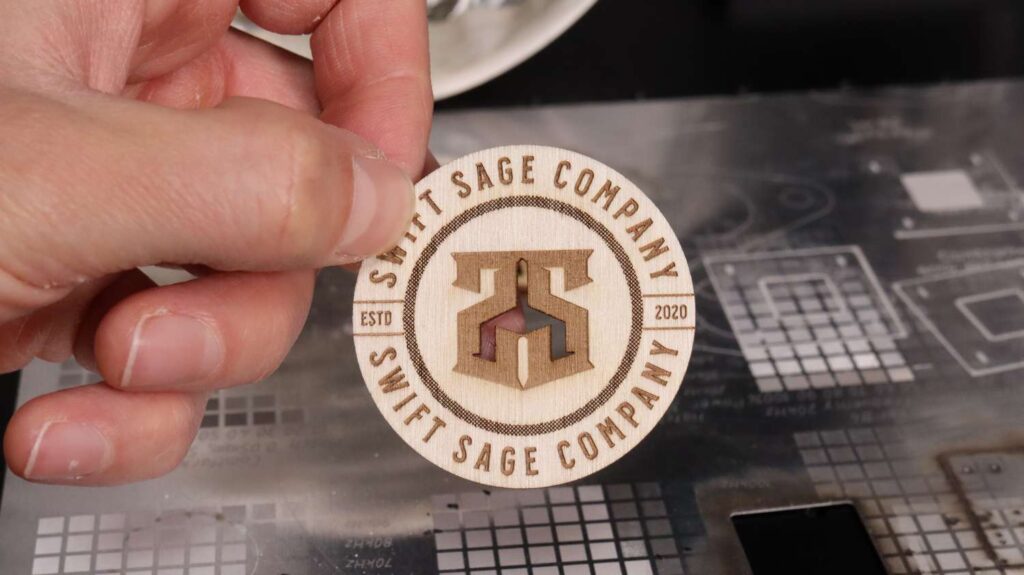
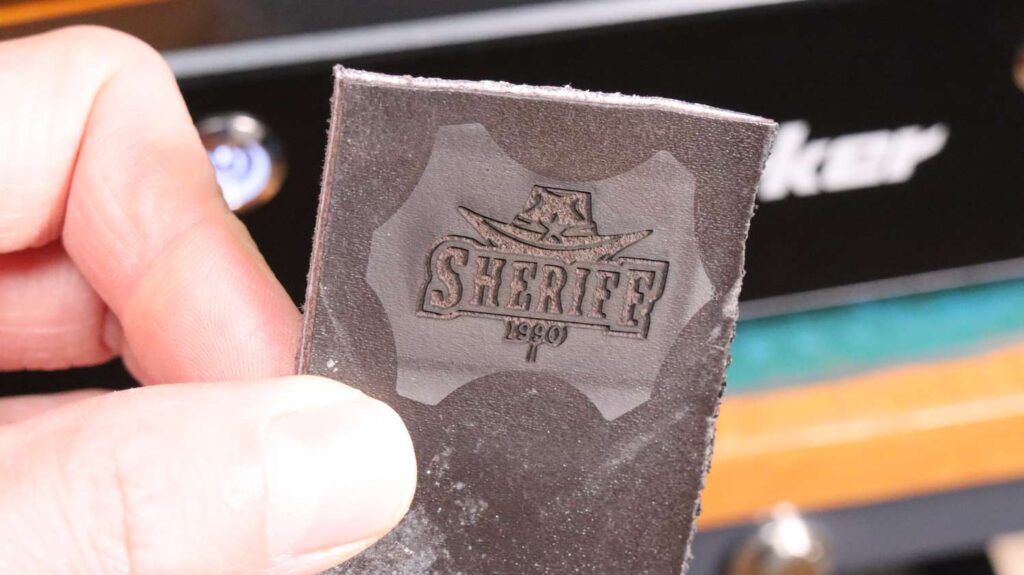
One feature I didn’t explore enough with the 5W ComMarker Omni 1 was its ability to cut wood with exceptional precision and zero burn marks. The 10W ComMarker Omni 1 has enough power to cut through plywood quickly and cleanly—no need for wobble parameters—resulting in incredibly thin, precise cuts. The edges have zero burn marks and the cutting kerf is so small that the part has an interference fit when it is placed back in the cutout.

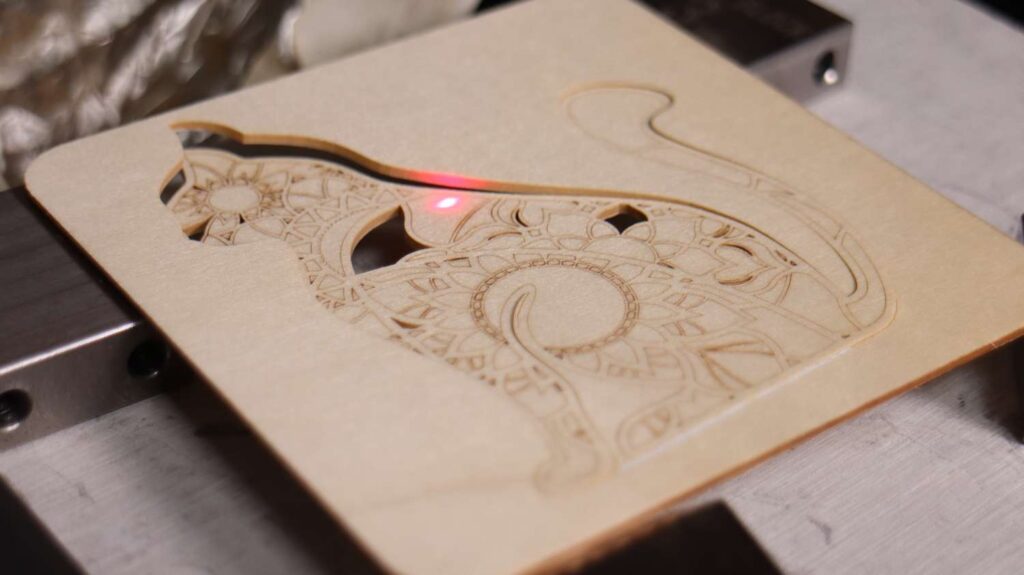
For the ultimate test, I cut an intricate art piece from 2mm thick plywood. It was mesmerizing to watch the machine performing fast and clean cuts in near silence. Once completed, the parts simply popped out, leaving behind a beautifully detailed piece of art. I’m still amazed at the level of clarity and precision this UV laser can achieve.


UV laser is ideal for making wood and PEARL inlays
Thanks to its razor-sharp cutting ability, this machine is perfect for creating wood inlays. By cutting the same shape from two different wood types and swapping them, the fit is seamless.
But I tried to make a different type of inlay. I created a quick design using Kittl designer to make it look as a proper end product. Kittl is the best tool to make professional looking designs as a non-designer like me. You should check it out by clicking the link above!


I had a batch of Mother of Pearl discs and was surprised by how well the 10W ComMarker Omni 1 cut through them. The cuts were clean and the corners crisp. After inserting the inlay into the wood, the result was fantastic. This method is perfect for making pearl inlays for guitars or other instruments.
The focus stick?
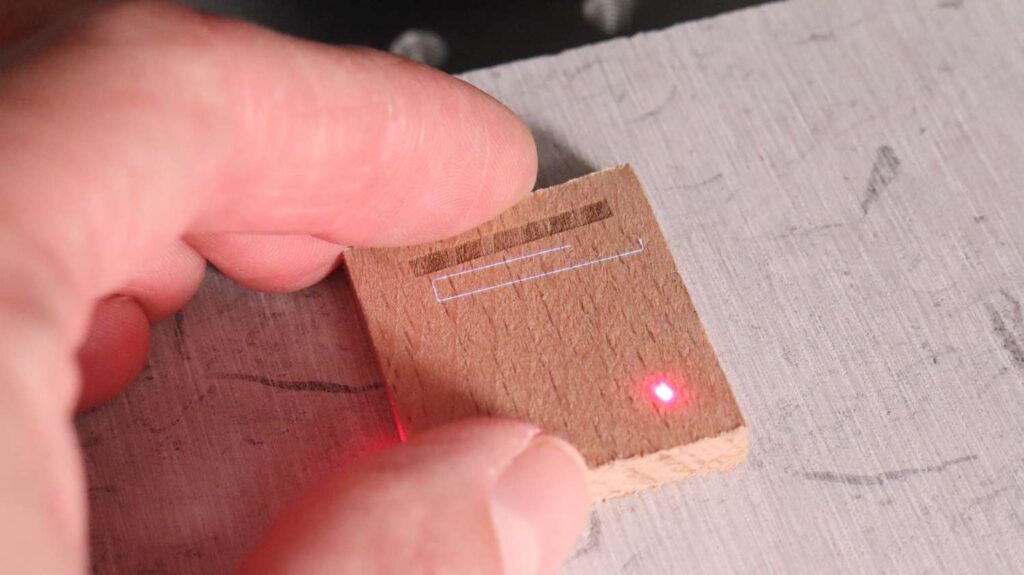
One of the most practical things you can do to make your life easier is to create a focusing stick, which makes it much easier to consistently focus the machine on different objects. The stick ensures the correct distance between the lens frame and the material surface so that the engraving effect is the strongest.
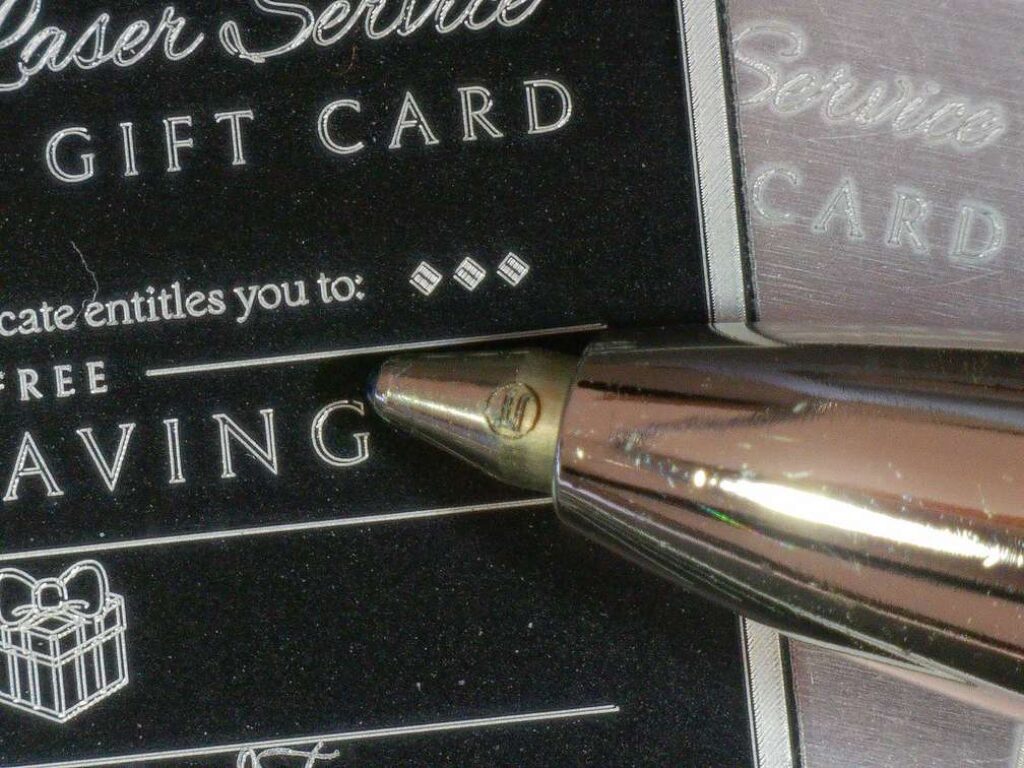
I engraved a set of lines on an angled aluminum business card. The engraving effect is the strongest where the shiny metal can be seen below the black paint. The middle of it is exactly the point where the optimal focus is.


150mm vs 70mm lens for ComMarker Omni 1?
While we are at it, I swapped the 150mm lens with the 70mm which provides much smaller focus spot and stronger engraving effect but has much shorter focus distance and much narrower focus range. I engraved the same set of lines(narrower ones are made with 70mm, while the wider ones are with 150mm) on an angled aluminum business card and we can clearly see that the range where the engraving effect is the strongest is much shallower.

Can UV laser be used for deep engraving in stone?
Next, I leveraged the ComMarker Omni’s full 10 watts of power to perform a deep engraving on stone. I ran the machine for just 15 passes at 60kHz with a 1ns pulse at the speed of 500mm/s. The engraving was completed quickly, and for comparison, I ran the same design with just one pass beside it. The ComMarker Omni delivered a deep and crisp result—honestly, it couldn’t be better. I’m extremely satisfied with it.

Live previewing tips and tricks!
UV lasers use UV light for live previews, which is the sharpest and most precise preview of any laser type, though visibility can be limited on certain materials.

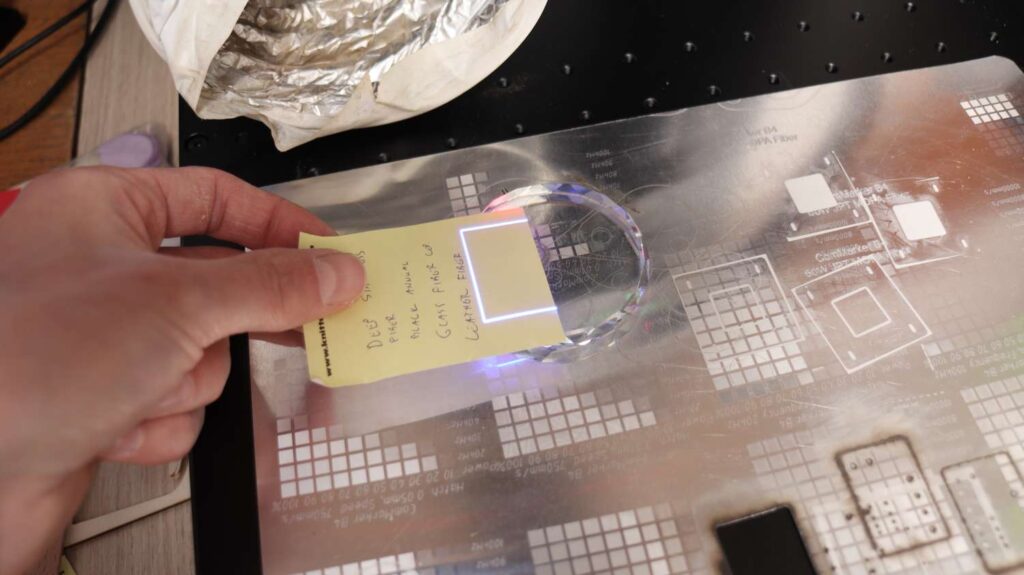
To assist with rough alignment, the ComMarker Omni 1 comes with a preview acrylic sheet. But for more precise positioning, I use thin yellow Post-it notes, which work very well.
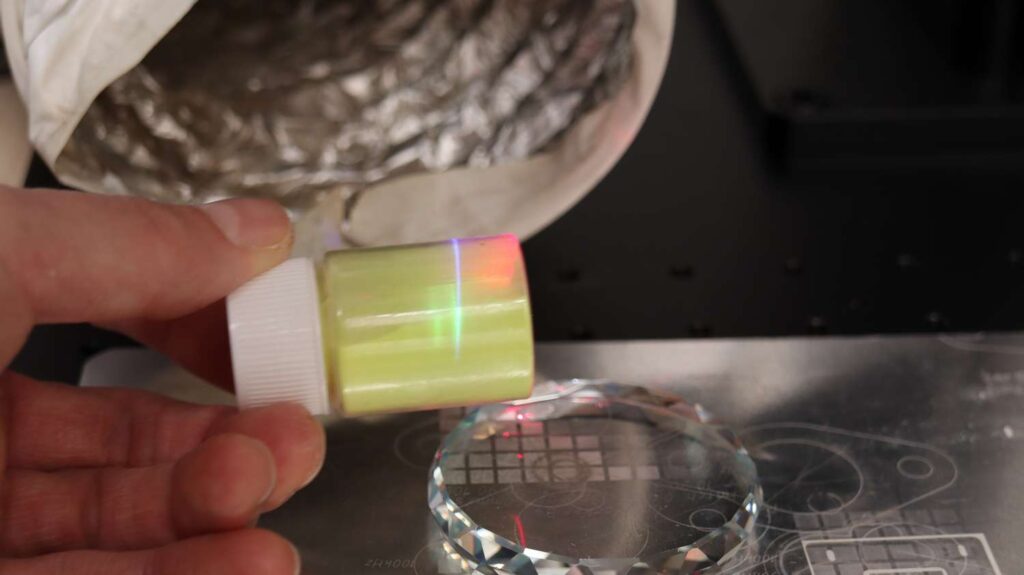
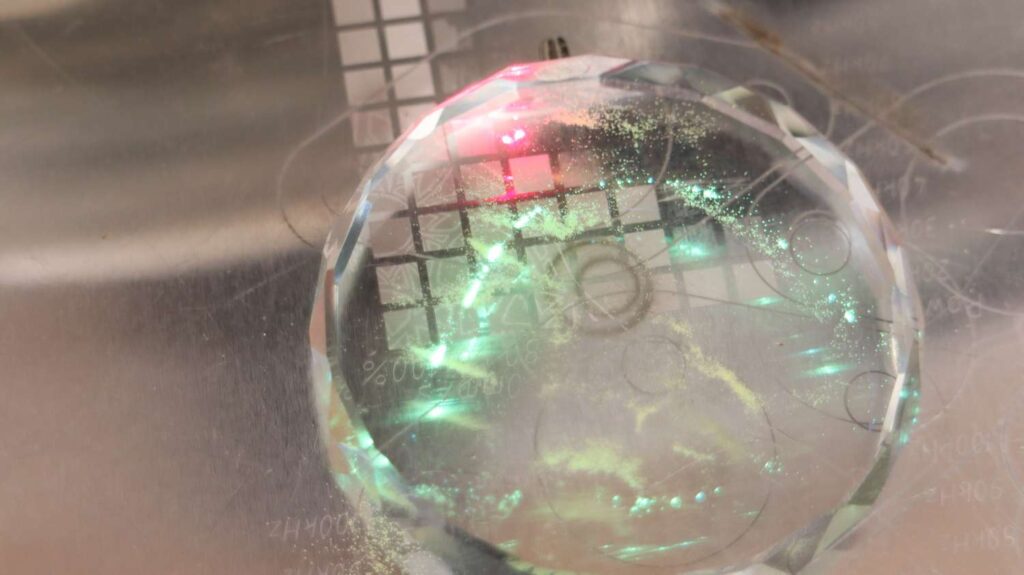
One of my subscribers suggested another great solution: luminous powder that glows when activated by UV light. Just apply a thin layer with a soft brush and you’ll get a clear preview on that stubborn materials.

Engraving Glass with 10W ComMarker Omni 1
I also wanted to test how the 10W ComMarker Omni 1 performs on glass. The higher power of the 10W ComMarker Omni 1 laser engraver made the process significantly faster and more reliable than with the 5W version.

The result was flawless. UV laser like the ComMarker Omni 1 is the best tool for making incredibly precise engravings on glass.
Using 70mm area lens for making embedded engravings in glass
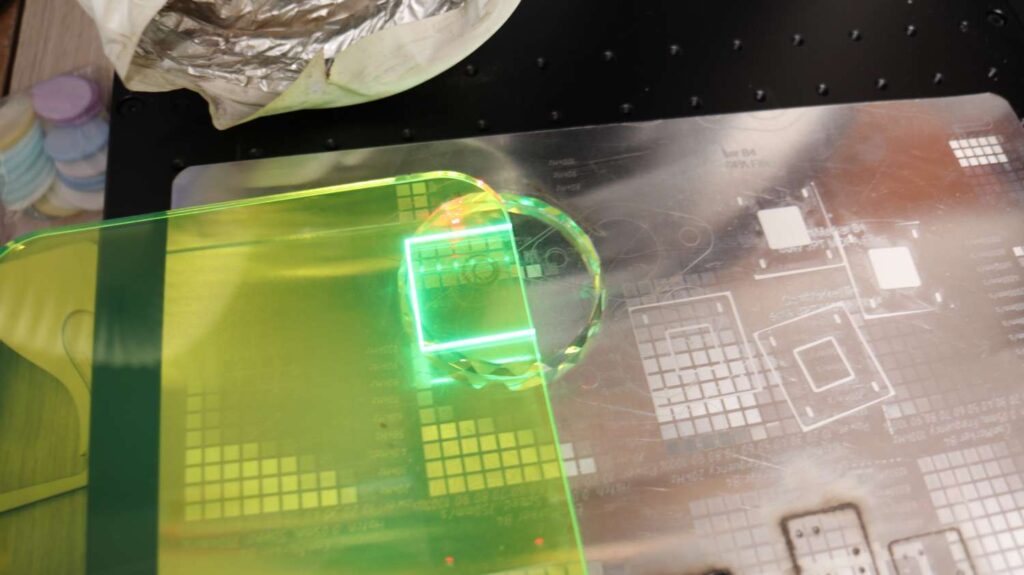
For fun, I switched to the 70mm lens which has a much shallower depth of field and much stronger engraving power.
I focused the machine inside the middle of the glass medal, to see if I can make an embedded engraving inside the material. I placed the glass on a piece of stone which wouldn’t stain the bottom surface if the beam would pass through the glass.
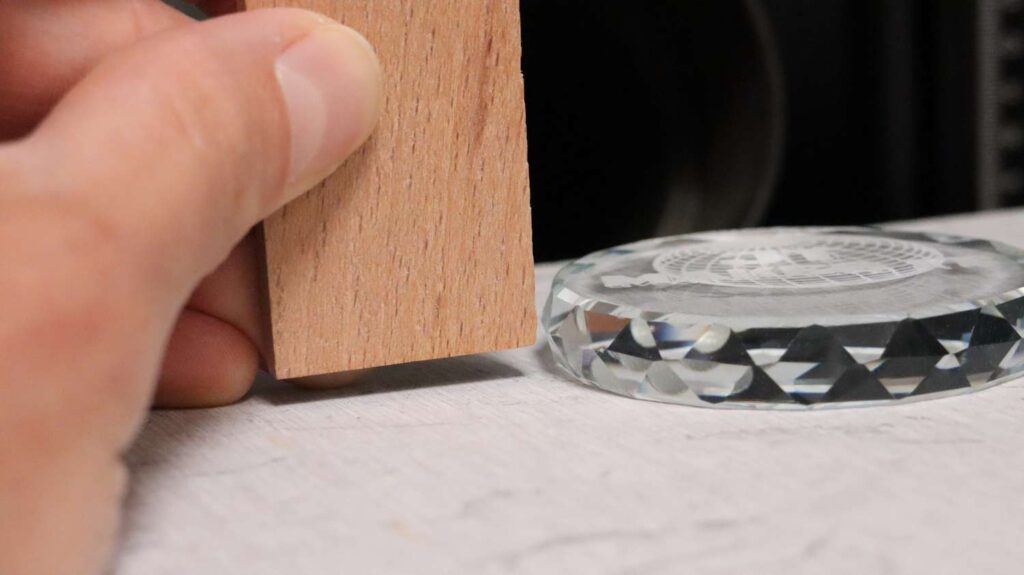
The engraving worked like a charm! I ran a few passes to get a high contrast engraving. The result is a completely embedded engraving inside the glass with an untouched smooth surface on both sides. It looks incredible. Looking under a microscope we can see that an incredible level of detail can be achieved this way.


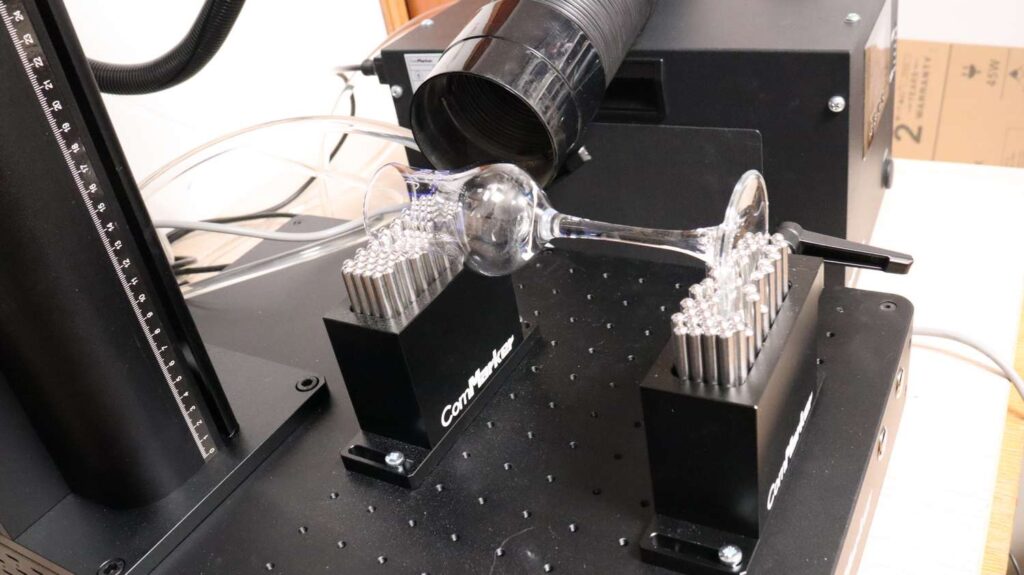
Engraving wine glasses
Extra power is also beneficial when engraving curved objects, such as wine glasses and cylindrical surfaces, where not all areas are in perfect focus. Out-of-focus beams require more power to effectively engrave tougher materials like glass. Once again, the ComMarker Omni delivered excellent results.
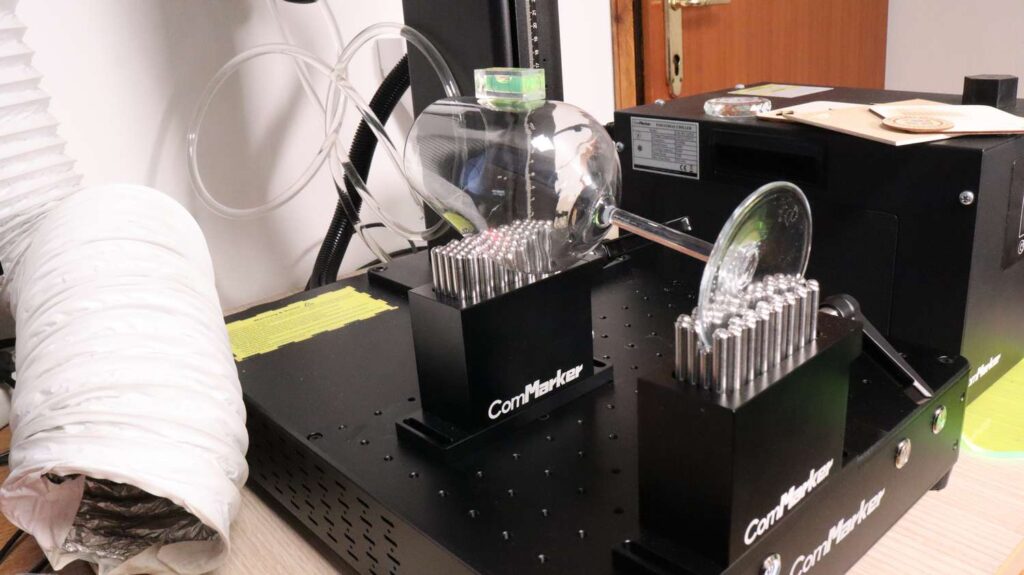
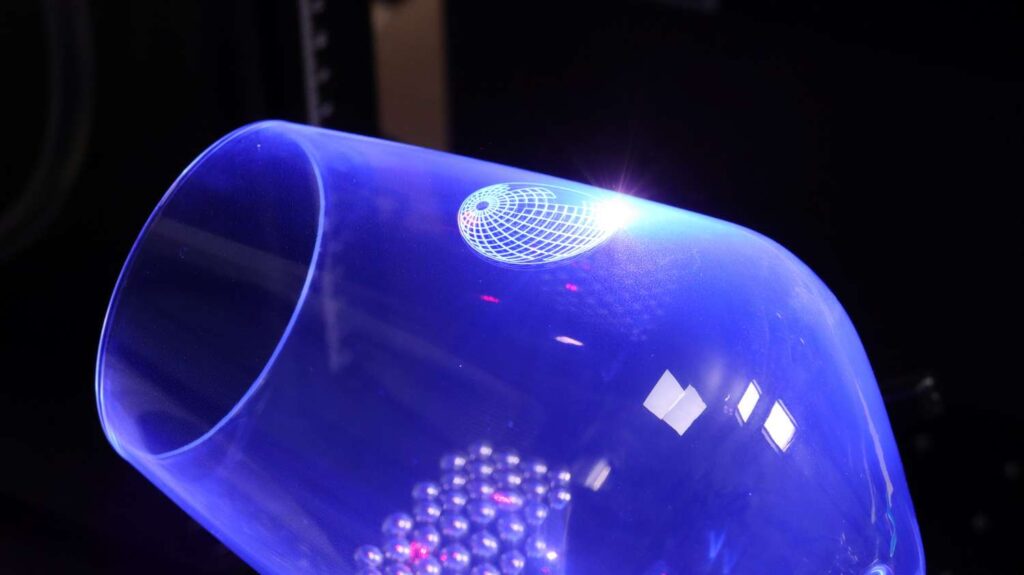

The results are much more detailed compared to sand blasting or engraving with a CO2 laser.
I also had a small side job where I needed to engrave 60 special liquor glasses. Using the ComMarker flexible fixture it was quick and easy to make a simple but very sturdy jig which held these weirdly shaped glasses at the correct orientation for engraving. Engraving with the ComMarker is fast and thanks to the foot pedal, you can engrave a whole batch in very short amount of time. This machine can pay itself off very quickly!

Engraving and CUTTING Thick Aluminum Business Cards
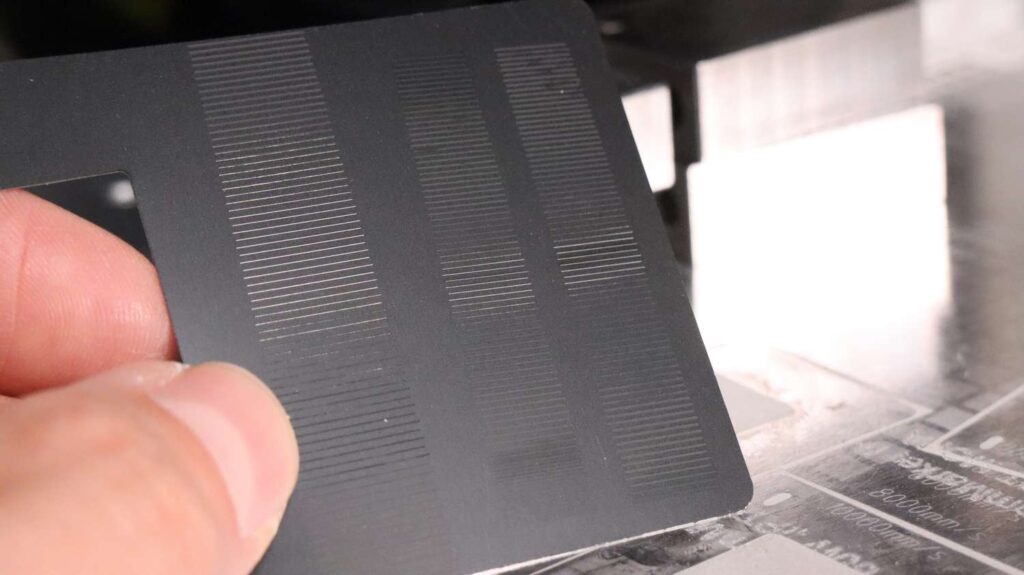
I then tested how well the UV laser could engrave and cut aluminum business cards. I engraved a highly detailed design of a miniature business card to assess how well the details held up. And then I proceeded to cut out the outer shape as well.
The machine cut through a 0.4mm thick aluminum card in just a few passes with razor-sharp precision. I repeated the engraving on a thinner black card, just to see the possible differences.


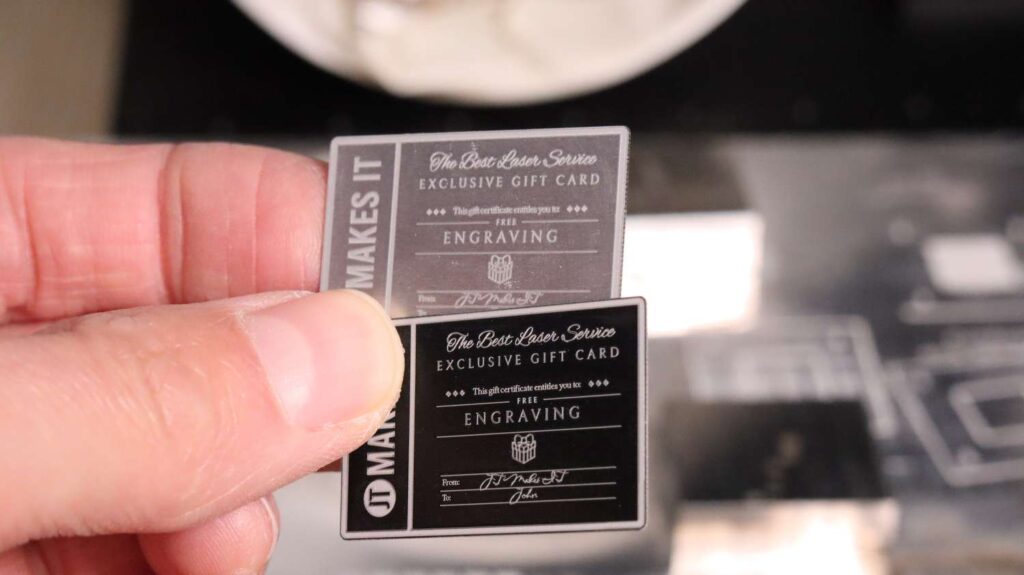
The cutout is razor thin and very clean. Despite their small size, the cards look amazing. If we look at them under the microscope, we can see the true level of detail that a UV laser can achieve even with this larger area lens.
I also performed a deep engraving on raw aluminum using 20 passes at a relatively high speed of 500mm/s. For deep engraving I used 50kHz and 1ns pulse, and at the end I ran a cleaning pass with double the speed at 100kHz and a 5ns pulse.

The result was stunning: clean, sharp, and with impressive depth.
Can You Etch a PCB With a UV laser?
After learning that the 10W ComMarker Omni 1 can ablate metal with ease, I tested its ability to etch a printed circuit board (PCB).


It completed the job in just 6 cutting passes and 2 cleaning passes, all within a few minutes. The result was extremely clean, with no charring on the substrate like you might see with fiber lasers. I believe that with more passes, it could even handle cutouts and holes.
If you’re torn between a UV laser and a fiber laser, I recommend reading our article where we compared UV and Fiber lasers performance on multiple materials.
Engraving Stainless Steel With 10W ComMarker Omni 1
Next, I tested various engraving effects on stainless steel using the 10W ComMarker Omni 1. I tried different speeds and achieved a range of finishes—from light brown to polished finish and white marks.

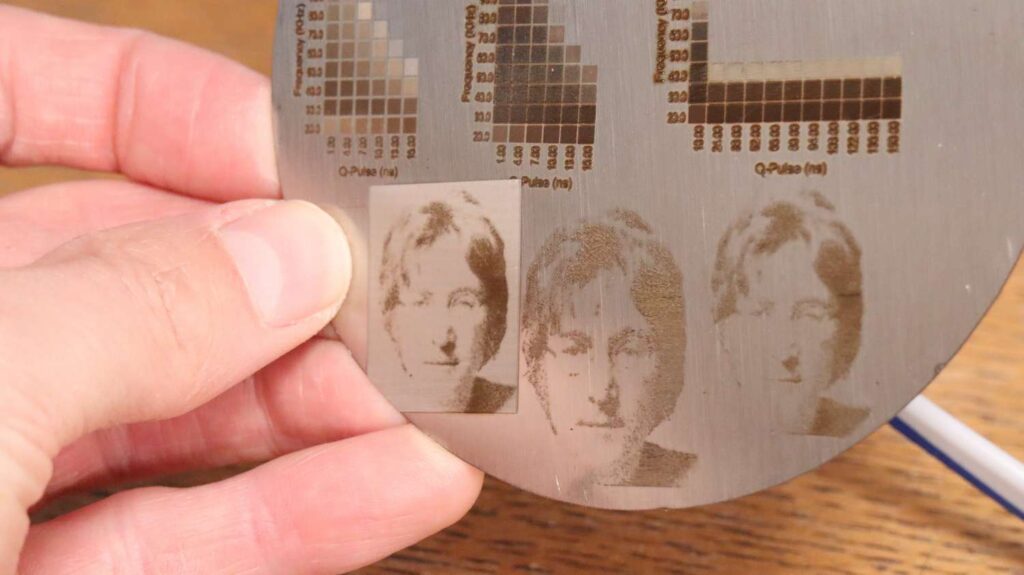
However, it is also possible to produce a black annealing effect like it is possible to do with fiber lasers. You need to set medium power (single digit q-pulse) and run very fine interval – from 0.001mm – 0.005mm. I also engraved a photo with and without a background pass; the result came out quite well. But adjusting the settings a bit would help significantly.
Engraving Plastic
Naturally, the 10W version also produces excellent engravings on plastic. The plastic is where UV lasers really shine.

I highly recommend checking out my review of the 5W ComMarker Omni 1, where I tested many other materials—all of which also apply to this upgraded machine.


Conclusion
However, if your primary focus is engraving plastics or similar materials—and you don’t require the extra speed or power—the 5W ComMarker Omni 1 will serve you perfectly well! make sure you read our review of the 5W version too!
If you decide to buy it and support our site at no extra cost to you, you can buy the ComMarker through this link! As a thank you, I got you a 5% discount if you use my discount code “jtmakesit” at checkout!
If you want to stay up to date with the latest laser machines, you can subscribe to our mailing list where we send out 1-2 emails per month, informing you of new articles on this website and let you know of any special deals in laser space!
You can also get it from the ComMarker store at Amazon.
Thank you and see you at the next review!

This post was written by JT Makes It.
JT Makes It is an engineer, hobbyist, and DIY-er armed with a Master’s degree in Electrical Engineering and over a decade of professional experience in the industry. From an early age, JT Makes It was pushed by an insatiable curiosity, spending countless hours disassembling, understanding, improving, and creating various gadgets and products. This lifelong passion led to a broad spectrum of technical expertise ranging from electronics, woodworking, metalworking, and CNC machinery, with a particular focus on laser engravers.
For the past 9 years, he has shared his expertise through engaging videos on his YouTube channel. With the last three years dedicated to scrutinizing and testing laser engravers, he also created this website and emerged as a recognized authority in the field. His expertise extends across the spectrum of laser technologies, ranging from diode lasers, CO2 lasers, and fiber lasers, paying attention to details and providing practical insights.
With JT Makes It, expect a blend of technical expertise, backed with hands-on experience, and a genuine passion for innovation and creation, making him a trusted source in the realm of DIY and laser engraving enthusiasts alike.
*The links on this website can be affiliate links. I earn a small commission at no extra cost to you. When you buy through these links you will support this website, which helps me to run this website(which cost money and a TON of time) and provide all these extensive reviews and information to you for free, without any paid membership.
2 responses to “Testing the 10W ComMarker Omni 1: Better Than the 5W UV Laser?”

Excellent review and demonstration!
I have a question—can the ComMarker Omni 1 UV laser be used for making PCBs, including drilling holes and cutting the board?
It would be really helpful to know its capability in PCB prototyping. If possible, could you consider making a video showing this application?
Thanks for the great contentThanks! Yes it can, especially the 10W model. New article will be released this week further exploring this application too.

Leave a Reply