
What if a single laser could engrave metal, glass, wood, stone, leather, denim, produce incredible engravings on plastic, and even create stunning 3D designs inside solid glass spheres?
In this in-depth xTool F2 Ultra UV review, we take a close look at a laser engraver many creators have been waiting for. xTool has finally released their first UV laser engraver, the xTool F2 Ultra UV [Official store, Amazon], and it promises to be one of the most versatile and the most user-friendly UV lasers on the market.
Table of Contents
*The links on this website can be affiliate links. I earn a small commission at no extra cost to you. When you buy through these links you will support this website, which helps me to run this website(which cost money and a TON of time) and provide all these extensive reviews and information to you for free, without any paid membership.
xTool F2 Ultra UV Review and Test: Versatile UV Laser Engraver with 3D Glass Engraving
The xTool F2 Ultra UV [Official store, Amazon] is a compact yet powerful UV laser engraver designed for creators, makers, and small businesses who need extreme precision across a wide range of materials. In this review and hands-on test, I will explore its performance on metal, glass, wood, plastics, textiles, and stone, with a special focus on its standout feature — embedded 3D inner glass crystal engraving. This article breaks down real-world results, software usability, and overall versatility to help you decide if the xTool F2 Ultra UV is the right laser engraver for your needs.
Introduction: One Laser, Endless Possibilities
This review is based on a full series of real-world tests, including surface engraving, cutting, photo engraving, and embedded 3D inner glass engraving, to determine how well the machine performs in practical use.

xTool F2 Ultra UV Overview and Specifications
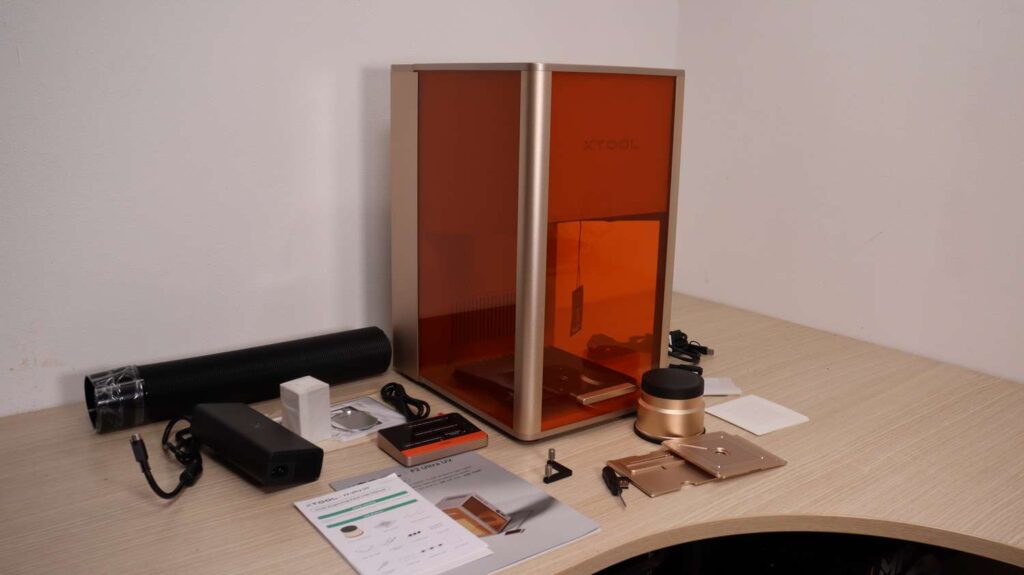
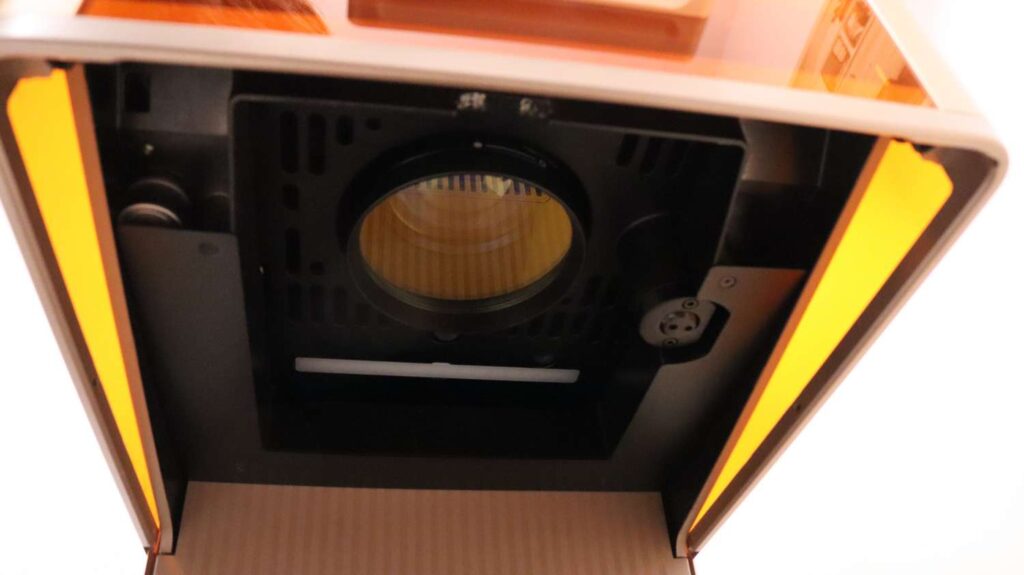
The xTool F2 Ultra UV is a 5-watt UV laser engraver built in a very compact form factor. It ships with two interchangeable lenses, each designed for different engraving tasks:
- The surface engraving lens provides a generous 200 × 200 mm working area, ideal for flat materials and everyday engraving projects.
- The 3D inner engraving lens offers a 70 × 70 × 150 mm working volume, specifically designed for embedded 3D engravings inside glass.
Build Quality and Hardware Design
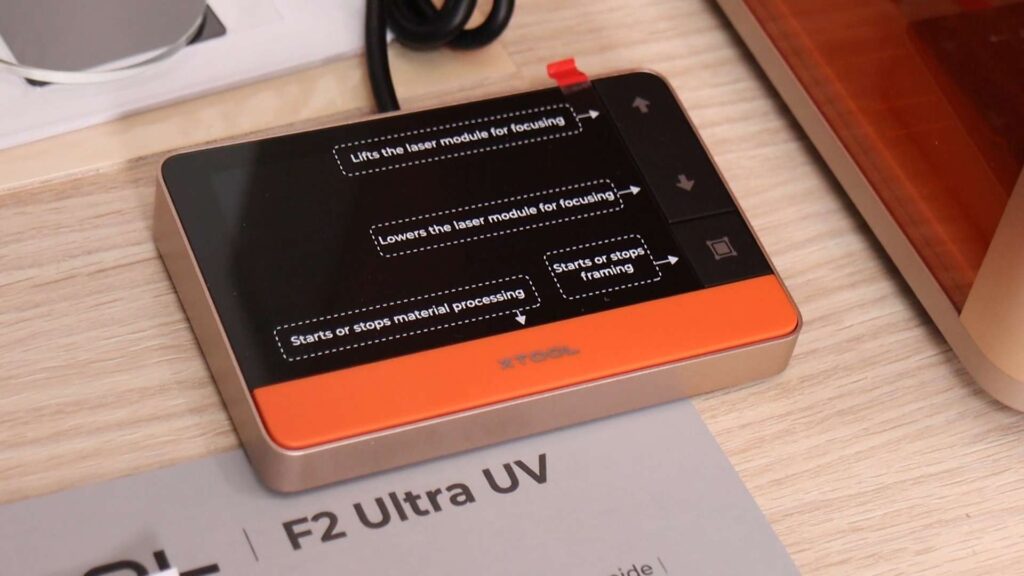
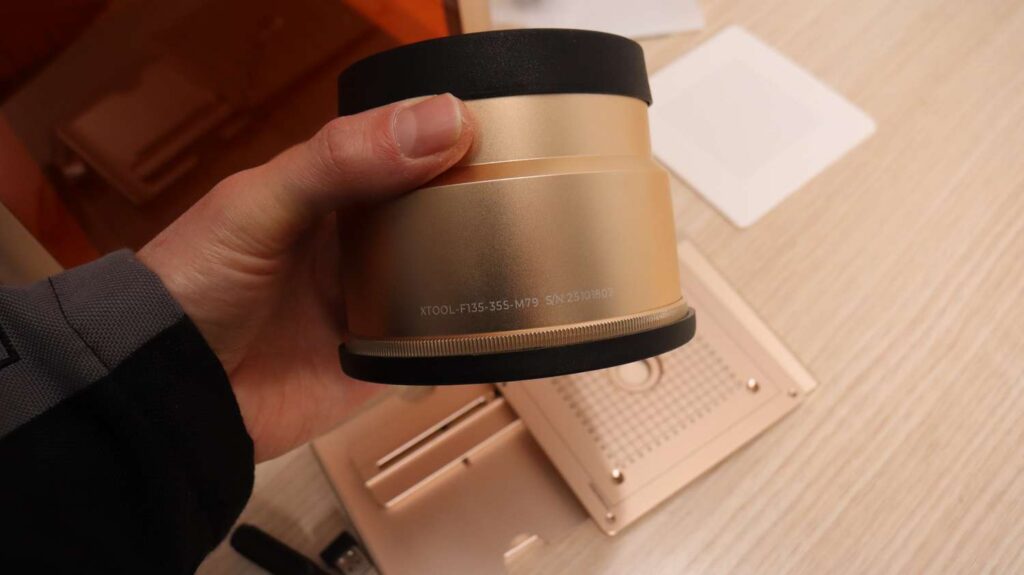
The machine uses xTool’s well-known controller module, allowing for basic standalone operation without a computer. The 3D glass engraving lens is noticeably larger and heavier, but it feels extremely premium, matching the high build quality of the rest of the machine.
For 3D engravings, xTool includes a custom foldable stand that makes positioning glass blocks precise and effortless. Aside from these additions, the overall design closely follows other machines in the xTool F1 and F2 lineup, with the same solid construction and thoughtful engineering. If you want to learn more, you can read my in-depth reviews of the xTool F1 and xTool F1 Ultra.

Software Experience: xTool Studio
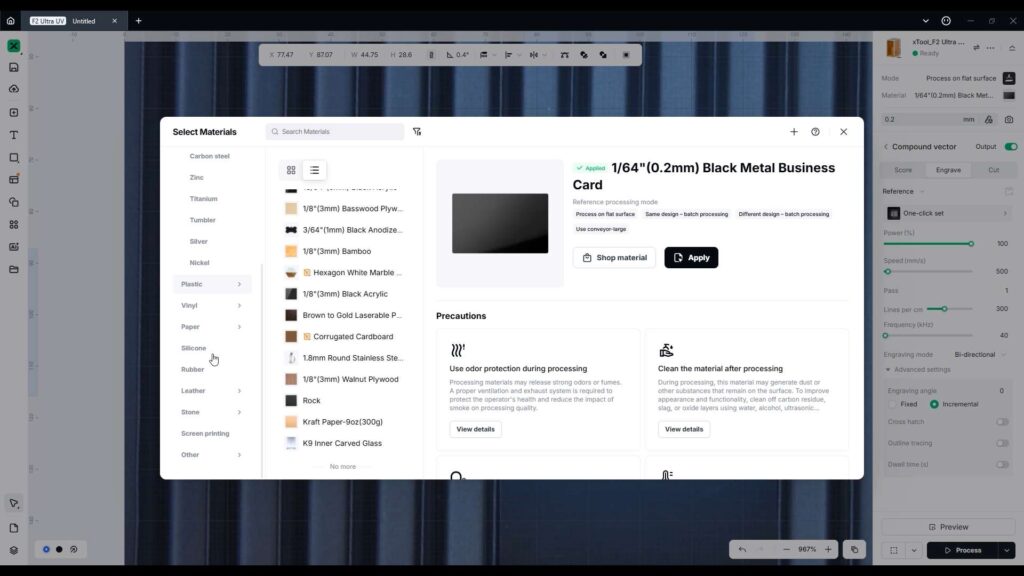
One of the biggest strengths of the F2 Ultra UV is its integration with xTool Studio software. This software is a major reason why the F2 Ultra UV is arguably the easiest UV laser engraver to use.
xTool Studio includes a large material preset library, automatic parameter selection, photo engraving tools, AI-assisted design features, and guided workflows for advanced tasks like 3D glass engraving.
Surface Engraving and Cutting Tests
Metal Engraving and Cutting
The first test involved engraving a metal business card. After selecting the correct material preset, the software automatically applied optimal parameters. I also added a manual cutout to test whether the machine could cut 0.1 mm thick aluminum.
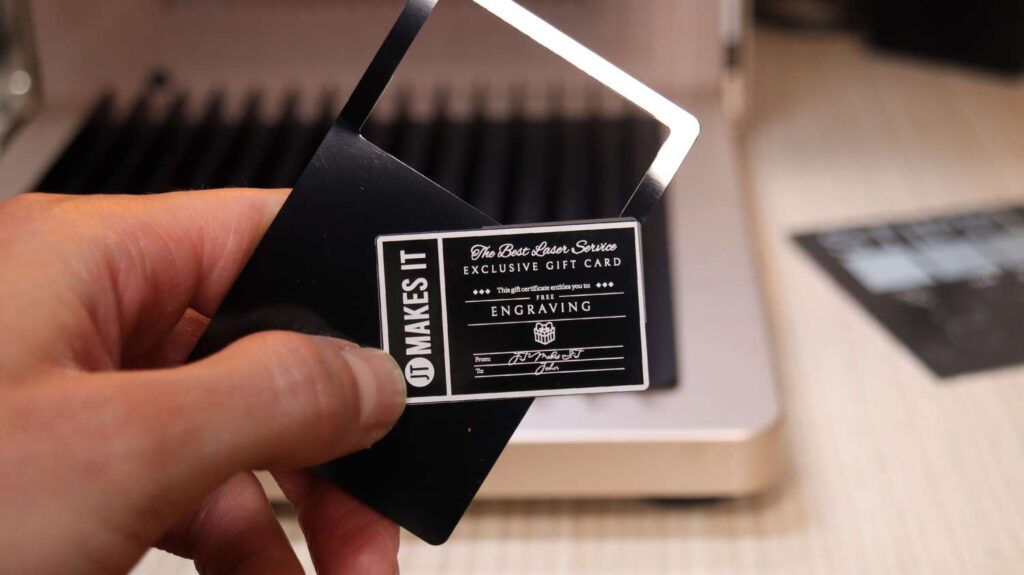
The engraving finished very quickly, the aluminum was cut successfully, and the engraving quality and detail were outstanding.
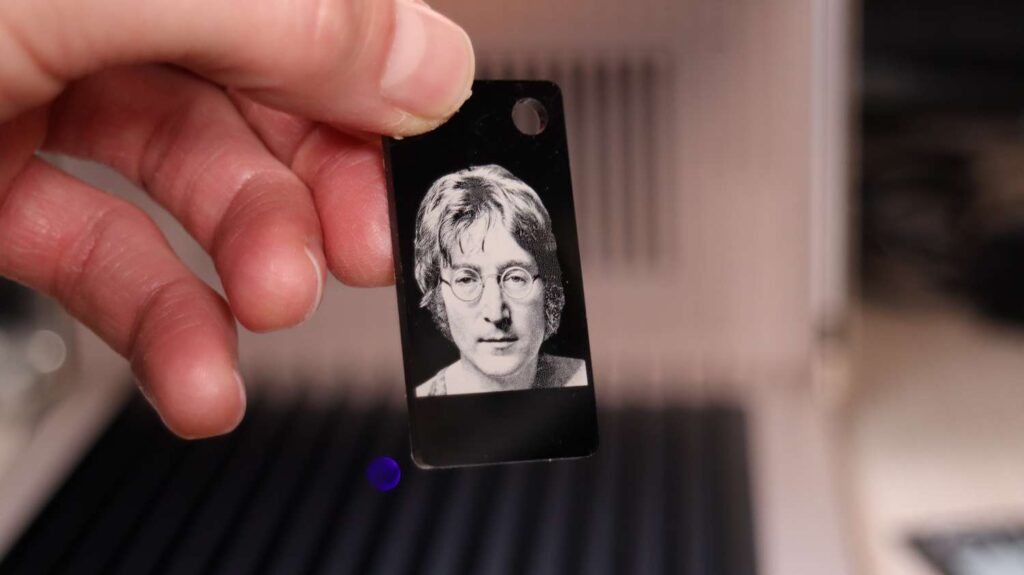
Photo Engraving on Acrylic
xTool Studio includes an auto-adjust feature that optimizes brightness, contrast, and other parameters for photo engraving. A photo engraved on black acrylic came out picture-perfect, making this setup ideal for custom keychains, name tags, and photo gifts.
Glass Engraving Performance
Engraving glass requires placing tape on the surface before focusing, since glass is transparent. Using a highly detailed image and selecting the deep and slow engraving mode, the engraving took approximately 4.5 minutes.
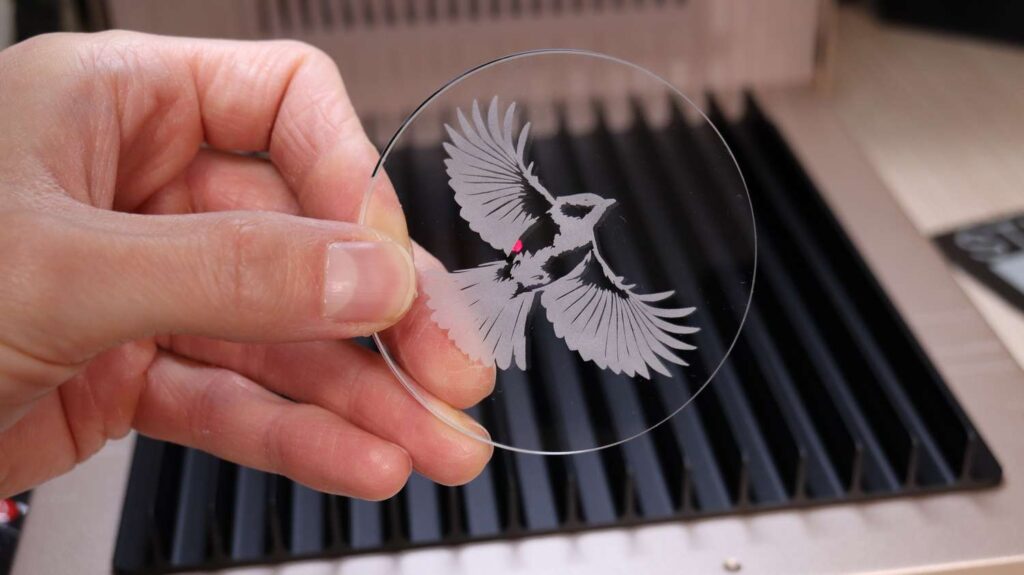

The result shows why UV lasers excel at glass engraving. The laser ablates the glass, producing a deep, matte finish similar to sandblasting but with significantly higher detail.
And while surface glass engraving looks impressive, the real highlight comes with embedded 3D inner glass engraving, covered later in this review.
Wood, Slate, and Anodized Aluminum Tests
Plywood Engraving and Cutting
The same design was engraved on plywood, along with a vector cutout using the outline feature. After several fast passes, the cutout went cleanly through the material.
The engraving shows excellent contrast, no charring, and very fine detail.
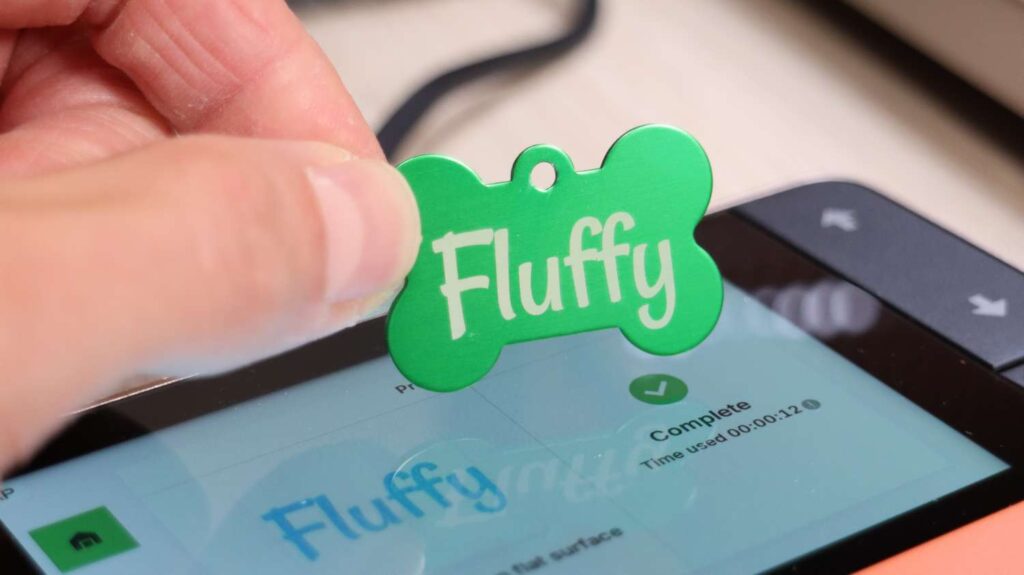
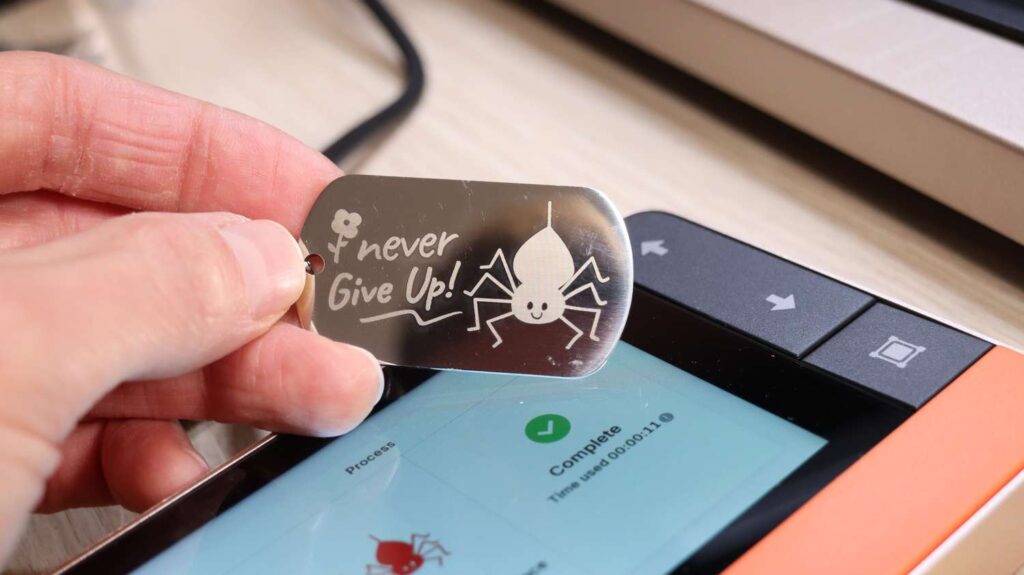
Anodized Aluminum Dog Tag
Using the built-in font library and anodized aluminum presets, a dog tag was engraved in just 10 seconds. The result is durable, clean, and professional-looking.
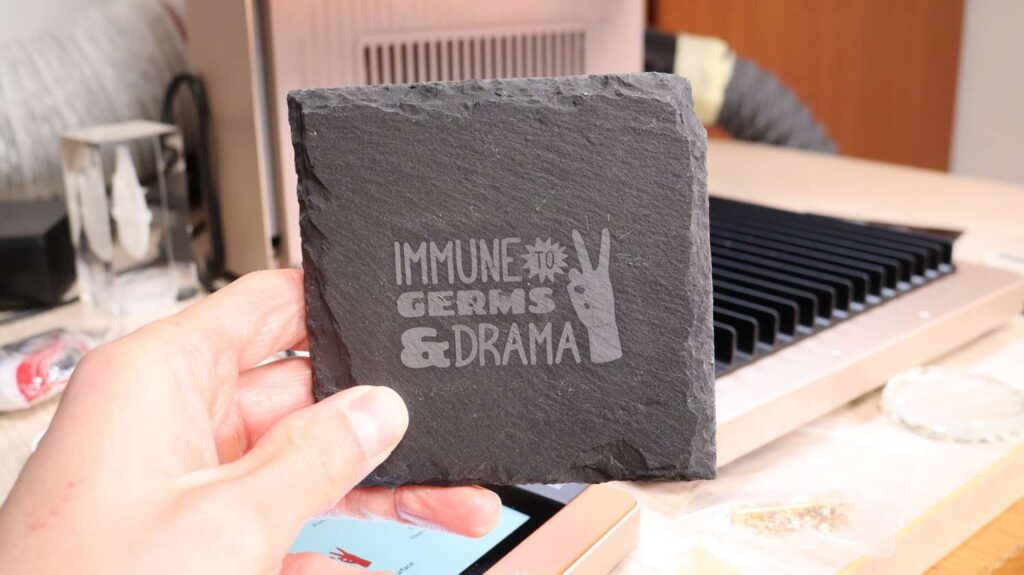
Slate Stone Coasters
Slate coasters engraved quickly using preset parameters, producing flawless and consistent results. The same goes for other similar stones and rock engravings.
Stainless Steel Engraving
Mirror-polished stainless steel is typically difficult to engrave, but the F2 Ultra UV handled it with ease. Using default presets and a design from the shape library, the engraving completed in just 11 seconds.
The engraving power was perfectly tuned, creating a matte, sandblasted appearance without discoloration.
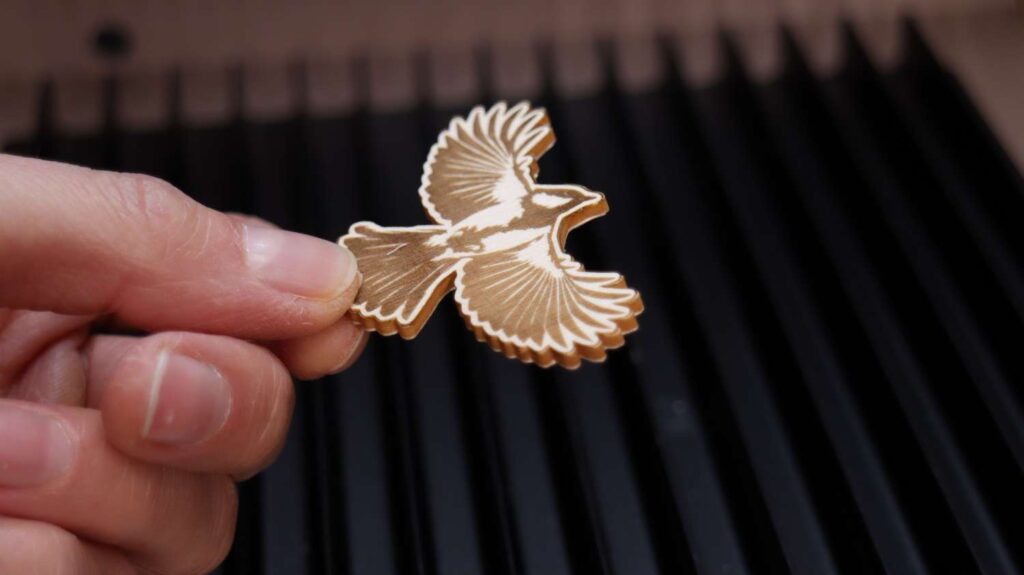
AI Design Features and Plastic Engraving
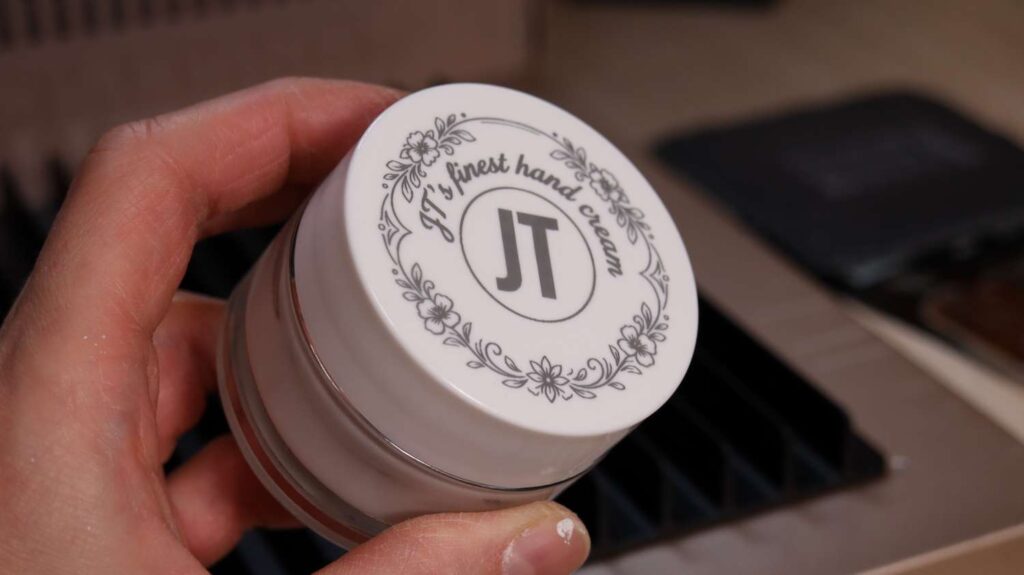
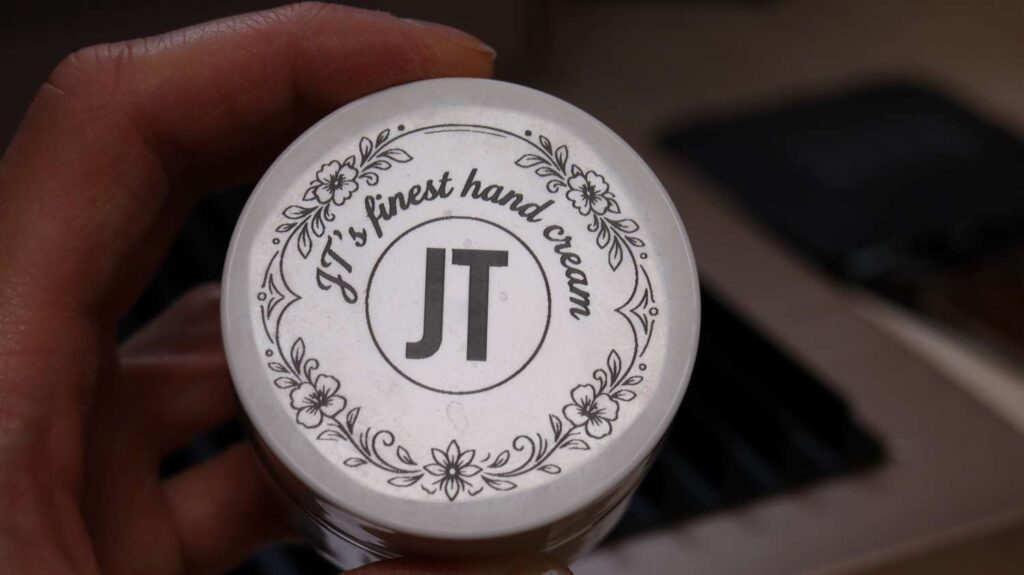
xTool Studio’s AI design tools were used to generate artwork for a hand cream jar lid. The design was converted to vector format using the built-in image tracing tool.
The lid, assumed to be white ABS plastic, engraved extremely quickly. UV lasers perform exceptionally well on plastics, producing smooth engravings with excellent contrast.
Denim and Leather Engraving
Denim Fabric
Denim engraving parameters are available for multiple fabric variants. The engraving completed quickly and produced a clean, professional result.
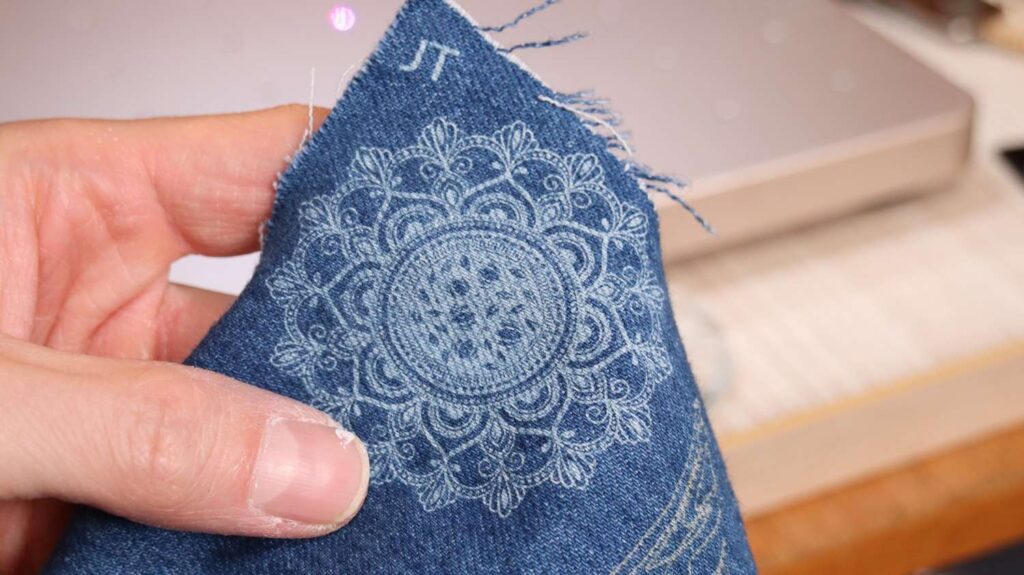
Unlike heat-based lasers, UV lasers remove color without damaging fibers, which is why manufacturers use them to create artificial wear patterns. For comparison, on the below photo, the brown-ish logos were engraved with a blue diode laser and look noticeably different. Also the diode laser has damaged the fibers and weakened the fabric.

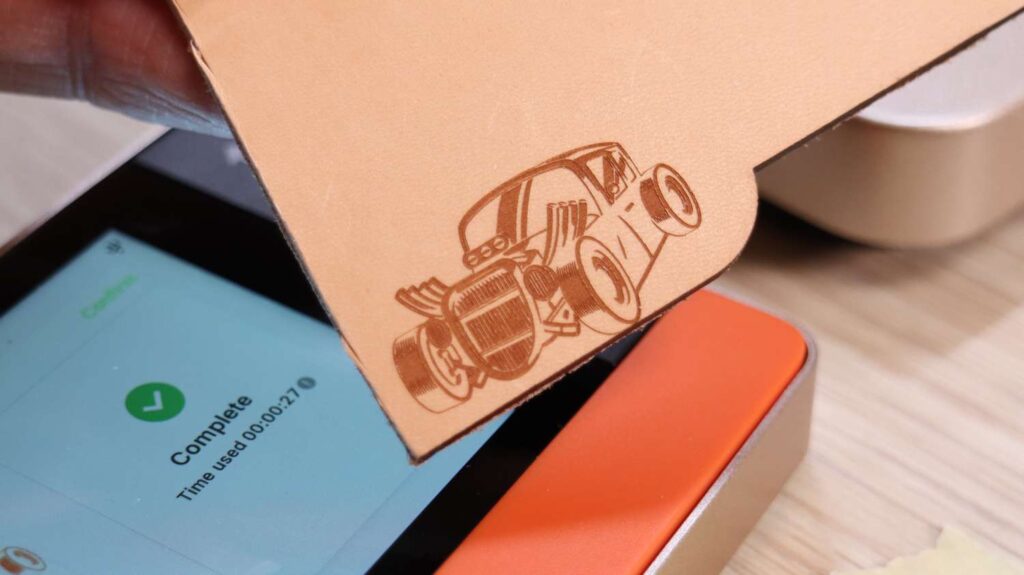
Natural Leather
Natural leather engraved cleanly using preset parameters, with ideal depth, sharp detail, and strong contrast.
Overall, the xTool F2 Ultra UV is extremely easy to set up for different materials, reinforcing its position as one of the most user-friendly UV laser engravers available.
Embedded 3D Inner Crystal Glass Engraving
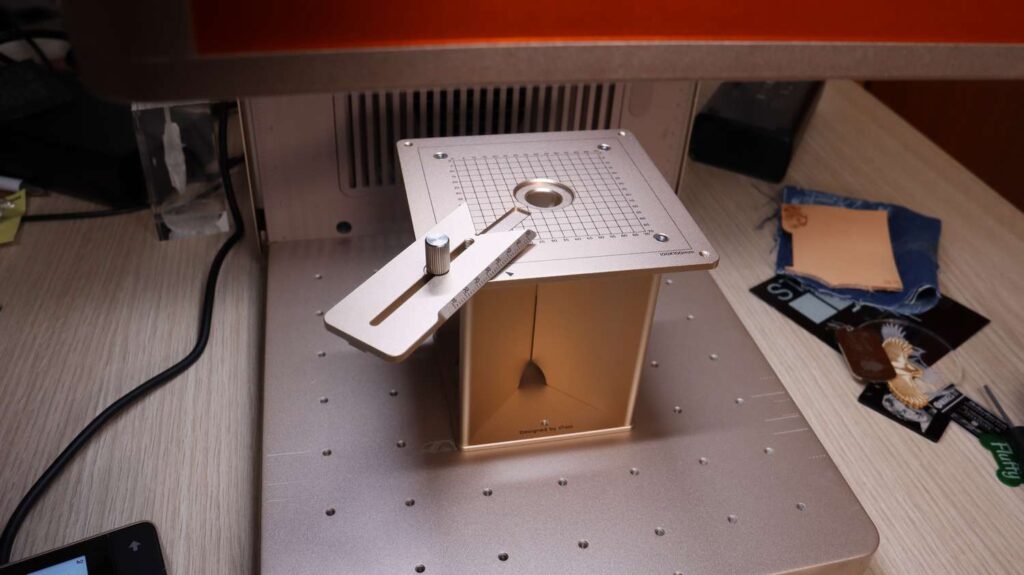
Hardware Setup
The F2 Ultra UV’s standout feature is embedded inner K9 crystal glass engraving. Switching to the second lens is fast thanks to the quick-lock mechanism, which doesn’t require threading.
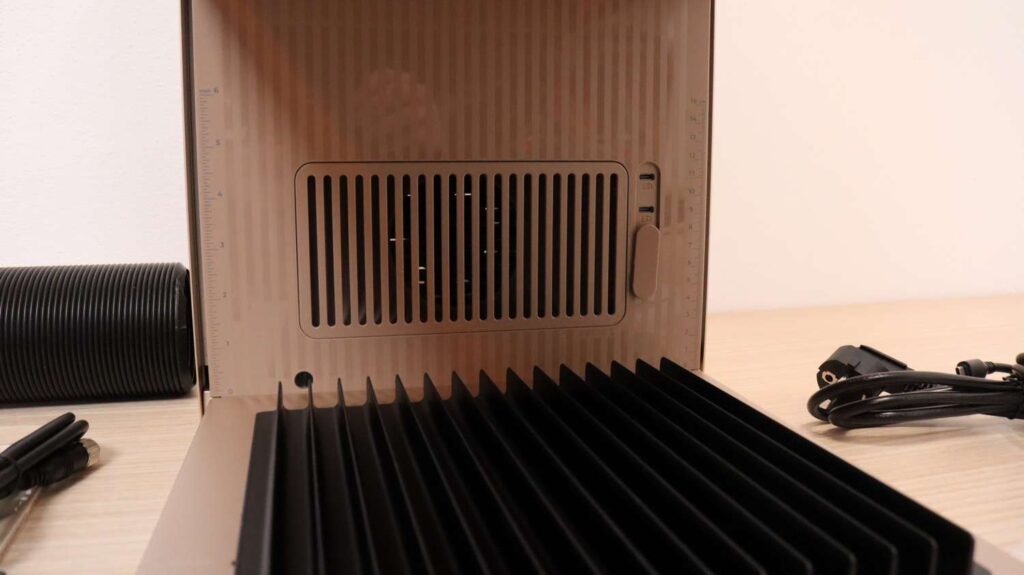
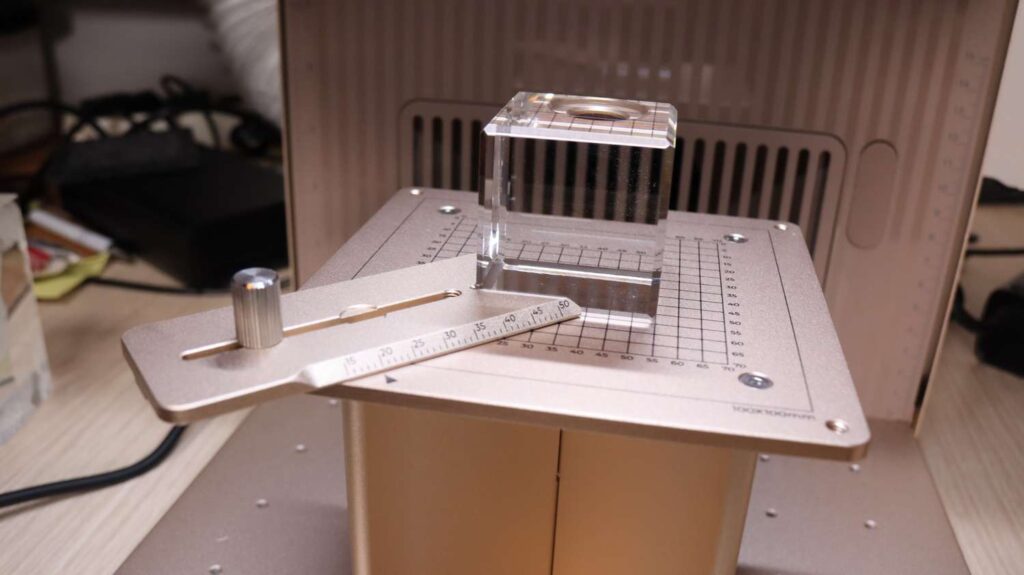
This lens must be used with the included riser table, which securely mounts to the machine base and allows for precise Z-axis positioning inside glass blocks.
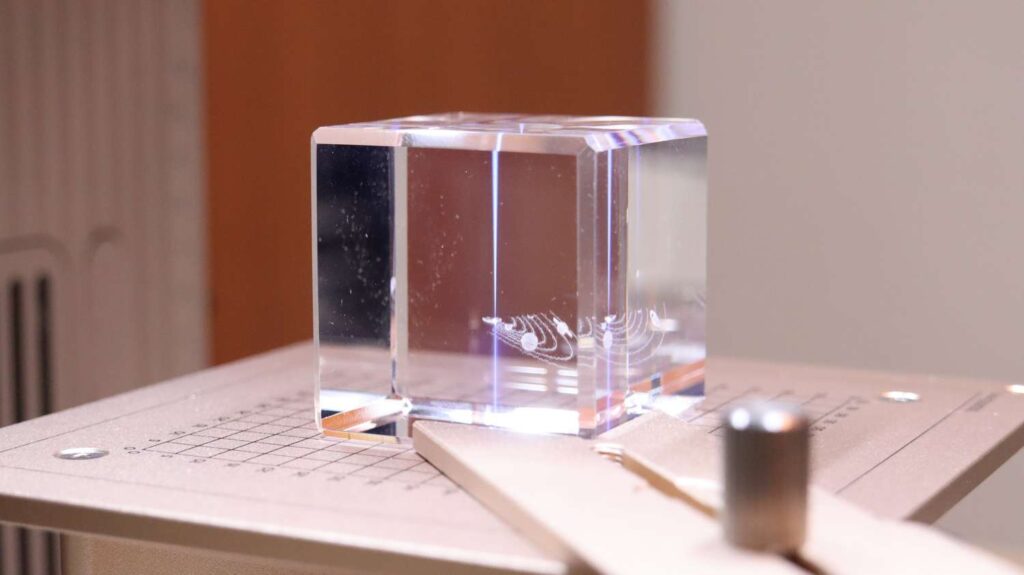
Software Workflow
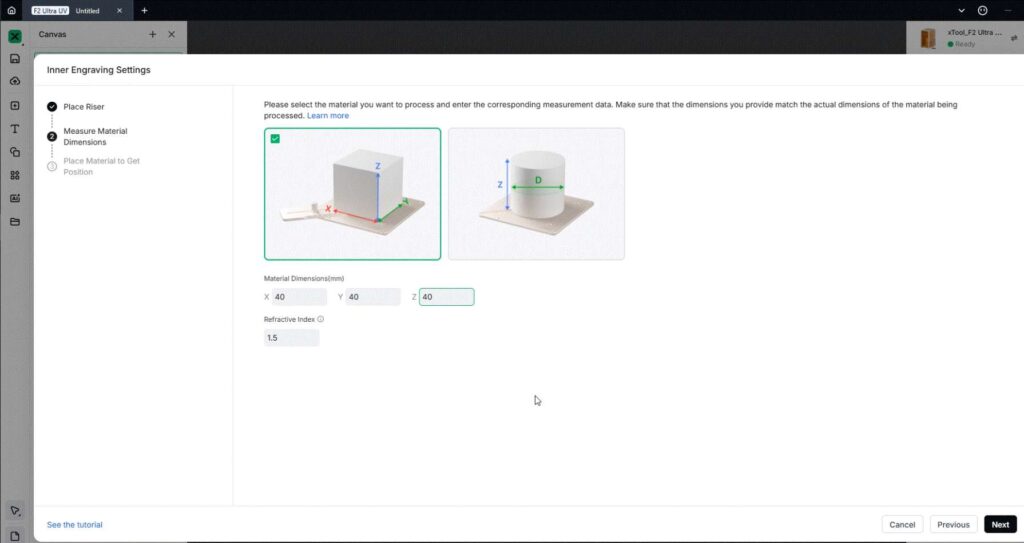
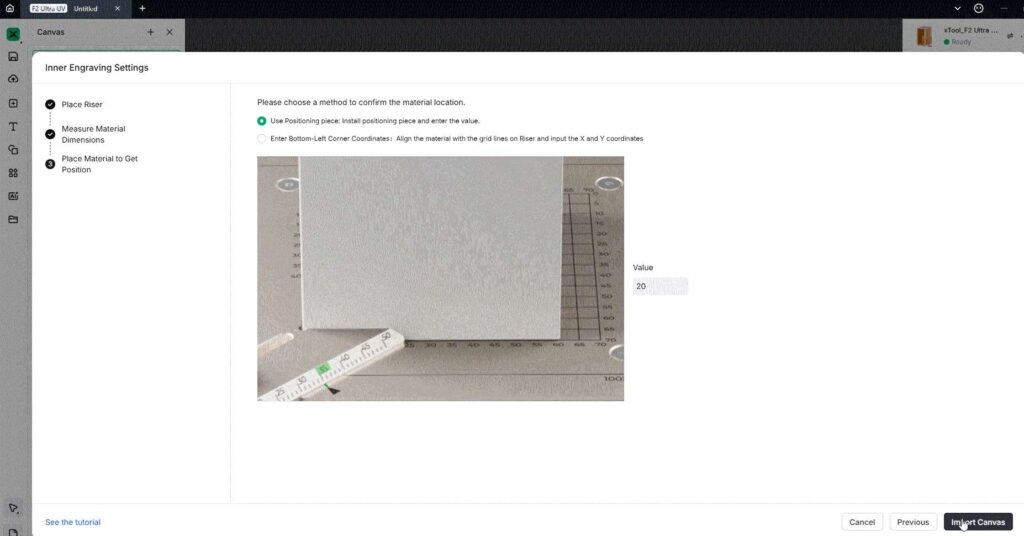
xTool Studio provides step-by-step guidance for 3D inner glass engraving:
- Select the size of the glass cube
- Center the cube on the grid
- Lower the slider until it touches the glass
- Enter the measurement into the software
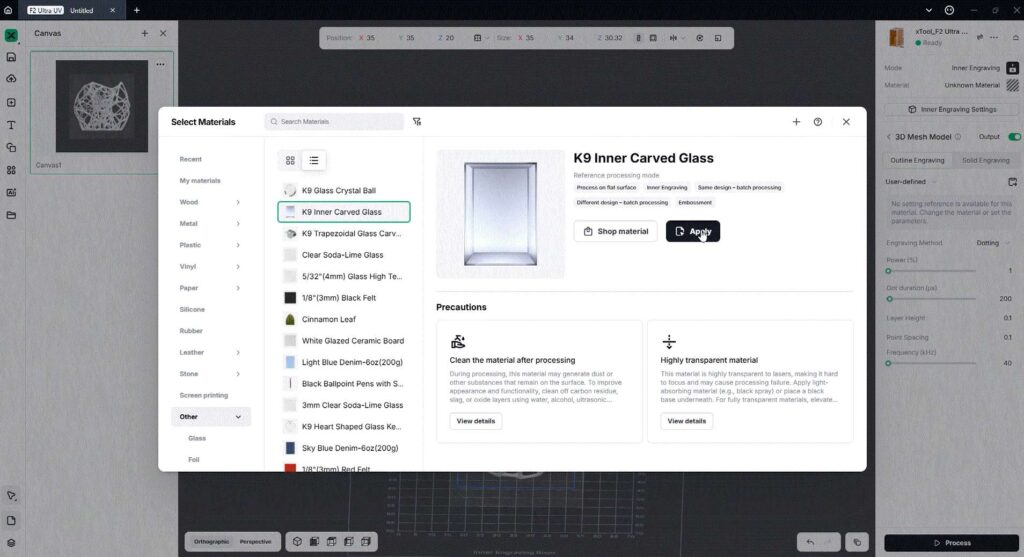
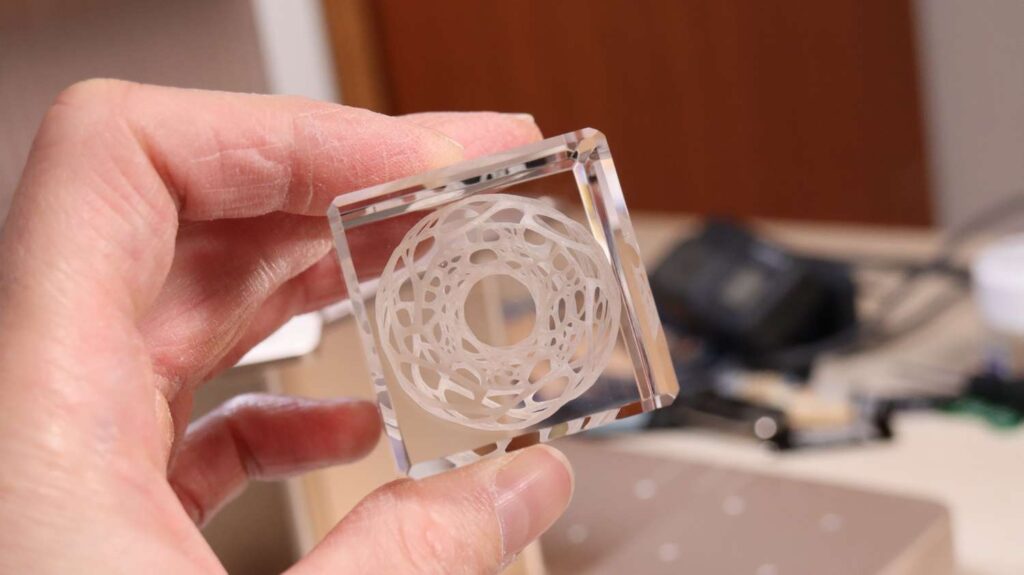
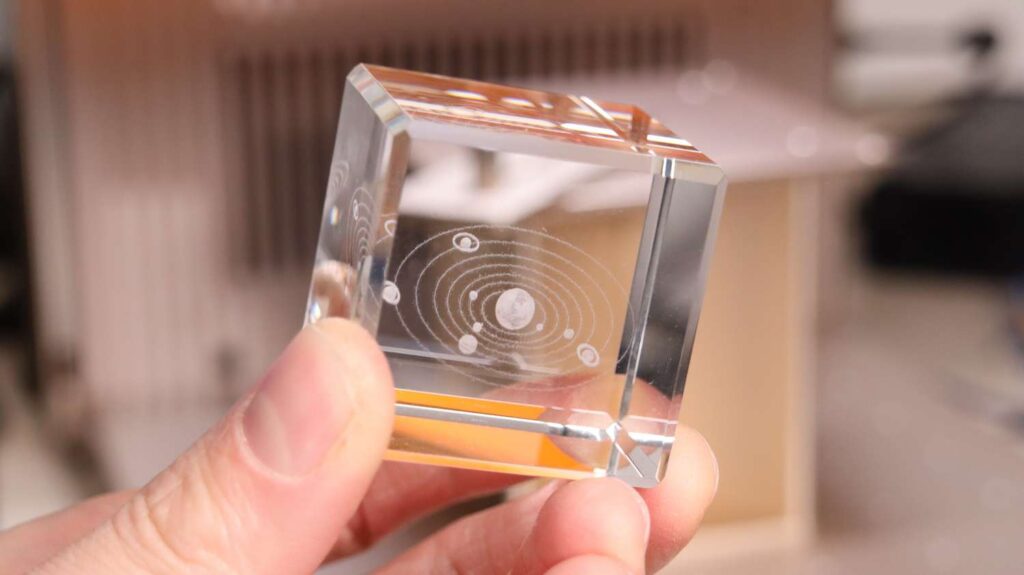
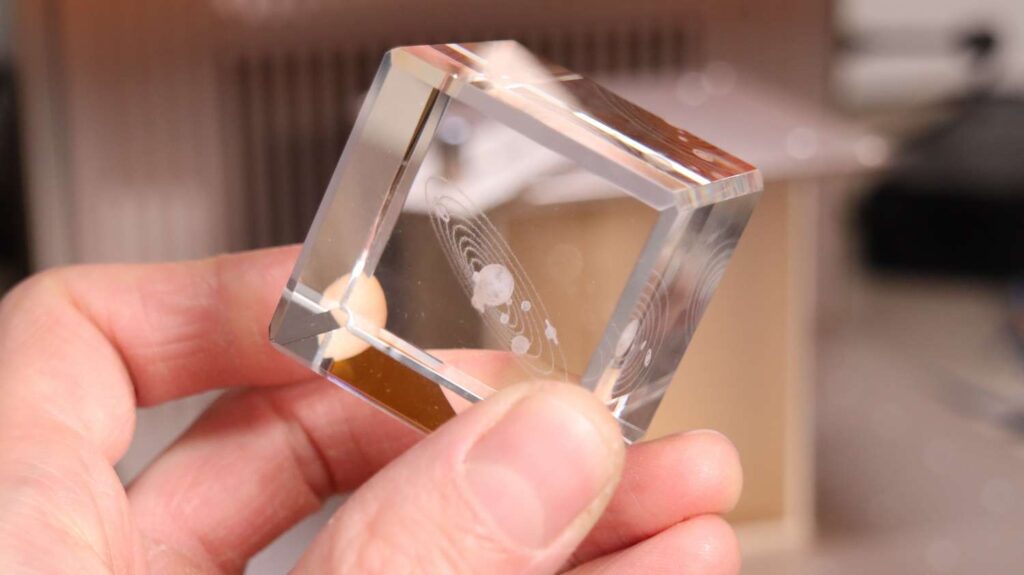
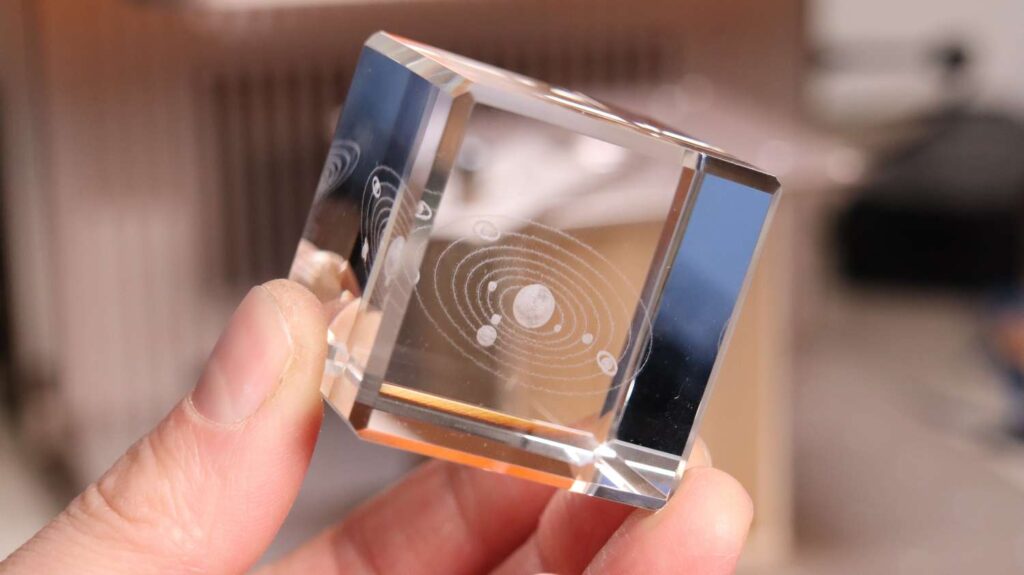
After importing a 3D model (I sourced this one from Thingiverse) and selecting K9 crystal glass parameters, you can choose between solid engraving or outline engraving.
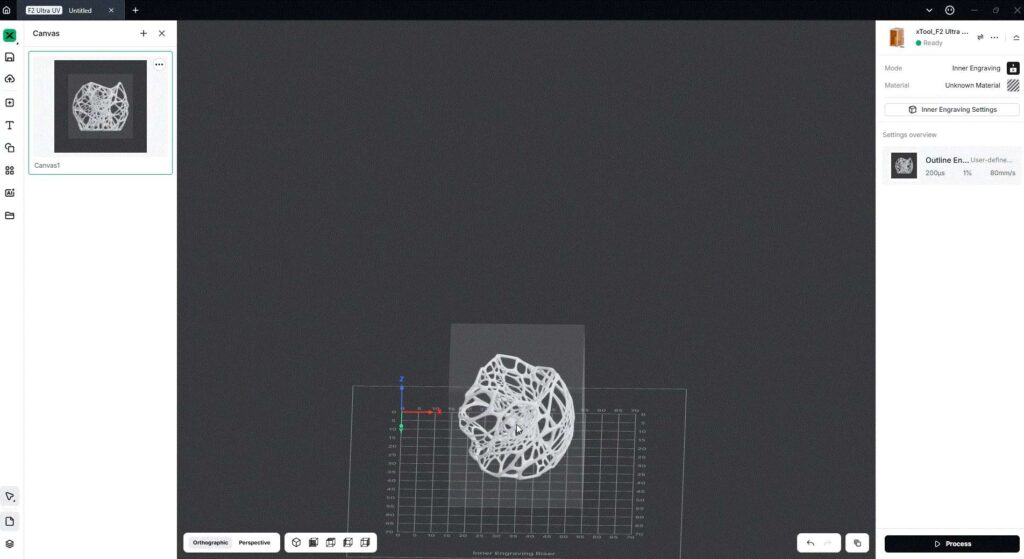
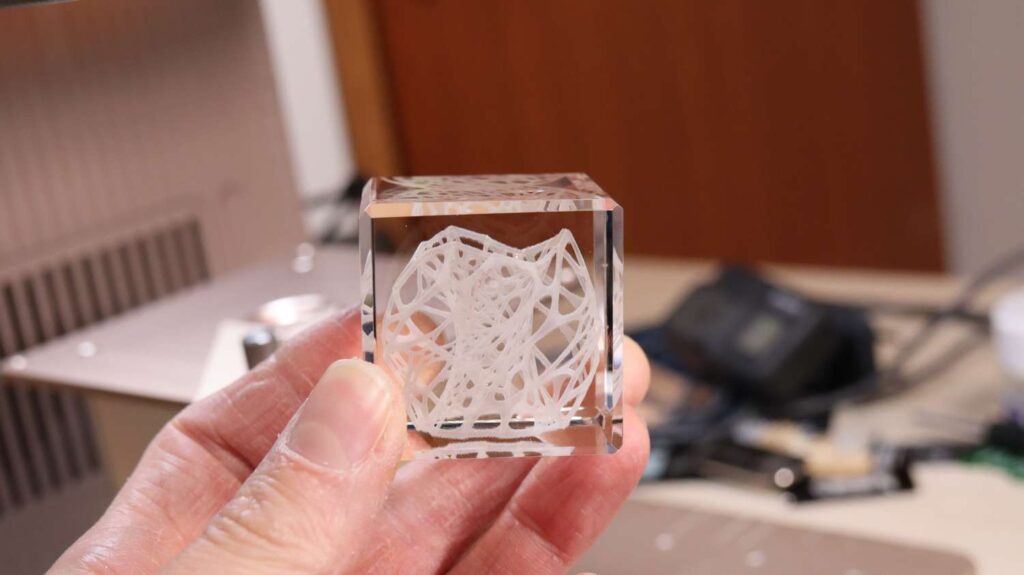
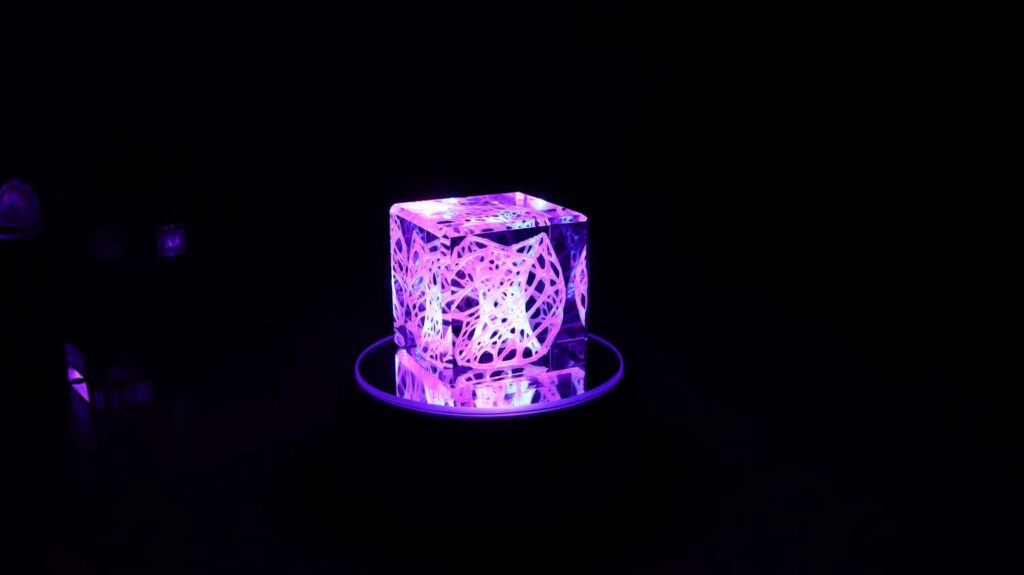
Outline engraving was used for faster results. The process works similarly to a 3D printer, raising the Z-axis layer by layer. The engraving finished in 11 minutes, producing a stunning result with exceptional detail—especially when displayed on an illuminated stand.
Complex Multi-Model 3D Engraving
A more advanced test involved importing four separate 3D models: the Stargate, event horizon, pedestal, and a logo.
Different engraving modes were applied:
- Scanning mode for the Stargate and pedestal
- Dotting mode for the event horizon
- Solid engraving for the logo
While the event horizon model was slightly too thin to achieve ideal density, the overall engraving demonstrated excellent detail and flexibility.
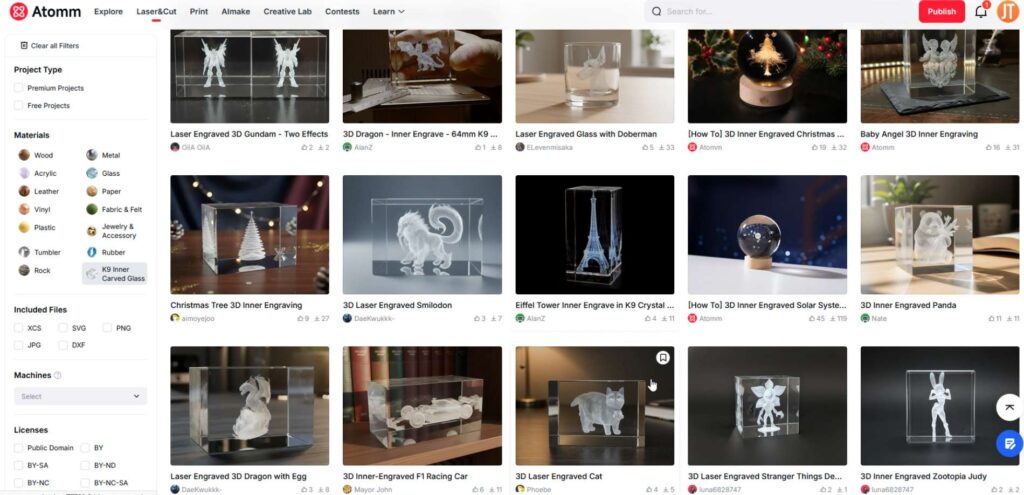
Community Designs and Glass Sphere Engraving
The xTool Atomm website offers a growing library of community-created designs, all of which can be opened directly in xTool Studio with pre-configured parameters ready to start engraving immediately.
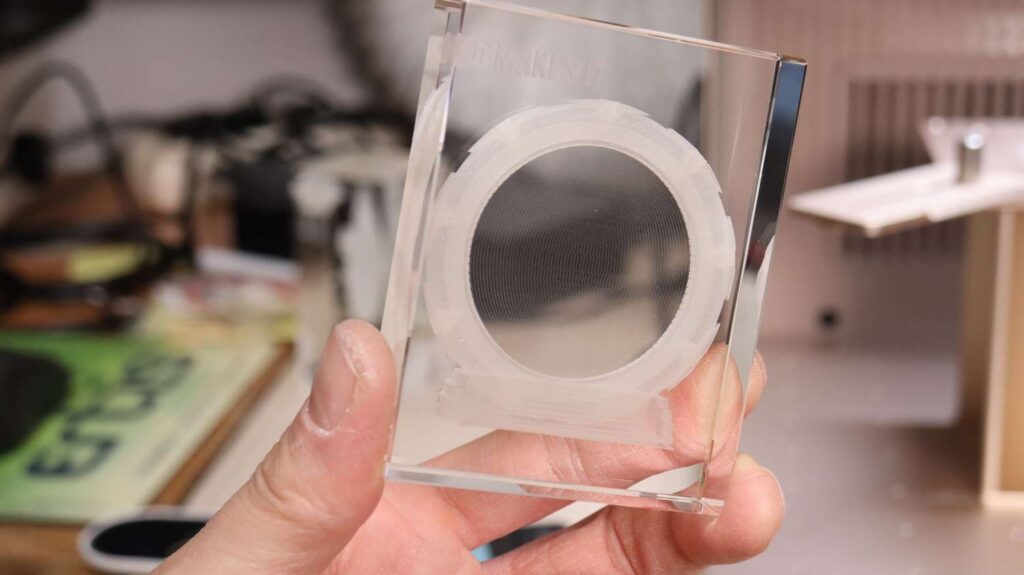
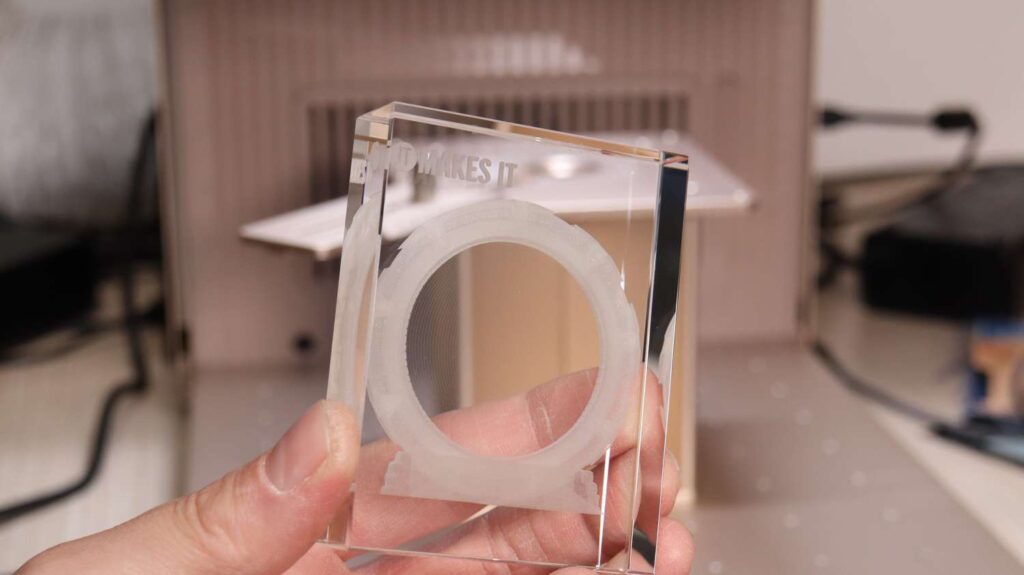
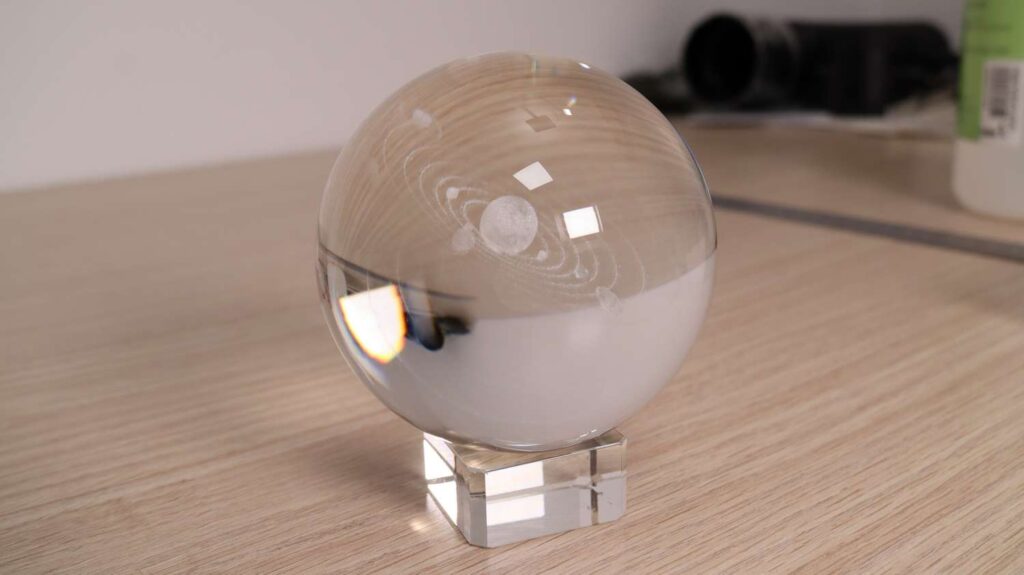
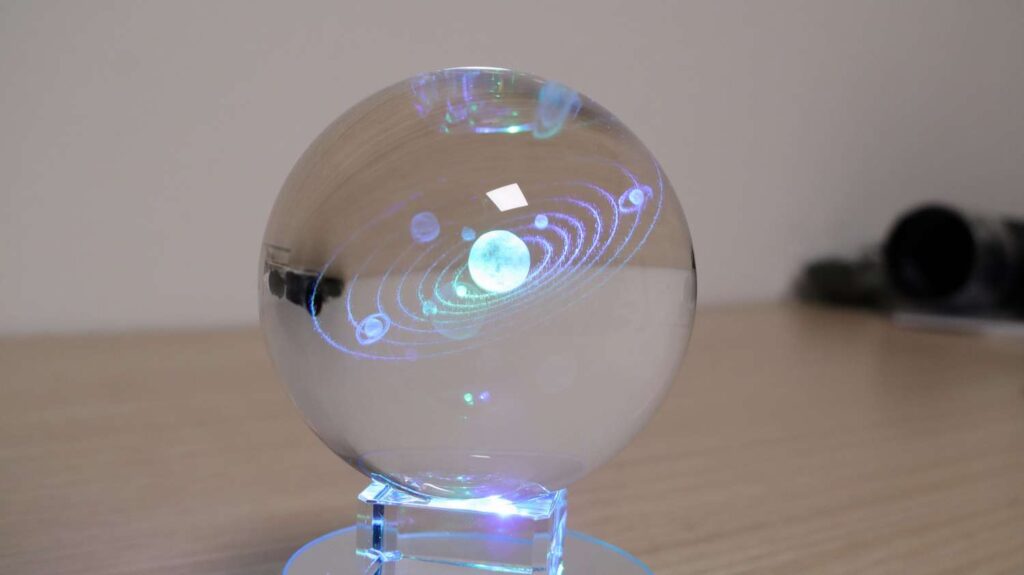
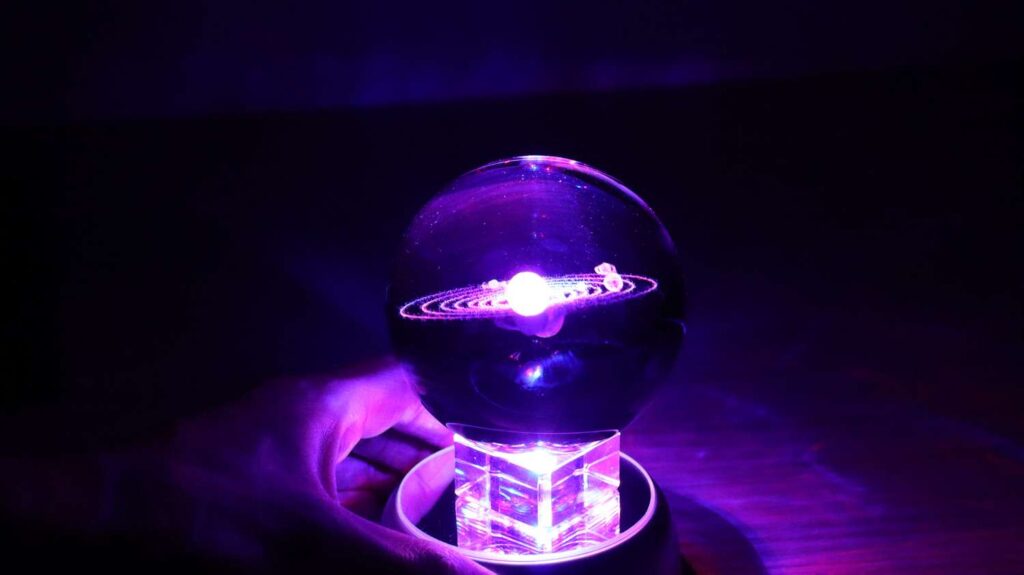
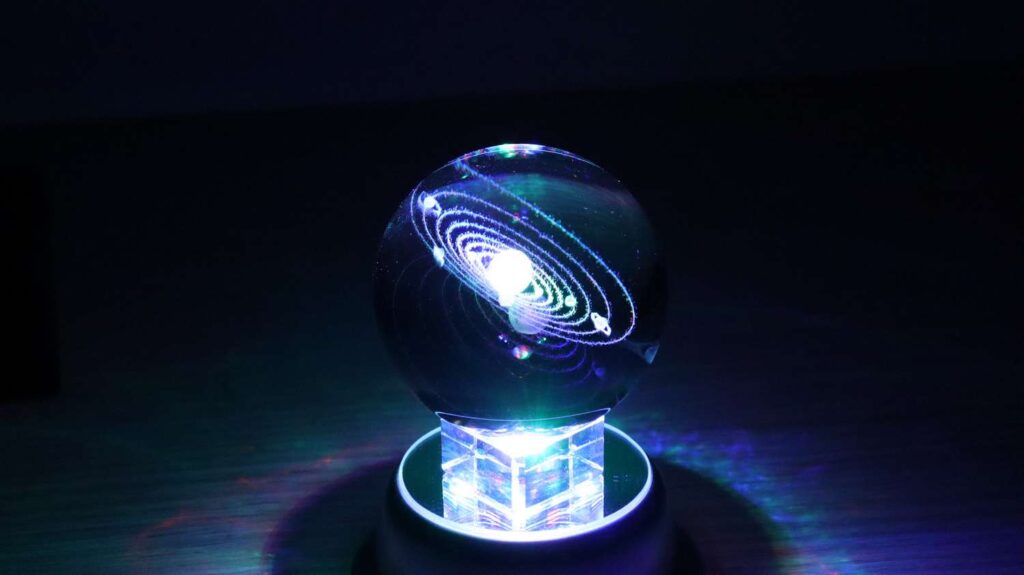
A pattern engraved into a glass cube completed in 4 minutes, but it truly shines when engraved inside a glass sphere.
Engraving Glass Spheres
Glass spheres require submersion in engraving oil to prevent light refraction on curved surfaces. The oil’s refractive index allows the laser beam to travel straight into the glass.
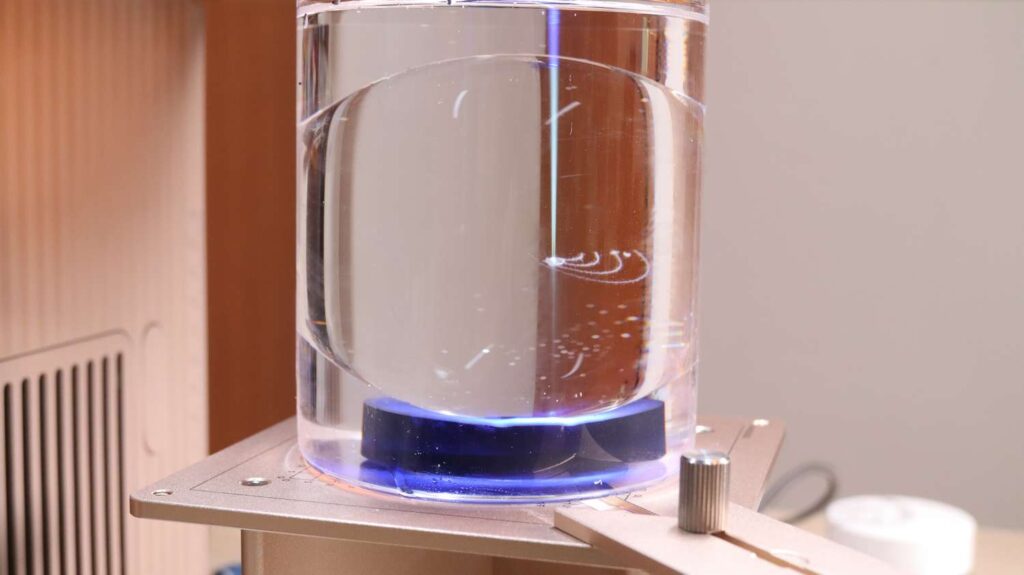
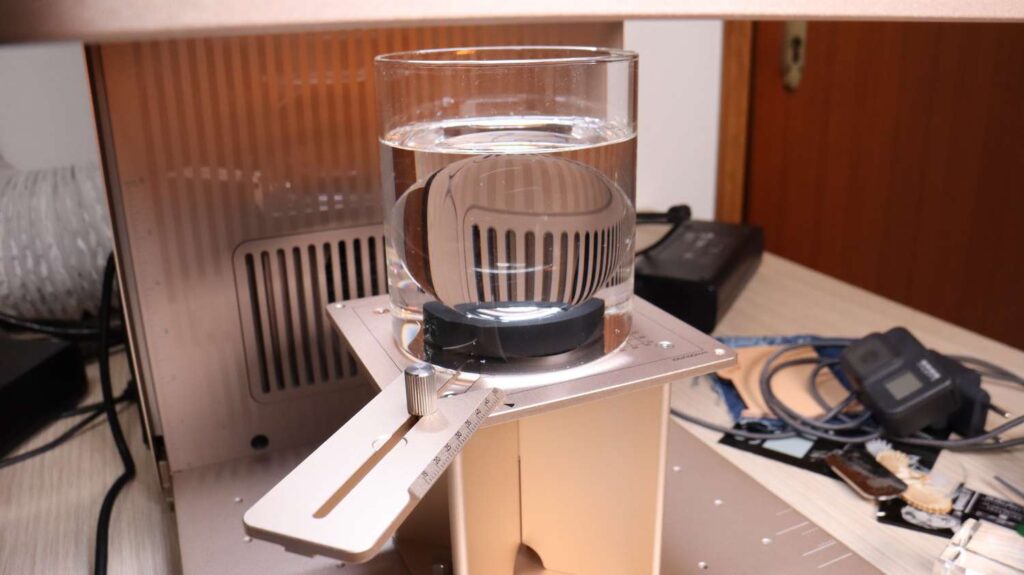
A glass container was used to hold the sphere centered in the oil. At the time of testing, xTool’s official oil was unavailable, so I used paraffin oil instead. While not ideal, it worked very well for initial testing. xTool will launch their own glass sphere engraving material pack this month in their official store amongst other material packs with everything needed to make the best results.
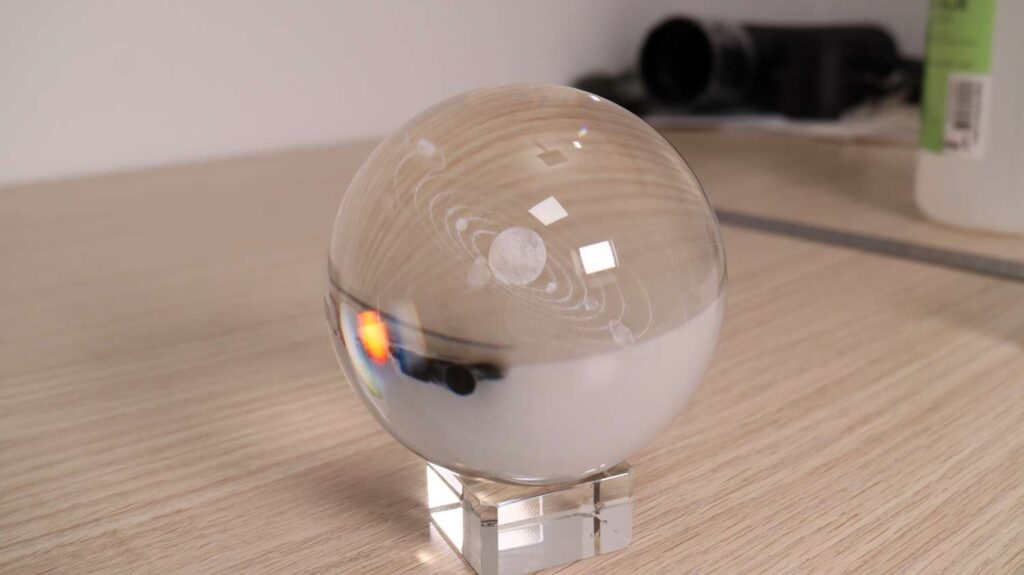
After engraving, the sphere is washed clean to reveal a truly mesmerizing result. With a custom message, it becomes a unique and meaningful gift. It looks absolutely incredible! The camera shots don’t do it justice.
Can You Etch PCB Printed Circuit Boards With a 5W UV Laser?
Due to many requests, I tested PCB fabrication using the xTool F2 Ultra UV laser engraver. To etch the copper layer, I used 100% power, 80 mm/s speed, a 200-line interval, and three passes with a 45-degree rotation between each pass. This setup completely ablated the copper, but it also left the FR4 substrate slightly charred beneath the etched areas.
To address this, I ran an additional cleaning pass using the same design and settings, increasing only the speed to 500 mm/s. This step removed most of the remaining charring from the etched sections.
For an even cleaner finish, I performed a final, more gentle cleaning pass across the entire PCB area using 30% power, 500 mm/s speed, and 300 lines. This pass completely cleaned the surface and, as an added bonus, made the exposed copper noticeably brighter and shinier.
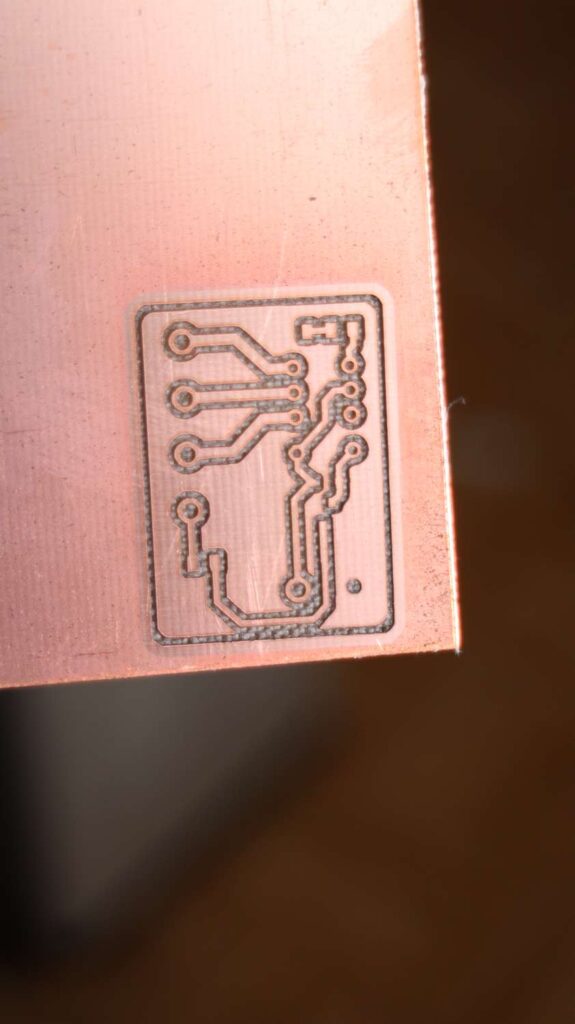
The final result looks excellent and it took only a couple of minutes for the whole process. Using this technique, it’s possible to produce very precise and clean PCB designs with the xTool F2 Ultra UV. If you want you can also drill the holes using this laser. You just need to run the cutting passes a bit longer where the holes should be..
Final Verdict: Is the xTool F2 Ultra UV Worth It?
If you follow the purchase link to the xTool official store in this review, you will get an additional discount as a thank you for reading this article!
If you found this xTool F2 Ultra UV review helpful, consider liking the video, subscribing, and leaving a comment with any questions. I read every one, and your support helps me continue producing detailed laser engraver tests and reviews.
And if you want to stay in touch with our latest reviews, subscribe to our mailing list to get notified when we release new review articles!

This post was written by JT Makes It.
JT Makes It is an engineer, hobbyist, and DIY-er armed with a Master’s degree in Electrical Engineering and over a decade of professional experience in the industry. From an early age, JT Makes It was pushed by an insatiable curiosity, spending countless hours disassembling, understanding, improving, and creating various gadgets and products. This lifelong passion led to a broad spectrum of technical expertise ranging from electronics, woodworking, metalworking, and CNC machinery, with a particular focus on laser engravers.
For the past 9 years, he has shared his expertise through engaging videos on his YouTube channel. With the last three years dedicated to scrutinizing and testing laser engravers, he also created this website and emerged as a recognized authority in the field. His expertise extends across the spectrum of laser technologies, ranging from diode lasers, CO2 lasers, and fiber lasers, paying attention to details and providing practical insights.
With JT Makes It, expect a blend of technical expertise, backed with hands-on experience, and a genuine passion for innovation and creation, making him a trusted source in the realm of DIY and laser engraving enthusiasts alike.
*The links on this website can be affiliate links. I earn a small commission at no extra cost to you. When you buy through these links you will support this website, which helps me to run this website(which cost money and a TON of time) and provide all these extensive reviews and information to you for free, without any paid membership.
4 responses to “xTool F2 Ultra UV Review: Is This the Easiest UV Laser Engraver to Use?”

Excellent articles thank you
It seems to be an excellent UV engraver BUT important to me:
-can not cut acrylic
-rather small working area
-focus issues on larger formats: out of focus out off the center…Is not the xTool P2S a better choice?
In the meantime I’m very happy with my xTool S1.
Thank you for this welldocumented review!P2S and F2 Ultra UV are completely different machines and are to be used with completely different purposes. P2S is a laser cutter primarily used for cutting wood and acrylic. F2 Ultra UV is a versatile engraver, capable of engraving on almost all types of materials. It is not meant for cutting other things than thin wood.
But the machine is perfectly in focus across the whole working area. It uses F-Theta lens which focuses the beam on a straight plane with some optical magic.
Can you please try making a pcb with smaller packaged components like qfn16 etc.
This is really needed. There is nothing like on the internet. I would like the buy it for pcb. But i need see its performance with small packages.
Thanks in advance.

Leave a Reply