
- Atomstack A10 Pro/X7 Pro – a Flagship BEAST!
- Contents of This Review
- What is the Atomstack A10 Pro (X7 Pro)?
- Specifications
- Laser Diode
- Focusing procedure
- Special Features
- Cutting and Engraving Different Materials
- Software and Supported Formats
- Our Test Results
- Wood Engraving
- Power Scale
- Interval Scale
- Photo Engraving
- Vector Image Engraving
- Anodized Aluminium Engraving
- Laser Focus Distance Test
- Acrylic Engraving And Cutting
- Plywood Cutting Test
- Hardwood Cutting Test
- Engraving Stainless Steel
- Upgrades and Accessories
- Conclusion
Atomstack A10 Pro/X7 Pro – a Flagship BEAST!
What is the Atomstack A10 Pro (X7 Pro)?
The Atomstack A10 Pro is the same machine as the Atomstack X7 Pro and the Atomstack S10 Pro. It features the same dual beam laser module and mechanical parts. We think that the only difference is that the A10 Pro does not have wireless connectivity.
The Atomstack A10 Pro should be a very capable laser engraving machine due to its dual beam laser module and an improved mechanical construction compared to the previous model – the Atomstack A5 Pro.
In this article, we will put it through a series of tests which will show what this machine is capable of.
The Atomstack A10 Pro has a rectangular engraving area of 410*400mm and it features a very premium control panel with display and quality buttons. It also has an offline controller, so the laser can be operated only by its touch screen. The computer is not needed.
The assembly of the machine is easy and it takes less than half an hour to assemble it thanks to a good manual.


*The links on this website can be affiliate links. I earn a small commission at no extra cost to you. When you buy through these links you will support this website, which helps me to run this website(which cost money and a TON of time) and provide all these extensive reviews and information to you for free, without any paid membership.
Specifications
| Parameter | Value |
|---|---|
Engraving Size |
410*400mm |
Engraving Materials |
Wood, Bamboo, Cardboard, Plastic, Leather, PCB Board, Aluminum Oxide, Non-reflective, Electroplating Layer and Paint Surface Layer Metal, 304 Mirror Stainless Steel, Glass, Ceramics, Cotton Cloth, Slate; |
Laser Output Optical Power |
10-11W |
Laser Wavelength |
445±5nm |
Focusing Method |
Fixed focus laser |
Operating Software |
LaserGRBL, LightBurn, Benbox, GrblController, LiteFire, Support Windows system, Support OSMAC system. Supported file formats NC, BMP, JPG, PNG, DXF and other image formats. |
Input voltage |
AC100-240V, 50/60Hz |
Weight |
3kg |
Warranty |
One Year |
Laser Diode
The Atomstack A10 Pro (X7 Pro) features the flagship M40 laser module which outputs 10W of power into a very compressed spot. Sintering temperatures are advertized to reach up to 1200°C which should allow us to engrave a lot more materials and metals.
The machine has a 32-bit controller board with a touch screen offline controller.

I would also recommend getting more quality protection googles with OD6+ protection. You only have one pair of eyes. Protect them! These lasers work in visible light spectrum and even reflections can be very harmful for your eyes!
Focusing procedure
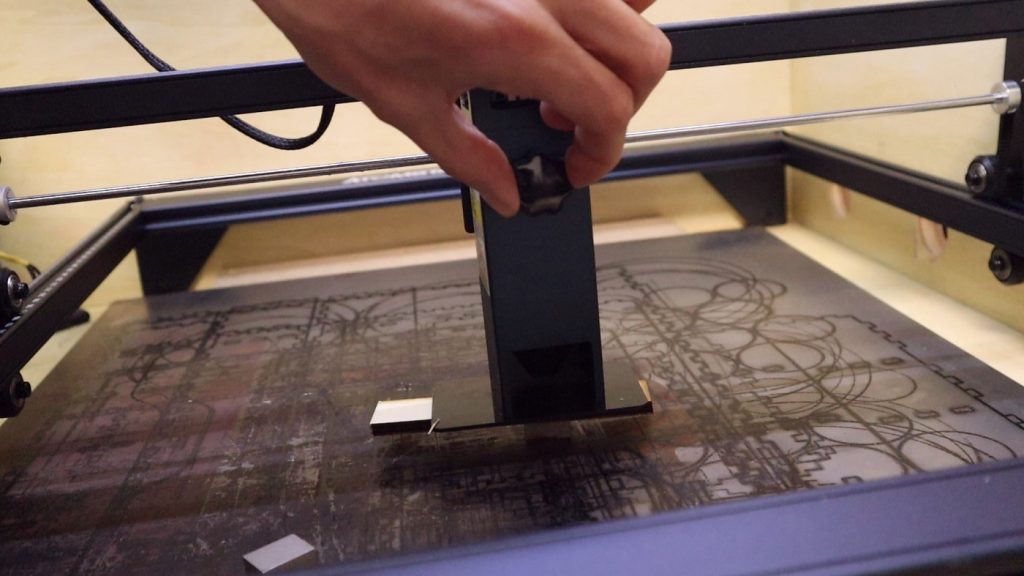
The focusing procedure is the same as with the Atomstack A5 Pro we tested previously. For optimal cutting, the head needs to be 2mm above the engraving surface. Focusing is done by putting an acrylic sheet/shim under the laser head and lowering the head on the shim. The shim is 2mm thick and after tightening the z axis screw, the head stays 2mm above the surface.
Special Features
Atomstack A10 Pro (X7 Pro) also has some special features worth mentioning:
Offline Controller
This machine has a cool offline controller which allows us to use the machine without the computer. It is very handy for field work and projects that require a lot of the same cut jobs. You set your design as you normally would in Lightburn or LaserGRBL but then, instead of starting the engraving, you export it as the gcode to the included SD card with the included SD card reader and with the touchreeen you can then select the file, fine tune the parameters and proceed to engrave your design without using the computer.
We engraved this with the offline controller. Check out the YouTube video at the top of the article, to see how to operate the offline controller.

Emergency Stop Button
It has a solid metal mushroom style emergency knob which comes in handy when you need to turn off the machine in a hurry.
Limit Switches
This is probably one of the best features which I hope that all lasers would have someday. Limit switches enable you to home the machine automatically so that it always starts from the same spot. This way, if you stop the engraving or add another layer of work (or if the machine has crashed mid-work), you can be sure that the machine will start working at exactly the same spot that you want. They decided to use the cheap tactile switches instead of proper limit switches, but they work alright.


Cutting and Engraving Different Materials
Engrave: Wood, Bamboo, Cardboard, Plastic, Leather, PCB Board, Aluminum Oxide, Non-reflective, Electroplating Layer and Paint Surface Layer Metal, 304 Mirror Stainless Steel, Glass, Ceramics, Cotton Cloth, Slate
The Atomstack A10 Pro/X7 pro is also a very capable cutter.
Cut: Cardboard, Non-woven Fabric, Wood Board, Acrylic, Some Thin Plastic Board, Sponge;cardboard…
You can cut more than 10mm thick stuff with this laser engraver. The machine can cut wood, especially Poplar plywood which is soft and it is the preferred wood for all laser cutters.
We have tested the machine with engraving and cutting different materials. You will find the results of our tests few chapters lower.
Software and Supported Formats
You can use the Atomstack A10 Pro laser engraver with free LaserGRBL software which works OK, but it is a little bit clumsy to use. It is great for some tests, but I chose Lightburn instead which is much more capable software, and it is very intuitive to use. It is not free though, but the license costs 60$. But, the software offers 1 month fully functional free trial which will help you decide if it is worth it to you. For me it was definitely worth it because it saves so much time (which is not free).
With LaserGRBL you can import vector files (NC, BMP, JPG, PNG, DXF…) and bitmap image files (bmp, jpg, png and gif),
Lightburn supports more formats: AI, SVG, DXF, PDF, HPGL, PLT, and RD for vector formats and PNG, JPEG, BMP, TIFF, TGA, and GIF for image formats.
Vector format is preferred format for these machines because it contains the paths around the shape edges on which the laser head tracks. Engraving vector files is faster because the laser directly cuts on the path versus scanning like a printer and making dots when engraving bitmap images (photos).
You can get millions of free vector designs on the internet, or you can use free vector drawing programs like Inkscape or QCAD (for more technical drawings)
You can also import tons of vector designs and images from free vector sites or you can buy great laser designs on websites like Etsy. This really expands your capabilities.
The Atomstack A10 Pro/X7 Pro can also be controlled via the included offline controller.

Our Test Results
In the video at the top of this article, we have tested the performance of the Atomstack A10 Pro and have compared some of the results with comparable 10W machines like the Neje Master 2S plus and our current favourite machine – the Sculpfun S9 (5W laser). You will find the results of the Atomstack A10 Pro in this post. For the results of the Sculpfun S9, check our other post here!
We have performed the more or less standardized test which we perform on all the laser engravers and cutters. This way, it is easy to compare results between machines. Here you have the video showing how the tests were done and below you will find detailed images of the test results together with explanation.
Wood Engraving
Our standard engrave pattern is designed to showcase the engraving capabilities at different settings, so you can see the effectiveness of the laser beam. Lets see the result in more detail in the below chapters.
If you want to test your own laser, you can get the below test file HERE.

The Atomstack A10 Pro /X7 Pro with the M50 module appears to output less power in the 10% power range. I think that this is due to the driver circuit response curve and it is not due to a weaker laser module as the higher power percentages still show very decent power output.
Power Scale
The power scale test pattern shows how the machine engraves with different power levels at different speeds.
Since this laser is twice as powerful, we have modified the pattern a little bit to better suit it to this much more powerful machine. We have omitted the 600mm/min speed in Power Scale since the machine has burned through the material with higher power. Instead, we have added a faster speed of 3000mm/min.
Power is varied from 10% to 100% in 10% increments and the speeds are 1200, 1800, 2400 and 3000mm/min. We have omitted the slow speed/high power shapes, because the beam burns too much at slow speeds. This leaves a big charred blob that gives no practical information.

Interval Scale
The interval scale test is here to show if the laser focus spot shape is square or rectangular. The scanning interval is progressively increased from 0.1mm to 0.5mm.
For this test the power levels were also reduced to accommodate higher output power of the Atomstack M50 laser module.
In this test, the Atomstack A10 Pro appears to have a very square beam shape as the engravings in vertical and horizontal direction look quite balanced but still not perfect.
We will be able to estimate the exact spot shape later when we test the engraving on anodized aluminium.

Photo Engraving
Here is a test of engraving a small photo, 20mm in size while changing the maximum laser power.
Photos are quite slow to engrave because the laser head must scan line by line like an inkjet printer. If you want to engrave a very large photo, prepare to wait a couple of hours 🙂
As we can see below, the Atomstack A10 Pro did a good job but the photo still looks less detailed than with Sculpfun S9, which had more contrast and detail with its engraving.
This was expected. Because of the higher output power, there is less resolution for controlling the laser power. Combined with a slightly larger laser spot size, you get less detailed photo engravings.
The Atomstack A10 Pro with the M50 module appears to output less power in the 10% power range. I think that this is due to the driver circuit response curve and it is not due to a weaker laser module as the higher power percentages still show very decent power output.

Vector Image Engraving
Vector images are much faster to engrave as the laser head directly follows the lines. You can not make a greyscale image though with this technique.
Our test includes this cute photo of a Tit bird in the top right corner of the test piece. The bird engraving took only a few minutes to engrave. In the software you can set to fill the closed shapes with pattern, on this one, the shape is filled by scanning with 0.1mm step. For big engravings you could increase the step to 1mm or more, to make engraving faster. This way it would make a raster or a grid on the black areas. But more on this at some other time.
Anodized Aluminium Engraving
Next, we have tested the Atomstack 10 Pro on a scrap piece of black anodized aluminium.
Below is the engraved test pattern which is setup to evaluate the focus dot size in both directions as well to see the effects of speed. Next we will further examine the separate parts of the test pattern.


The most important part is again the interval scale. By scanning vertically and horizontally with different interval steps we can approximate the laser dot size. From the results we can see that the laser dot of the Atomstack A10 Pro /X7 Pro with the M50 laser module is more or less rectangular as the pattern looks the same when scanning in horizontal (X Axis) and vertical (Y Axis) direction.
The text engraving is done at 600 mm/s which is quite fast for such small movements, and therefore some shaking of the laser head is visible in the corners. This can be easily avoided by reducing the acceleration and speed in the settings.
There are quite a lot of vibrations visible when engraving text. There is way more vibrations compared to the mechanically similar Atomstack A5 Pro we have tested a while ago. I don’t believe that this laser has worse mechanics. I think that the reason for this is because I didn’t adjust the X axis rollers tight enough. I am sure this problem can be solved easily, and the problem is not due to the machines mechanical design.
Let’s do some further testing with the digital microscope. Here are the pictures taken with an Andonstar AD407 digital microscope.


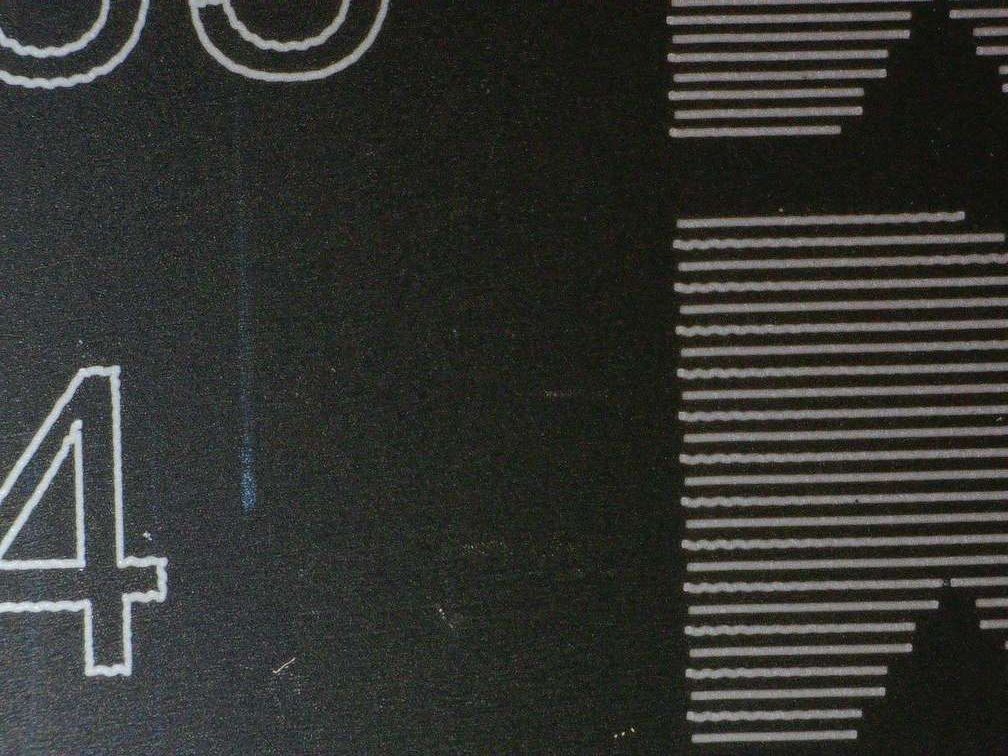

First thing that we see is that the Atomstack M50 laser module has a dot shape, sized approximately 0.15 times 0.15 millimetres.
Next was testing with different text sizes. We can see that with this machine – the 1mm text conditionally readable. As mentioned previously, we should tighten the axis rollers a bit more tightly as there should not be so much wobble present. The Atomstack A5 Pro we tested previously had much less wobble and the mechanics were mostly the same.


Below is the engraving of two sets of squares on the right side, one inside the other. The inner square is engraved with 1000mm/min and the inner square is at 100mm/min.
We can see that at higher speed there is more wobbling present (mechanical) but the speed shows to have no effect on brightness of the engraved pattern. There is a lot of shaking present in diagonal lines.


Laser Focus Distance Test
In this test we will see how the laser dot size increases further down into the material. The further down in the material the dot stays focused, the thicker material you will be able to cut.
We achieve this by progressively lowering the board by 3mm for each square, without refocusing the laser head.
0mm means that the focus is perfectly set (with aluminium block). The 3mm square is engraved by lowering the test piece 3mm lower than the optimal focus. The result shows how big the dot is 3mm down into the material that is being cut. The same principle goes for larger distances.
We can see that the Atomstack A10 Pro with the M50 module performed better than Neje Master 2S Plus, but still a bit worse than the Sculpfun S9, but still quite well. With greater distance the Atomstack M50 module spot size is getting bigger than with Sculpfun S9. This means what the cutting performance will decrease more rapidly with the M50. But on the other side, the M50 has double the output power.


But farther away we go, the dot starts to increase significantly. At 9mm the dot becomes quite thick compared to Sculpfun S9. But this laser has double the power and should still cut well.
You can use the thickening effect to your advantage in cases when you want to engrave bigger stuff with low detail. You set up the laser in this out of focus position. The beam will be larger and the engraving will be done faster this way as the distance between engraved lines can be bigger.
Acrylic Engraving And Cutting
Did a short test on 3mm thick black acrylic (plexi glass) at 600mm/min. The engraving and cutting came out great with a clean cut edge. Atomstack 10 Pro with M50 module was able to cut through 3mm thick black acrylic in 4 passes which is very good.
We also tried to cut the 10mm thick black acrylic. It took around 36 passes to cut through at the speed of 600mm/min. We could say that this thickness of acrylic is not as practical for cutting since it would take very long to cut through.


Plywood Cutting Test
Test was made at three different speeds with 3mm, 6mm and 10mm thick Poplar plywood being cut.
The test was performed in both scanning directions – horizontal X axis (left-right) and vertical Y axis (back to front) as the cutting performance is different in each direction because the dot has rectangular shape.
Here is a comparison table between the Atomstack A10 pro/X7 Pro with the M50 laser module and the Neje Master 2S Plus.


The Atomstack A10 Pro is a capable cutter with a quite balanced cutting performance. On the last photo above you can see the results compared to the Neje and Sculpfun S9.
Hardwood Cutting Test
This test shows how well the Atomstack A10 Pro Plus cuts harder woods at 600mm/min.
First we tried to cut 4mm pine wood which is still quite soft.
Atomstack A10 Pro has cut it in 4 passes.
Then we tried harder and denser 3mm and 5mm thick Beech wood. The Atomstack A10 Pro had no problems cutting it and did it in 3 passes for 3mm thick ans 4 passes for 5mm thick beech wood.
We also tried cutting 5mm thick Oak wood and A10 did it in 4 passes.
This is a much better performance than we saw with the Neje Master 2S Plus. But it still leaves darker edge compared to the Sculpfun S9.


Engraving Stainless Steel
Tried to engrave text on blackened stainless steel (sprayed with cheap acrylic spray paint) with full power and 200mm/min. The engraving came out quite nice. Compared to the Sculpfun S9 using the same settings, we can clearly see that the Atomstack has a larger laser spot. A very small laser spot of the Sculpfun S9 makes it a very capable cutter/engraver despite having half the power.

Upgrades and Accessories
If you want to engrave cylindrical objects, the Atomstack Rotary Tool is a great buy! If you are a very demanding rotary user, they are both also compatible with the xTool RA2 Pro rotary attachment we reviewed here!
And we also highly recommend to use a laser engraver enclosure, to vent the harmful air out through a window. Read more about laser engraver enclosures here!
A good laser engraver with premium features!
Conclusion
The Atomstack A10 Pro is a premium, higher end machine with good mechanics and it has a strong 10W laser module which has a pretty long focus range which makes it a good laser cutter also for thicker stuff. The offline controller comes in very handy when engraving multiple pieces or having no computer nearby.
Buy Atomstack A10 ProBuy Sculpfun S9Be sure to also check out my reviews of newer laser engravers HERE!

This post was written by JT Makes It.
JT Makes It is an engineer, hobbyist, and DIY-er armed with a Master’s degree in Electrical Engineering and over a decade of professional experience in the industry. From an early age, JT Makes It was pushed by an insatiable curiosity, spending countless hours disassembling, understanding, improving, and creating various gadgets and products. This lifelong passion led to a broad spectrum of technical expertise ranging from electronics, woodworking, metalworking, and CNC machinery, with a particular focus on laser engravers.
For the past 9 years, he has shared his expertise through engaging videos on his YouTube channel. With the last three years dedicated to scrutinizing and testing laser engravers, he also created this website and emerged as a recognized authority in the field. His expertise extends across the spectrum of laser technologies, ranging from diode lasers, CO2 lasers, and fiber lasers, paying attention to details and providing practical insights.
With JT Makes It, expect a blend of technical expertise, backed with hands-on experience, and a genuine passion for innovation and creation, making him a trusted source in the realm of DIY and laser engraving enthusiasts alike.


Tags: AtomstackDiode Laser


“This was expected. Because of the higher output power, there is less resolution for controlling the laser power. Combined with a slightly larger laser spot size, you get less detailed photo engravings.”
This is supposed to have a 0.06×0.06mm spot size which is pretty small. Did you measure it?
It is measured in the interval test within anodized aluminium test pattern. Its 0.15mm times 0.15mm square
0.15mm by 0.15mm Laser Beam? Isn’t this rather LARGE for a “Flagship Beast” (Top of the line machine) as you called it?
I have seen lower wattage modules produce beams half that size (I’m thinking Sculptfun).
I thought ATOMSTACK advertised it as 0.08 x 0.15 in their literature. Could it be the material had changed after it was exposed to heat causing the difference in burn width, before you measured? I have seen this happen with other materials, so much so that they don’t accurately document the Laser beam width.
Usually all the dual diode modules have larger beam sizes than standard 5W modules. I think it has something to do with the challenges of focusing the two light sources together. It is a flagship because it is very well built and has the most features. The fact that the beam is perfect square is very important. This helps A LOT when cutting wooden boxes with tight fitting joints. Otherwise parts cut vertically and horizontally don’t fit together.
With 10W machines, I engrave the test pattern on anodized aluminium with 50% power so the light output should be about the same as running 5W machine at 100% power.
I picked up an Atomstack X7 with extension kit, air assist kit, and rotary attachment kit. This is plugged via USB to an I7-3770k running Windows 10 with 16GB of memory, 512GB SSD. The computer and laser are plugged into an APC 550VA battery back up surge protector (with a new battery). The USB is an industrial cable, double shielded with ferrite EMI filters. The USB on the computer is set to not power down or timeout. I am running an up to date licensed version of Lightburn.
A while back I noticed that the laser would reboot about 1/4 of the way through a 12×24 job marking slate. I just happened to be standing there when it happened, there was no warning message. It just rebooted and came back to the (Carve)(Settings) screen. It did this both while using USB AND using the SD Card. It was set for its fastest travel at full laser power. After numerous trashed jobs I contacted Atomstack and they sent me a new board. I noticed that they slightly increased the size of the heat sinks on the two 4988ET chips (motor driver IC’s) on the new board. I switched motherboards and it would get through 1/3 of the job now. At this point I was strongly suspecting a heat issue. So, I 3D printed a new control box cover/leg with a hole in the back (with a little velocity stack) and mounting holes for a 25mm 12v fan. I positioned the fan right between the two 4988ET’s. Now the when burning a flat job the laser never fails.
However… When using the rotary attachment (a roller type) the laser reboots after completing about 1/4 of the job.
I’m thinking, even with the fan, the rotary attachment uses just a tiny bit more power than the Y-Axis normally would and something overheats and reboots the controller.
They did send me a new board, but I don’t find the actual tech support all that helpful. Has anyone had a similar issue with the Atomstack? Or, does anyone have any further insight into what might be going on?
Thanks,
Rich
There could be a slight chance that the power supply might be a problem?
was ist der Unterschied zwischen Pro und nicht Pro
A10 only exists as Pro.
i have a A10 non pro, it’s missing the offline controller
The display only comes with the Pro version.
When you did the Plywood cutting tests, you mention speed, but what was your power output set to?
All cutting is done at 100% power.
Hi there,
I’ve now read some of your reviews and have much enjoyed them. I’m new to laser engraving, but I would like to buy one in the next few weeks and was hoping you could give me some useful advice.
In most of your reviews I read about the quality of the laser engraving work, which is helpful ofcourse, but I miss a part that could highlight the durability or use frequence of the machine.
My plan is to build a (semi-)professional business where the main purpose is to engrave powder coated stainless steel objects (names/logos), so only the powder coating would need to be removed. My budget is approx $500, but I cannot seem to find what machine would be durable enough to engrave for instance 10-20 objects a day (each day).
Is there a recommendation you could give on a machine that would be fitting for this job? Like I said, durability of the machine is a high priority, while I think the laser itself does not have to be that strong.
All of the machine should be OK for your use. You just need to clean lenses regularly.
Sculpfun S30 Pro has a replacable lens which is great for longevity. The xTool D1 has a bit more durable mechanics.
Hi I just bought the Atomstack A10 Pro. I would like to engrave natural stone like Marble, granite etc, and engineered stone like quartz. I was led to believe that it can engrave these materials. Is this the case? Thanks.
It can engrave stones of solid color (black, white grey..) It can’t engrave stone that has clear crystals inside which some marble stones do have. maybe you can engrave that too if you paint it black for the engraving process.
how do you know the lens size? I’ve read that replacing the factory lens can provide a better experience, but there are 10mm and 14mm lens. Atomstack does not indicate which fits the S10 or A10.
You should try to measure it and see which one will fit to your machine.
I have been using a S10 Pro for engraving our woodproducts for 1,5 year now. I am noticing that sharp lines are getting more wobbly, but everytime the same. So when a rather thick line (1,5mm) gets engraved at 8 lines per mm, the entire line gets engraved wobbly.
You mention up here that you suspect the tension is the problem. I have tried to tighten everything, but to no approvement. Do you know what could be the problem? It is getting worse over time I think, it was spot on when we first used it.
I also notice when i push the laserhead around the ‘field’ it ‘hickups’ at certain points. I can’t find dirt of damage anywhere.
I hope you have an idea. Thanks!
This is due to worn roller bearings on the rails. You should replace them. That “flat spots” occur if the machine is stored for a long time in the same position. Could also be due to having the eccentric nuts too tight.