
- xTool P2 Review - What Will We Be Testing
- Unboxing the xTool P2 Laser Cutter
- xTool P2 - What’s Under the Hood?
- What Materials Can the xTool P2 Engrave and Cut?
- Cool Features and Accessories for the xTool P2 Laser Cutter
- Connectivity and Software
- How Precisely Can You Position Engravings Using the Dual Camera System?
- Curved Surface Engraving With The xTool P2?
- Automatic Batch Fill
- Plywood Engraving Test Pattern
- High Speed Engraving Performance
- Measuring Laser Spot Size and Mechanical Stability Test
- Focus Distance Test
- Plywood Cutting Test Pattern
- Cutting 18mm Thick Solid Wood With the xTool P2
- Acrylic Cutting Test Pattern
- xTool P2 Pros and Cons
- xTool P2 vs Glowforge vs Gweike Cloud Pro
- Conclusion
- xTool P2 55W CO2 Laser Cutter
- xTool P2 FAQ
xTool P2 Review - What Will We Be Testing
In this article we will highlight some of the features of the xTool P2 laser cutter as this machine is packed full of them. The 55W xTool P2 CO2 laser machine boasts a clever dual camera system for amazing positioning precision, it can be controlled with the xTool Creative Space software, and it also supports Lightburn software.
If you like video content you can check the video review on our Youtube Channel!
*The links on this website can be affiliate links. I earn a small commission at no extra cost to you. When you buy through these links you will support this website, which helps me to run this website(which cost money and a TON of time) and provide all these extensive reviews and information to you for free, without any paid membership.
In this review article we will put the xTool P2 55W CO2 laser cutter through a range of technical tests. We will engrave our standard engraving test patterns to see how good the xTool P2 is at laser engraving, and we will also put it through a lot of different laser cutting tests ranging from thin to very thick plywood and acrylic cutting tests as this laser machine is an excellent laser cutter. We will also compare all the features and test results to the Gweike Cloud Pro 50W CO2 laser cutter and other laser machines which we have tested and reviewed previously.
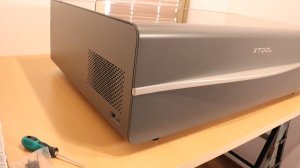
Unboxing the xTool P2 Laser Cutter
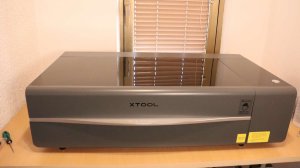
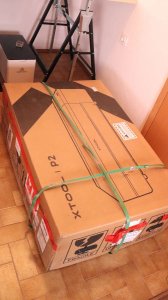
The xTool P2 is a desktop laser engraver with a laser power output of 55W. It is direct competitor to Glowforge and Gweike Cloud. The machine weighs 45 kilograms and comes in a big sturdy cardboard box. Inside it is well protected in foam packaging.
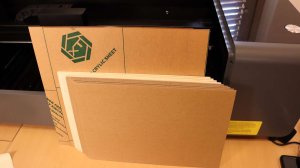
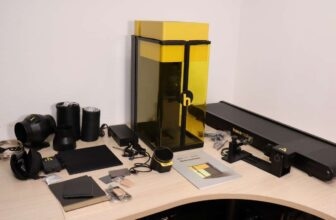
With the machine you also get an air hose, antifreeze, some small parts and tools and a sample material pack featuring Basswood, cardboard and acrylic boards.
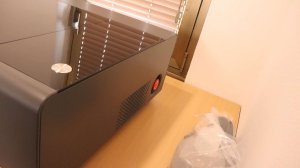
This laser machine looks very nice and it definitely shows similarities to the Glowforge and Gweike Cloud with its one button interface. The machine definitely looks and feels very premium and high quality.
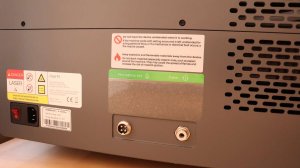
What You Need to Do Before First Use
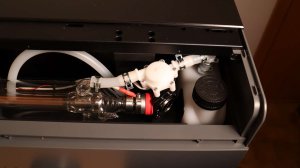
Before use, you need to remove the rear cover and inspect the laser tube for possible shipping damage.

Next to it you will see a coolant reservoir and interestingly, this machine also has a flow sensor which measures the flow of coolant to detect in case the machine would have a coolant leak or the pump would malfunction. The coolant reservoir also has a coolant level sensor so the machine always knows if it has enough coolant for safe operation. This will prevent any possible damage to the laser tube. They really thought of everything and they didn’t skimp on stuff that increases reliability! This means that the xTool P2 is well thought out laser cutter and it will be able to work reliably for many years!
Before use, you need to pour in the distilled water and the included antifreeze into the CO2 tube cooling system, power on the machine and wait a bit for the bubbles to go away while the coolant starts to flow.
xTool P2 - What’s Under the Hood?
The xTool P2 has a plastic enclosure, but the top cover and some other internal walls have metal plating on the inside which is great for fire safety.
The machine has an enclosed design and the lid also has an automatic lock which automatically locks the lid, preventing it to be open during the machine operation. This makes it safe to use without eye protection goggles, since it is impossible to open the lid while the machine is working and the window on the lid has a protection filter to protect your eyes.
The lid is supported by pneumatic cylinders. This makes it easy to use as there is no danger of the lid accidentally closing down on your head or fingers.

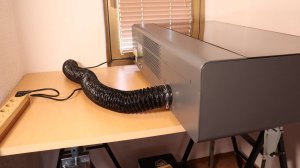
On the rear side there is a smoke exhaust port which needs to be directed out the window or you can also use the xTool smoke purifier which eliminates most of the smoke and smell.
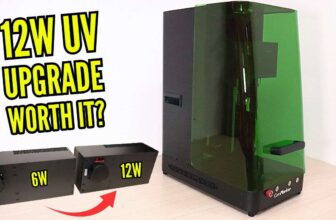
The CO2 laser tube
First difference from the Gweike Cloud Pro that we have noticed is that this machine has a stationary CO2 laser tube. The Gweike Cloud Pro has the CO2 tube sitting on the Y-axis and it is moving together with the whole gantry. The xTool P2 has the tube stationary, which is a better system as the Y-axis will be lighter and the xTool P2 will be able to engrave faster. The xTool P2 can engrave with a maximum engraving speed of 600mm/s!
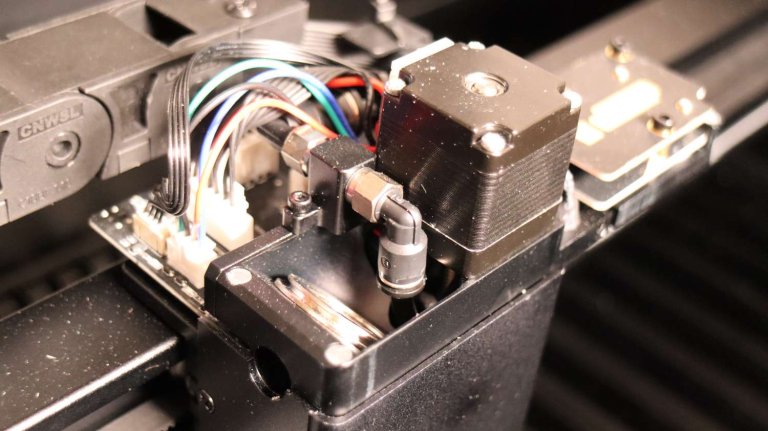
The laser head
The laser beam enters the working area through a small hole and is bounced by a mirror into the laser head. The head has removable covers to protect the insides. On the head there is also a Z-axis focus motor for automatic focus control, an air assist tube and the beam deflection mirror.

-

- xTool P2

Display and one button interface
The machine has a nice hidden display which shows the coolant temperature and the status of the machine. Everybody is copying the Glowforge one button design, but a few more buttons wouldn’t hurt either.

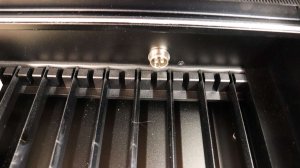
Slat work bed
The bed is not a traditional honeycomb, but it is a slat bed type. The slat bed offers better smoke extraction. Another cool thing about the xTool P2 is that the slats can be removed and adjusted as necessary.
The xTool p2 has a large working area:
Bed Size: 26.7”×14.1”(680*360mm)
Processing Area: 23.6”×12.1”(600*308mm)
Max workpiece height is 2.5″(64mm) with tray, 2.7″(71mm) without tray and 8.5″(215mm) with riser base.

The machine also comes with spring retainers which are great for holding down the bent plywood boards which greatly improves the engraving quality.
Under the bed there is a steel tray which collects the small bits that fall down. The tray is removable for easy cleaning.


Adjustable air assist
The xTool P2 has a built-in air assist. The air assist is also adjustable in the xTool Creative Space software. You can adjust the air flow for engraving and cutting process individually. The air assist adjustable range is from 15 to 150Kpa.
What Materials Can the xTool P2 Engrave and Cut?
The xTool P2 can engrave and various materials. It can engrave everything the diode lasers can and much more! Because CO2 laser machines produce a laser beam in the far infrared color spectrum (which is basically heat), it can be absorbed in some transparent materials too. This is why CO2 lasers can easily cut and engrave transparent acrylic, which is what diode laser engravers can only dream of, no matter their output power.
xTool P2 can CUT:
- wood and plywood up to 20mm thick (depending on the wood density)
- acrylic plexiglass of any color up to 20mm thick
- cork
- paper and cardboard
- cloth, silk and other textiles
- leather
- EVA foam
- foam for RC aircraft building
xTool P2 can ENGRAVE:
- all types of wood
- anodized aluminum alloy
- painted and coated metal (tumblers too!)
- stone
- stainless steel (with some help of laser marking spray or powder)
- anodized titanium steel
- acrylic and other plastics that are safe for laser use
- EVA foam
- leather
- glass
- ceramic
- rubber (for making stamps)
- cloth and fabrics
- and much more!
What the xTool P2 CAN’T engrave:
- raw aluminum, copper, brass (which diode lasers also can’t engrave) You need a fiber laser for engraving these materials
- stainless steel without using marking spray (diode lasers are a bit better at marking stainless steel directly compared to CO2 lasers. But the best results on metals are achieved with Fiber lasers.
Cool items to engrave with xTool P2 CO2 laser
Thanks to its dual camera system, wide range of attachments and accessories and features, the xTool P2 has a great positioning accuracy and you will be able to engrave on many cool items like:
- cutting boards
- tumblers
- wallets
- animal tags, keychains and metal business cards (aluminum color anodized or painted)
- phone cases
- tools
- wooden craft products (boxes, art, games…)
- wooden bowls, plates, spoons and other kitchen utensils (thanks to the curved surface engraving capability)
- you can make a lot of gifts and art buying cheap vector designs on Etsy.com
- and much more!
You can also get a lot of materials and blank items directly from xTool store.
Cool Features and Accessories for the xTool P2 Laser Cutter
Dual camera positioning system
There are two 16-megapixel cameras in the machine. One is stationary 16-megapixel wide angle panoramic camera which can capture the whole working area, and the second close range camera is mounted on the laser head and moves to the required position to precisely capture a small part of the working area with much higher accuracy.
This helps a lot to achieve amazing positioning precision which was always an issue with single camera lasers like Gweike Cloud or Glowforge.


xTool RA2 Rotary attachment
The xTool P2 also has a connection for connecting the xTool RA2 Pro (Check our review of the RA2 Pro), chuck-style rotary system for engraving cylindrical objects. Rotary engraving diameter is 0-50mm without riser base and 0-180mm with riser base.
Currently we don’t have the connection cable, but we will soon test the xTool P2 with the RA2 rotary attachment and update this article with the results. If you want to be informed when this happens, subscribe to our mailing list to get notified when we release new content!
The riser base for the xTool P2
The xTool also offers riser base for the xTool P2 laser cutter. This will raise the machine and you will be able to put taller objects under the machine. This expands the usability significantly, especially when rotary engraving or when engraving on ready made parts, boxes, suitcases and other larger items.
Max workpiece height is 2.5″(64mm) with tray, 2.7″(71mm) without tray and 8.5″(215mm) with riser base.
We plan to test xTool P2 riser base too, and will update this article with the results. If you want to be informed when this happens, subscribe to our mailing list to get notified when we release new content!
Safety features of the xTool P2
On the right side there is an emergency button which could have been a placed a bit more conveniently. But the single button on top of the machine also stops the engraving process immediately if you happen to notice something wrong.
If that doesn’t help, the emergency button completely cuts power to the entire machine.
Another safety feature is the lid locking function. The machine locks the lid during the engraving process which removes the possibility of someone opening the lid during operation and being accidentally blinded by the laser beam. The light filtering lid makes it safe to use without the need of wearing laser goggles.
The xTool fire safety set
This machine can also be connected to the xTool fire safety set which uses a bunch of sensors and can discharge CO2 gas cartridges to extinguish the flames if the material catches fire during the operation. We plan to test xTool fire safety set too, and will update this article with the results. If you want to be informed when this happens, subscribe to our mailing list to get notified when we release new content!
Automatic conveyor feeder
Another cool addition for expanding the capabilities of the xTool P2 is the automatic conveyor feeder. using the pass-through function will enable you to engrave super long boards up to 118”×19.6” (300*50cm) in size! We plan to test the automatic conveyor feeder too, and will update this article with the results. If you want to be informed when this happens, subscribe to our mailing list to get notified when we release new content!
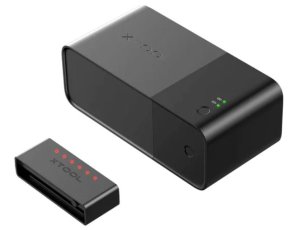
xTool smoke purifier
xTool P2 is a powerful laser cutter. It cuts very fast. And laser cutting process produces a lot of smoke and smell. The xTool P2 allows you to vent this smoke out through a window. But if you have neighbours nearby they will not be happy for sure as they will be engulfed with smoke when having a picnic behind the fence.
Here is where the xTool smoke purifier will come in handy. It filters out almost all the smell when laser cutting. No matter if cutting wood or plastics, the smell that comes out of the exhaust tube is barely perceivable.
Also, if you vent the air directly out the window, without smoke purifier, the smoke often gets blown back inside the workshop with a small gust of wind and then your shop will fill with smoke and possibly dangerous smell which can affect your health. The purifier is a worthy investment in your health and health of others nearby.

Connectivity and Software
The machine can be connected via USB C, Wi-Fi or the Ethernet connection which is great if you have a larger distance between the machine and computer.
xTool Creative Space software
xTool creative space (XCS) software is free and easy to use and offers all the capability needed for operating the xTool P2 laser machine.
Using the XCS software you can unleash the full potential of the xTool P2 laser cutter and use all of its smart features like dual cameras and all the attachments.
The software is much better than we have expected. Using it you will not feel like you are missing out on some features. It is a fully featured software that works well.
Compared to Lightburn, it has some lacking features like vector editing tools and the layers work a bit differently. But the XCS is beginner friendly and is much easier to use than Lightburn which is a big convenience if you don’t have prior experience with lasers.

Using the xTool P2 with Lightburn
Currently you can’t use all the smart features of the xTool P2 in Lightburn. Focusing can be done either by adding a G-code command to set the material thickness or you can manually move the laser nozzle down by the required amount before engraving using the movement controls.
Currently you can’t use camera in Lightburn. You need to frame the engraving manually by observing where the laser head is moving when framing. This is probably going to be improved in future updates. I asked the xTool team about this and they are actively working in Lightburn to enable camera support and more features in Lightburn. Dual camera is an advanced technology not commonly used and third party software can’t keep up with the development.
Another advantage of the xTool P2 is that it is still a GRBL machine, just like all the diode laser engravers. This means that you will be able to use the cheapest Lightburn license and you will not need to upgrade Lightburn to DSP license (which you need with the Gweike Cloud) if you already use Lightburn for your diode laser engraving machine.

How Precisely Can You Position Engravings Using the Dual Camera System?
First lets test how precisely can you position the engravings using its innovative dual camera system. We will engrave a quality, american-made anodized aluminum keychain we got from chewbarka.com.
The main camera captures the full workspace and the second camera which is mounted on the laser head will move to the required position and capture a smaller part of the workspace with much higher precision.
I have engraved this cool looking design I designed in just a minute using Kittl graphical designer. The engraving looks great, and it is precisely positioned on the keychain just like we wanted.
Standard single camera systems are accurate to around 3-6mm, but this dual camera system provides much higher position accuracy which is needed to engrave on small parts like this keychain.


Curved Surface Engraving With The xTool P2?
Why only engrave flat surfaces? The xTool p2 has a fast moving Z-axis and together with the xTool Creative Space software an amazing feature has emerged! It is called curved engraving and it will automatically adjust focal length in real-time to follow the curve of the curved surfaces.
This will blow your mind! The curved surface auto focusing function is still in beta phase, but it is already awesome! This is a great feature for engraving curved objects like wooden spoons, plates, bowls and even tumblers without the need of the rotary tool.
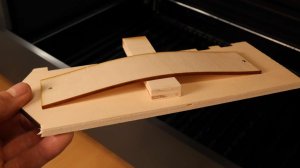
For this purpose, I have created this simple curved surface. The procedure for engraving curved surface is very simple in the xTool software:
- Select the curved surface engraving mode in the software.
- Move the laser dot to the top left corner of the curved object and save that point.
- Repeat step 2 for the bottom right point.
- The machine will measure a set of points and create a correction dataset.
- The captured curve will be displayed in 3D for you to inspect
- Position the engraving design on the highlighted surface.
- Start the engraving process.
- Profit.
We recommend watching our YouTube video how it corrects the Z axis height in real time.


Automatic Batch Fill
Here is another cool function that xTool Creative Space software offers, and it’s called automatic batch fill. For this purpose, we need a small batch of identical parts which we have quickly cut out using the software’s internal shape library.
- Position the shapes on the laser bed.
- Scan the shapes using the camera.
- Adjust the design on one shape.
- Press the smart fill button to automatically copy the design to the other shapes.
- Some random placements can occur, depending on the complexity of the shape, but the rest of them look good. Delete any excess placements.
- Proceed with engraving.
- Profit.
This feature will definitely save you a lot of time when trying to engrave a lot of loose parts simultaneously. It works surprisingly well!


Plywood Engraving Test Pattern
We connected the xTool P2 CO2 laser to Lightburn to run it through our standard engraving test pattern. If you want to download our test patterns and test your machine, subscribe to our mailing list and you will get a download link for all the test files that we use on our site.


- The power scale test shows us how the machine performs when engraving at different speed and power levels.
- The interval test in horizontal in vertical direction shows us how fill density affects the engraving quality.
- The photo engraving will show how good is the machine at engraving bitmap photos at different power levels.
The results look quite promising. If we compare it to the Gweike Cloud Pro, it looks like the Gweike is more powerful engraver as it burned through the board at lowest speed. But this is not the case as you will see later.
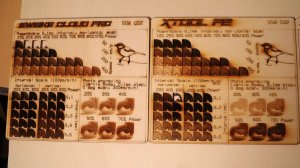
The xTool has a more linear shading progression in power scale test and photo engraving test, which means that the xTool is better at regulating optical power output. The same can be seen with photo engraving. When engraving wood, having more shades available makes bitmap engraving much better looking.
If we compare the test pattern to the xTool D1 40W diode laser engraver (read our full review here), we can see that the diode laser offers even more dynamic range. Note that the engraving speeds are different.
The diode laser engraver appears to produce less smoke stains, but if you look closer, you can see that the xTool P2 produces much deeper engravings than the xTool D1 40W, and consequently, more smoke is produced. You can use tape or adhesive foil on the material to protect the surface and peel it off afterwards which will eliminate smoke staining of the surface.

High Speed Engraving Performance
We compared both the xTool P2 and the Gweike Cloud at a fast engraving speed of 500mm/s. Once again, the xTool P2 shows much more linear power control and it also produced deeper engravings than the Gweike which means that the xTool P2 has higher output power density.


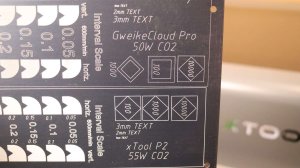
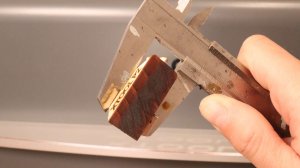
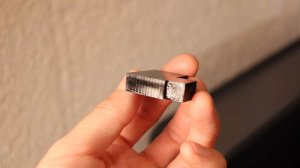
Measuring Laser Spot Size and Mechanical Stability Test
We also ran our standard anodized aluminum test pattern. Engravings on anodized aluminum come out very crisp and detailed and because of that, we use it to measure the laser focus spot size and shape.
The main part of this test is the interval test. This pattern consists of a set of shapes which are filled with lines, spaced from 0.05 to 0.4mm in vertical and horizontal direction and it is used to measure the focus spot size and shape.
The pattern also consists of some very small text and a set of three squares which are engraved at different speeds ranging from 100 to 10000mm/min. This can show us how stable is the machine at higher speeds.

We used our microscope to evaluate the results.
The small text engraving is perfect. It is the best result we have seen so far. Minimal mechanical vibrations are visible even with the smallest of text! Amazing!
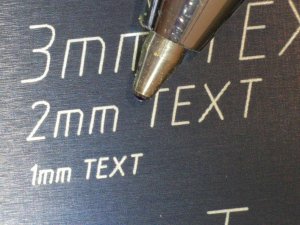
The set of squares engraved at different speeds are also perfect! Notice that the gap between the outer and inner square made with 10000mm/min is due to a mistake in the design file itself and not due to the machines mechanical stability.


Looking at the interval scale test we can see that the laser spot is sized just under 0.2mm square. The pattern is much crisper than we got with the Gweike Cloud Pro. You can check our full review of the Gweike Cloud Pro.


Focus Distance Test
We also wanted to know how well the laser spot retains its focus at a greater distance. This will be a good indicator of how well it will cut thicker materials. Longer focal length will result in tighter focus at greater distance away from the optimal focus.
The pattern consists of 4 squares. The first one is engraved in perfect focus, and the other ones are engraved further away from the optimal focus to see how large the laser spot becomes when cutting thicker materials. We were able to use the Z-axis focus adjustment instead of the usual procedure by underlaying acrylic plates and then removing them.
The results are very impressive! The xTool P2 retains focus very well, much better than Gweike Cloud Pro. It retains focus approximately as good as the Sculpfun S30 Pro Max which is a 20W diode laser engraver which has the best focus spot retention in our tests so far.


Plywood Cutting Test Pattern
We did some laser cutting and ran our standard cutting test pattern on 3, 4 and 6mm thick Poplar plywood. The pattern is divided into two sides. One uses one pass, and the other uses two passes to cut through the material at different speeds and power levels.
This machine is a very capable laser cutter! It cuts plywood like butter at very high speeds! Compared to the Gweike Cloud Pro, the xTool p2 wins the cutting competition!
Interestingly, the 4mm plywood cutting result with the xTool P2 was identical to the Gweike Cloud Pro cutting the 3mm board. The 55W xTool P2 appears to be cutting approximately 25% faster than 50W Gweike Cloud Pro.


Thick Plywood cutting test
Also tried to cut the 10mm poplar plywood board. At 600mm/min it was able to cut through in just over one pass and at 1800mm/min it needed only 3 passes which are very impressive results! The best so far!
Cutting 18mm Thick Solid Wood With the xTool P2
We made a quick test to see, how well the xTool P2 cuts 18mm (0.7″) thick spruce board at 600mm/min. It was able to cut through in only 2 passes which is an amazing result! The result looks very clean and there is minimal charring. Gweike Cloud was unable to cut this due to its inferior focus retention compared to the xTool P2.
Acrylic Cutting Test Pattern
The next test on the list is laser cutting acrylic test. We decided to use transparent acrylic because unlike diode lasers, the CO2 machines can engrave transparent acrylic just as well as colored ones.
When engraving, there is a bit of hazing around the text because the air assist pump is enabled. You can get around this by leaving the protection film on the acrylic board and remove it later.
The test pattern is the same as we use for plywood cutting, just a smaller size. Compared to Gweike Cloud Pro, the xTool is almost twice as fast at cutting acrylic which is incredible result for only a 5W difference in optical power! This means that the xTool has a much more tightly focused laser beam with higher power density.

Note: Laser cutting acrylic produces very strong smell. Good ventilation of exhaust gasses is necessary. If other people are outside and near the exhaust tube, you should be using the xTool smoke purifier to eliminate the smell and protect your health and health of others.
Laser cutting 10mm (0.4") and 15mm (0.6") thick acrylic with the xTool P2
We tried to cut 10mm thick black acrylic at 600mm/min like we do with all laser engravers.
It was able to cut through in only 2 passes which is a record! Gweike Cloud Pro needed 5 passes and the xTool D1 pro 40W octa-diode laser module needed 6 passes! Also the cut is very clean and shiny. The xTool P2 seems to hit the “hot spot” for cutting the acrylic which leaves a great looking glazed edge!
Feeling confident we have proceeded to cut 15mm thick transparent acrylic.
By knowing that this machine retains focus very well, we proceeded by trying to cut this 15mm thick transparent acrylic. We set the speed to 10mm/s (600mm/min) like usual and full power. It was able to cut through in only 5 passes which is phenomenal!
Then we reduced the speed to 2mm/s(120mm/min) and the machine didn’t make it through by just a tiny bit. By setting the speed to 1mm/s(60mm/min), the P2 was able to cut through in only one pass.

If we compare the quality of the cut, we can see that the single pass at lower speed has produced much cleaner looking cut, compared to using higher speed and multiple passes.
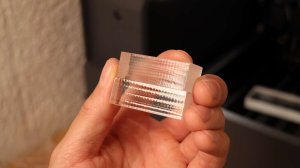
We also wanted to see how well it will cut out more complex shapes like this figure of a dude riding a DIY OneWheel. The result is incredible. We really did not expect such a good quality when cutting small parts out of the acrylic this thick!

xTool P2 Pros and Cons
Pros:
- Very fast engraving performance
- VERY good cutting performance, especially for very thick wood and acrylic
- Dual camera system is very precise
- Z axis autofocusing and curved surface engraving correction
- A lot of attachments and accessories (Rotary, pass through feeder, smoke purifier, fire extinguisher,…)
- Many safety features (lid lock, emergency switch, fire extinguisher option…)
- Flow sensor, coolant temperature and liquid level sensor for protecting the laser tube
- xTool Creative Space software is free, offline and very capable. It did not feel like it is holding me back from using the full potential of the machine
- Also supports Lightburn (its GRBL machine and does not need more expensive DSP licence)
- Great connectivity (USB C, Ethernet and Wi-Fi)
- Built-in air assist pump with adjustable flow
- Sleek design – looks great
- Affordably priced
Cons:
- Currently you can’t use all smart features in Lightburn (Cameras, Auto focusing)
- Slat bed is not the best for thin and flimsy materials like cloth and paper, but you can always put something else on top
- xTool Creative space does not have as many settings and drawing tools as Lightburn
- Sometimes the DXF files that have curves are imported incorrectly in the xTool Creative Space (SVG works fine)
xTool P2 vs Glowforge vs Gweike Cloud Pro
Here is a comparison table comparing the three laser engraving machines that are direct competitors to each other.

Looking at the price, the xTool P2 sits right in between the Gweike Cloud Pro and the Glowforge Pro. But it offers much more features and accessories and performance which is worth the extra cost compared to the Gweike.
Conclusion
The xTool P2 laser cutter is a highly capable machine with exceptional cutting performance, particularly for thick wood and acrylic materials. Its dual camera system ensures precise operations, while a wide range of advanced features, attachments, and accessories enhance its versatility. Engraving extra large boards, curved surfaces, cylinders or very small parts is dead easy using the xTool P2. Not many machines are this versatile!
The machine boasts many safety features and exhibits great mechanical stability, delivering fast and precise results. The included xTool Creative Space software, which is free, offline, and capable, enables users to fully unleash the machine’s potential without limitations. Additionally, the xTool P2 supports Lightburn and offers excellent connectivity options. The built-in air assist pump with adjustable flow and the adjustable slat bed add further customization possibilities.
Despite a few drawbacks, such as limited smart feature compatibility in Lightburn, the slat bed’s unsuitability for thin materials, and fewer settings and drawing tools in xTool Creative Space compared to Lightburn, the xTool P2 CO2 laser cutter is a reasonably priced machine that excels in cutting and offers a wide range of features for various applications.

Exceptional Performance and Extensive Features for Various Applications
xTool P2 55W CO2 Laser Cutter
In our opinion, the xTool P2 CO2 laser cutter is a much better bang-for-the-buck compared to other laser engraving machines in the same price and size range. We hope our xTool P2 review has helped you to decide if this is a great tool to have in your workshop.
If you are looking for more affordable options and you don't need top performance, then you should also look at the Gweike Cloud Pro which we have reviewed earlier.
Or if you want a 20W or 40W enclose diode laser engraver, check out the review of the xTool S1.
Click the buttons below to buy your pick. You can use my coupon code "JTxTool" for a 10% off at checkout!
Buy the xTool P2 here!Buy xTool S1 Diode 40W laser
Be sure to also check out my reviews of newer laser engravers HERE!
xTool P2 FAQ
How Long Does the xTool P2 Laser Tube Last?
The laser tube will last approximately 6000 to 8000 working hours (this counts time when the laser beam is active). This is a VERY long cutting time and it can be extended if you don’t run the tube at 100% power all the time. If you want maximum lifespan try cutting with around 60 to 70% power and make more passes to compensate. This will extend the life of the laser tube. The tube can also be replaced when it wears out, you will not need to discard the machine when that time comes.
Can you engrave glass with xTool P2?
Yes you can! CO2 lasers are good at engraving glass. But they can’t cut it though. But you can use it for scoring glass and then you can break the glass along the scored lines.
How to handle engraving smoke shadow?
You can protect the surface with a peel-able protective film or tape
How thick can xTool laser cut?
It can cut up to 20mm thick materials. But not all stuff can be cut at this thick. Dense and tough stuff needs to be much thinner in order for thee xTool P2 to be able to cut it.
Can you engrave stainless steel with xTool P2?
Yes you can. For good results, you will need marking powder or spray like THIS one. it leaves a pitch black engraving on the surface.
Can you start a laser engraving business with the xTool P2?
Yes of course! xTool P2 is one of the best do-it-all laser enrgavers for starting a laser engraving business. For more business ideas you should read our article that describes all sort of ideas for starting a laser engraving business.
Is a CO2 laser worth it?
It is! CO2 lasers are very versatile machines and they can pay themselves back very quickly.

This post was written by JT Makes It.
JT Makes It is an engineer, hobbyist, and DIY-er armed with a Master’s degree in Electrical Engineering and over a decade of professional experience in the industry. From an early age, JT Makes It was pushed by an insatiable curiosity, spending countless hours disassembling, understanding, improving, and creating various gadgets and products. This lifelong passion led to a broad spectrum of technical expertise ranging from electronics, woodworking, metalworking, and CNC machinery, with a particular focus on laser engravers.
For the past 9 years, he has shared his expertise through engaging videos on his YouTube channel. With the last three years dedicated to scrutinizing and testing laser engravers, he also created this website and emerged as a recognized authority in the field. His expertise extends across the spectrum of laser technologies, ranging from diode lasers, CO2 lasers, and fiber lasers, paying attention to details and providing practical insights.
With JT Makes It, expect a blend of technical expertise, backed with hands-on experience, and a genuine passion for innovation and creation, making him a trusted source in the realm of DIY and laser engraving enthusiasts alike.


This is an amazing laser engraver for the money! It really does everything a good machine should do. Thanks for this extensive review!
You said the P2 will engrave but not cut rubber. I want to cut rubber gaskets (from natural, nitrile, or silicone rubber sheets) up to .25” thick. Will it do that?
I think it can, but I don’t know how will the edge look like. I have never cut rubber.
I cant remember my craft room without my P2 in there. It has elevated my home decor game, as well as the gifts I’ve been making. My husband and I are close to retirement and plan on starting something up using our Xtool P2 to help pad our Retirement