xTool S1 Laser Engraver Review
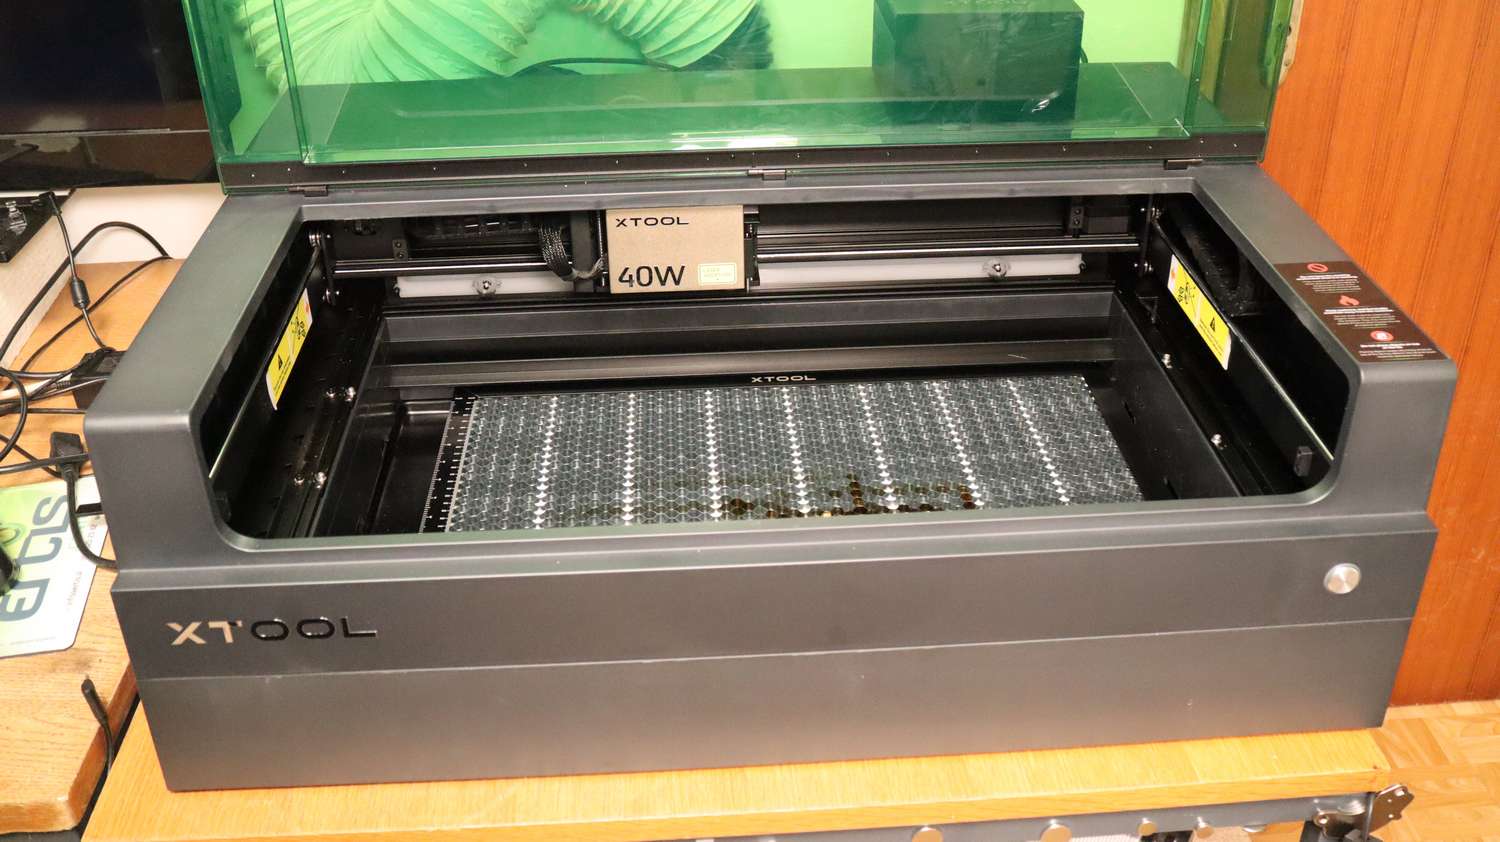
The xTool S1 diode laser engraver is designed like fully enclosed CO2 laser cutters. It comes pre-assembled and the only thing that needs to be installed is the laser module. Here we have the 40W blue laser module, but the machine also supports more affordable 20W blue laser and the 2W infrared laser module which is great for engraving metals and plastic.
*The links on this website can be affiliate links. I earn a small commission at no extra cost to you. When you buy through these links you will support this website, which helps me to run this website(which cost money and a TON of time) and provide all these extensive reviews and information to you for free, without any paid membership.
What is included in the box
The xTool S1 laser cutter also comes with a diverse material pack featuring slate stone, metal keychain, glass, colored paper and faux leather which looks very nice. It also comes with plywood and acrylic board. All these materials are great for discovering the capabilities of this laser.

Quick exterior overview
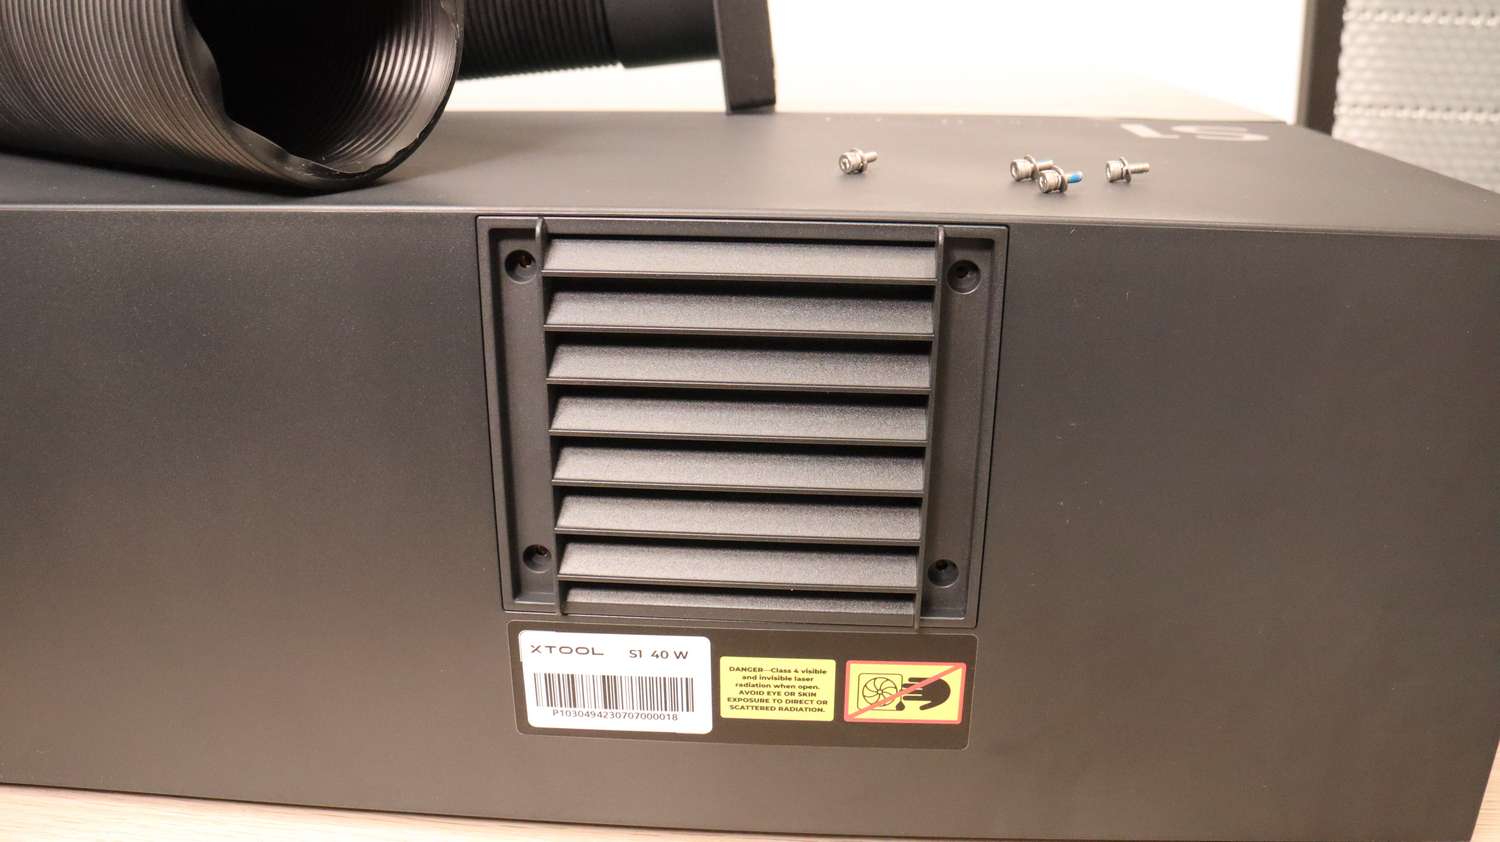
On the side you have the emergency stop switch and on the back side there is a connection panel for interfacing the machine with a computer and connecting all the attachments like RA2 rotary chuck attachment or the automatic conveyor feeder. It also has an air assist inlet and port for connecting the fire extinguishing system.


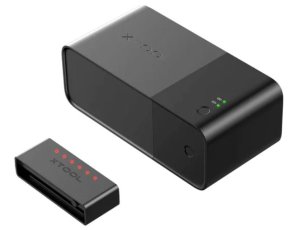
The machine only works if this safety key is inserted. This is a great feature for preventing kids and unauthorized people from using the machine.

You also get a fume extraction hose. You can use it to direct the fumes out the window or connect the hose to the smoke purifier which filters almost all smoke and odors. This smoke purifier is definitely worth the money. I am currently using it with the xTool P2 and it is awesome!

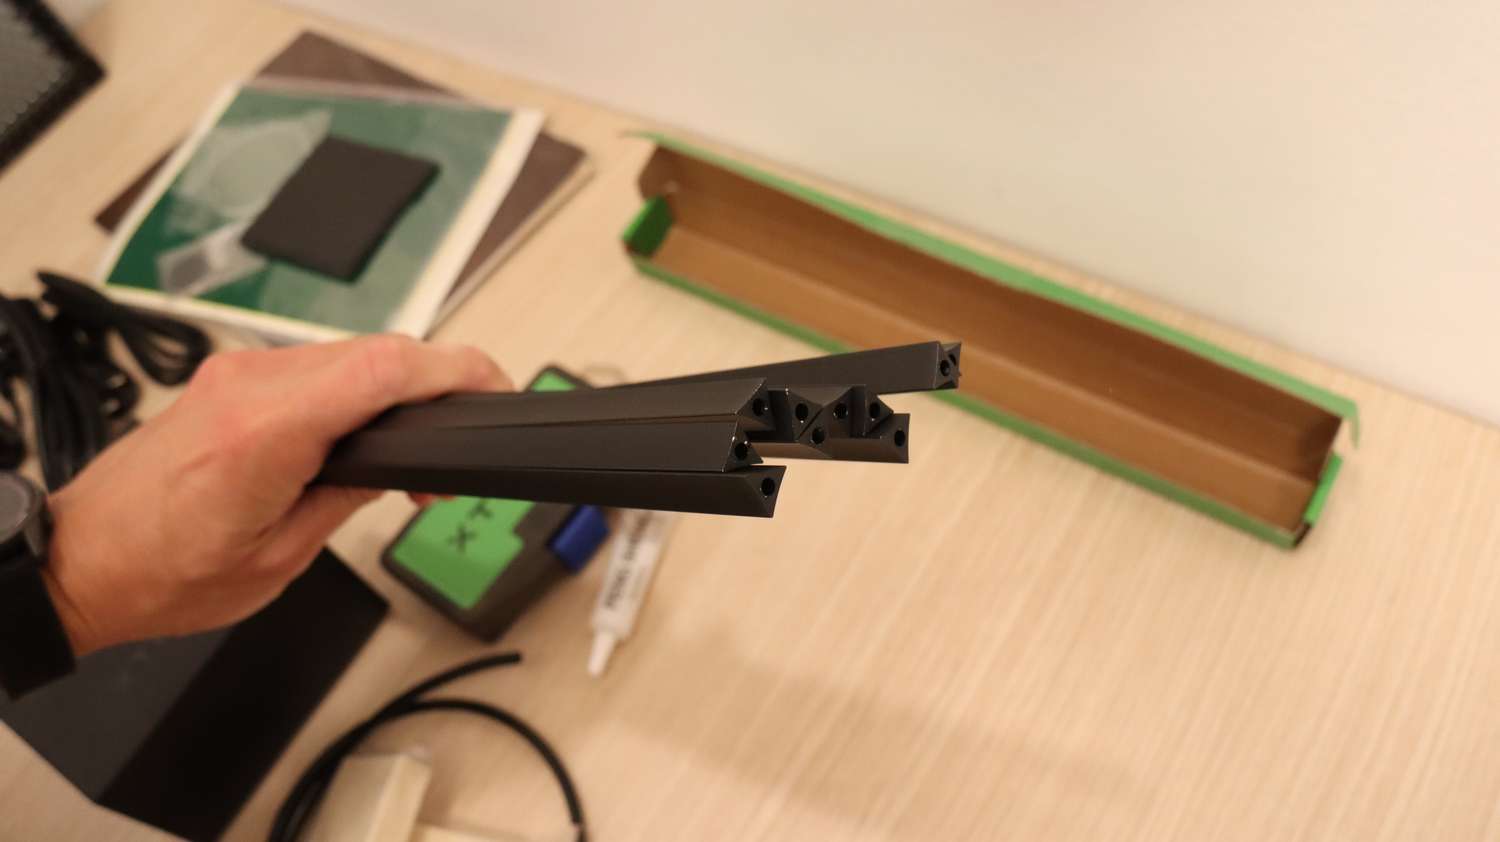
This laser engraving machine comes with these triangular slates which you can use to put under the material instead of the honeycomb, but we opted to get the standard honeycomb which is way more convenient. Honeycomb comes with very cool magnetic hold down pins which are very easy to use for holding down the material.
Specifications
- Laser Types and power: 40W and 20W blue diode laser and a 2W infrared laser module for marking metal
- Working Area: 498*319 mm (19.61*12.56 inches) for 40W version and 498*330 mm (19.61*13 inches) with 20W laser module
- Materials Compatibility: The xTool S1 are designed to work with a variety of materials, including wood, acrylic, fabric, leather, stainless steel, anodized aluminum, (with the infrared module also raw aluminum, brass, copper, better results on plastics and more)
- Max Working Speed: 600mm/s
- Software Compatibility: xTool Creative Space and Lightburn
- Product certification: IEC/EN60825, US: FCC FDA, Canada: IC, Australia and New Zealand: RCM, SAA, United Kingdom: UKCA, Japan: Telec, PSE, European Union: CE-RED, ROHS, EN60825, CE-MD
- Dimensions and Weight: 765*561*183 mm (excluding riser base) 765*561*268 mm (including riser base), 20kg
- Connectivity Options: USB, Wi-Fi
xTool S1 Best Features
xTool S1 supports 3 different diode laser modules
The xTool S1 supports the following diode laser modules:
40W diode laser module is great for converting the xTool S1 into a capable laser cutter.
20W diode laser module is a cheaper option if you don’t need top performance at laser cutting and you are more focused on laser engraving. Although with the 20W, you are not in the range of true laser cutters you can still cut anything that the 40W diode laser can, but the laser cutting job will take approximately twice as long.
Blue diode laser modules are great for engraving and cutting wood, leather, some plastics and they can also engrave stainless steel and anodized aluminum. But they cant mark other metals like brass, raw aluminum, silver copper and more.
2W infrared diode laser module works differently as it is specialized for engraving on metals and plastics. It works very similarly as the xTool Infrared module that we reviewed previously. We will not repeat ourselves here so you should definitely check out that review and you will see that a whole new world opens with the infrared module! It can engrave metal of any kind and it works wonders on some plastics too as it makes engravings with much more contrast than you can make with blue diode laser.


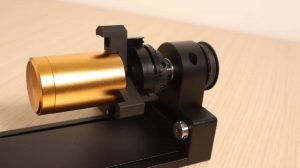
The laser modules feature a red crosshair positioner and a flame sensor. It also has an air assist port. The biggest new feature is the new focusing sensor probe. You will see how it works later in the article. Spoiler alert, it is awesome!
Combining high power with high speeds that this machine can achieve (600mm/s), you get a fast and capable laser engraver and cutter! A wide range of available laser modules (and attachments) makes the xTool S1 a very versatile laser engraver/laser cutter.

Autofocus system and automatic focus adjustment
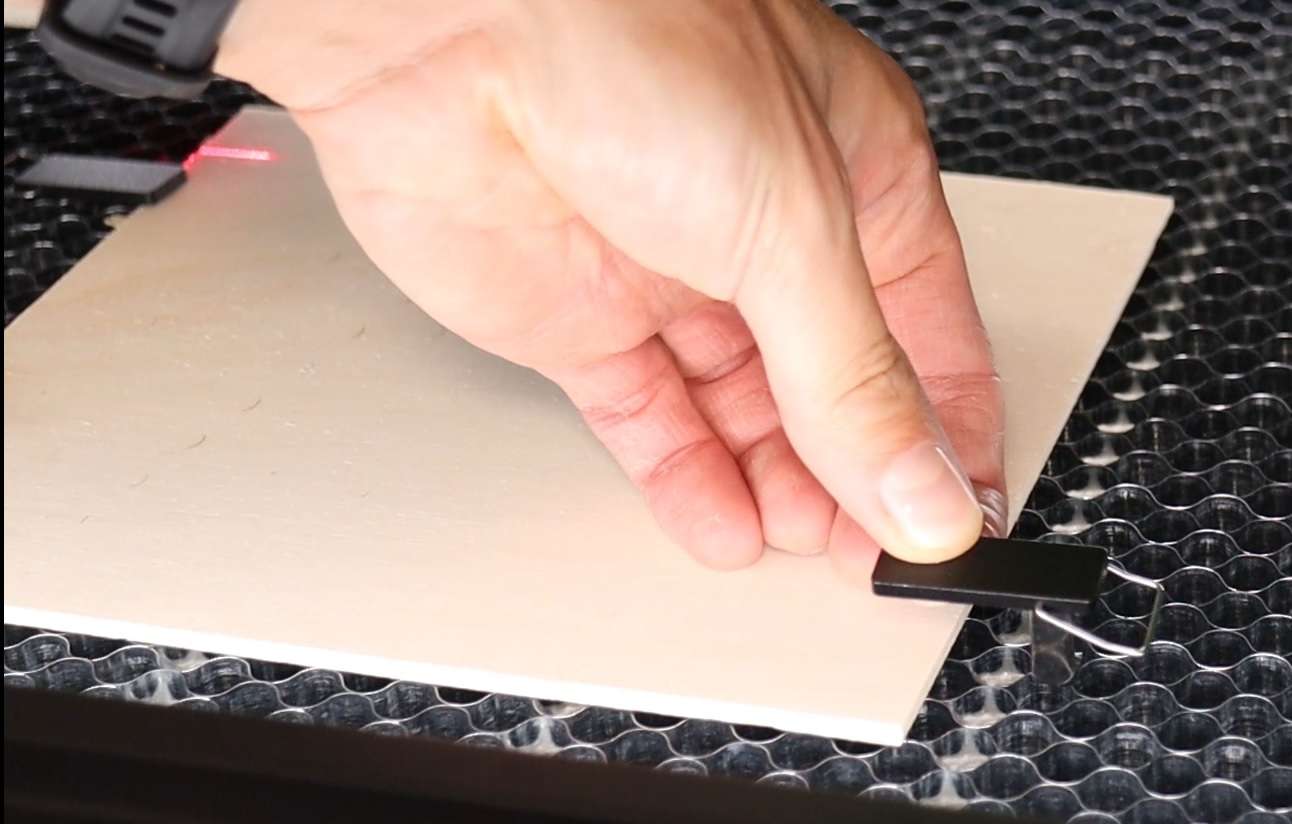
The auto focusing system in the xTool S1 is very interesting. It uses a needle for probing the surface. This system works on all materials and it is very precise. It works in the xTool Creative Space software as well as in Lightburn.


In Lightburn you need to add the custom xTool settings file provided by xTool to get the macro controls needed for operating the focusing procedure. It is a bit more complicated, but it works almost as good as in the xTool Creative Space Software.

having the auto focusing sensor and the motorized Z-axis, you don’t need to worry with focusing your laser anymore. Just by pressing one button, it will automatically measure the surface height and automatically adjust the Z-axis height for ideal focus distance.
You know what’s really neat? The XCS software has this cool feature that can automatically lower the laser head just for cutting stuff, making the cutting process for thicker materials better without messing with the engraving quality. It’s pretty awesome!
xTool S1 supports curved surface engraving
If the object you want to engrave has a curved surface, you would usually have problems for setting the optimal focus to get a desired effect. But not with the xTool S1!
With the focusing probe you can measure a grid of points on the object you want to engrave. The software then converts those points into a 3D surface and the xTool S1 then automatically adjusts the focus distance in real time to keep the laser in perfect focus across the entire object. Very clever feature for engraving cups, mugs, spoons and odd-shaped flasks.
You should definitely watch our YouTube video to see this in action!


Twin point positioning system can be more accurate than a camera
The xTool S1 does not have a camera which we initially thought as a drawback. But after some testing we discovered that this is not the case as the xTool S1 features a lot of clever features for precise positioning of the engravings. xTool S1 features precise position encoders on both axis. Because of that, the machine always knows where the laser head is located, even if you move the head by hand. This is a feature no other laser engraver currently has.
Using the red crosshair emitted by the laser module, you always see where the machine will start engraving on your surface. If you use the xTool Creative Space software, you can move the cutting head by hand, and you will also see movement of the red cross in the software, which will reflect the actual laser head position in real time.
Using the red crosshair emitted by the laser module,you always see where the machine will start engraving on your surface. If you use the xTool Creative Space software, you can move the cutting head by hand, and you will also see movement of the red cross in the software, which will reflect the actual laser head position in real time.


The xTool S1 employs a twin point positioning system, a feature that ensures precise and accurate design positioning on various objects. Here’s how it works:
Initial Reference Point: The first step in using the 2-point positioning system is to define your initial reference point. This is typically done by manually positioning the laser head to the starting point of your engraving on the material’s surface.
Setting the Second Point: After you’ve set the initial reference point, the 2-point positioning system requires you to specify a second point. This point is usually located at the opposite end or a specific distance away from your engraving starting point. You can also manually position the head to this second point.
Calculating the Working Area: Once both reference points are defined, the xTool XCS software calculates the exact engraving area based on the distance and coordinates between these two points. This information is crucial for the laser to know the precise area in which it needs to operate.
Laser Engraving: With the working area accurately determined, you can now input your design or text into the software, ensuring it fits within the calculated space. When you initiate the engraving process, the laser beam moves precisely between the two reference points, following the specified path, and engraves your design with high precision.
The 2-point positioning system helps eliminate guesswork and ensures that your design is perfectly aligned and sized as you intended. This is especially important for tasks like engraving text, logos, or intricate designs, where accuracy is important. It’s a valuable feature that simplifies the setup process and enhances the quality of your laser engraving projects on the xTool S1. This method can be more precise than using a conventional camera system.
Smart air assist system
The machine supports two different air assist types – the old one which was used with the xTool D1 series and the new one, which is what we have here. It is an automatic air assist which can also be manually controlled if you need so.


In the xTool Creative Space software you can individually set different air speeds for engraving and cutting process so there is no need to worry about air assist control at all. The pump comes with two spare filters to ensure a long lifespan for the pump. Basic pump does not have a replaceable filter.

xTool S1 Supported Software
xTool Creative Space software
We have already used the xTool Creative Space (XCS) software with the xTool P2 and the xTool F1 that we reviewed previously. It is their dedicated free software which is a vastly more capable than other free options like LaserGRBL. It is becoming a very mature software and it supports a ton of advanced features of the xTool S1 like 2-point positioning, auto-focus system, curved surface engraving and running all their attachments like xTool RA2 chuck style rotary attachment and conveyor feeder with ease!
It has a library of included vectors and designs to speed up your creation process. And it also supports AI image generation on the spot! They are constantly adding new features!
xTool S1 works perfectly with Lightburn
The xTool S1 diode laser engraver is pretty cool because it works seamlessly with Lightburn software too. You see, Lightburn is this fantastic laser control and design software that’s super user-friendly. What’s great is that it pairs up perfectly with the xTool S1, making your laser engraving projects a breeze.
It doesn’t matter if you’re just starting or you’re a pro, this combo makes it easy to create amazing designs and engravings. It’s like having the best of both worlds – the powerful xTool S1 and the user-friendly Lightburn – at your fingertips, ensuring your projects are not only safe but also super precise. Although not all advanced features can be used in the Lightburn – like curved surface engraving.
xTool S1 Has a Lot of Safety Features
The xTool S1 laser engraver stands out as an exceptional tool not only for its precision and versatility but also for its remarkable focus on safety. When it comes to ensuring user safety, the xTool S1 has gone the extra mile. It features a four-tier safety system!
Fully enclosed design
One of its most prominent safety features is its Class 1 safety system certification of its fully enclosed design. This certification is a mark of the highest standard of laser safety, assuring users that the engraver poses no risk to the naked eye.
The laser inside the machine is entirely contained within the system, preventing any harmful light from escaping. This fully enclosed design is essential for safeguarding the user’s eyes, making the xTool S1 suitable for use in a variety of environments, from a hobby use at home to educational institutions and businesses where laser safety is paramount.

Certification standards: IEC/EN60825, US: FCC FDA, Canada: IC, Australia and New Zealand: RCM, SAA, United Kingdom: UKCA, Japan: Telec, PSE, European Union: CE-RED, ROHS, EN60825, CE-MD
Furthermore, the xTool S1 is equipped with a lid-open safety switch. This feature ensures that the laser will not operate when the machine’s enclosure is open, preventing any accidental exposure to the laser beam. It’s a simple yet effective safety mechanism that underscores the manufacturer’s commitment to user well-being.
Flame detection system and fire extinguishing kit
The xTool S1 also boasts a five-direction flame detection system, which further reinforces its safety measures. This advanced system is designed to quickly identify any unusual conditions or hazards, such as the presence of flames or smoke, and automatically shuts down the laser operation.


This proactive approach to safety ensures that any potential fire risks are promptly detected and mitigated, preventing accidents and damage. xTool is also selling the fire safety set, which automatically releases CO2 gas in the enclosure to extinguish the flames. It does that using a small replaceable CO2 cartridge.
Additional safety mechanisms
In addition to the flame detection system, the xTool S1 comes equipped with an emergency stop switch. This switch allows users to instantaneously halt the engraving process in case of any unexpected issues or concerns, adding an extra layer of control and peace of mind.
The xTool S1 also includes other safety protocols to guarantee a secure operating conditions. These include automated shutdown tilt and impact detection which immediately stops the machine if something hits or moves it from a stationary position.
The xTool S1 also has a safety key protection system to prevent unauthorized use, adding yet another extra layer of security to the device.
In conclusion, the xTool S1 laser engraver’s safety system is a testament to the manufacturer’s dedication to providing users with a safe and reliable laser engraving experience. With its Class 1 safety certification, fully enclosed design, five-direction flame detection, emergency switch, and lid-open safety switch, it sets the standard for laser engraver safety in its class. Users can confidently harness the power of the xTool S1 for their creative and professional projects while knowing that their safety is a top priority.
xTool S1 Add-ons and Attachments
Riser base
With the riser base, you can engrave taller objects, up to 125mm, although the US version is different and has an adjustable base plate height and can support a bit taller (133mm) objects. This is probably due to different certification requirements for each country.


The riser base allows you to have three different engraving platform heights– with the honeycomb in top or bottom position and without it.


Supports the xTool RA2 chuck style rotary attachment
The use of riser base also enables you to use the RA2 rotary attachment which we will showcase in another article very soon. If you want to engrave taller objects or use larger projects with the rotary system, you can make the machine taller with a riser base.
Automatic Conveyor feeder
The automatic conveyor feeder can feed in boards that are longer than the machine and thanks to this you can engrave very large boards.
Smoke purifier
The xTool S1 is a high-speed laser cutter with efficient smoke extraction capabilities. However, the process can be problematic if you have neighbors nearby or you don’t have proper means of fume extraction. To address this issue, the xTool smoke purifier can effectively eliminate over 95% of smoke and odors.
This investment in health is especially crucial as venting without a purifier can lead to smoke entering your workspace, posing potential health risks to you and the people outside. We are already using it with our xTool P2 and S1 and it works amazingly well!
Fire extinguishing system
The xTool S1 has a lot of fire sensors inside. If it detect the fire it immediately shuts down. But if you want to step up your safety, you can purchase the fire extinguishing system. It uses a CO2 cartridge and it gets triggered by the S1 automatically and extinguishing the fire immediately.
This thing might save your house one day. It is highly recommended. But still, you should never leave the machine working unattended.
True optical output power measurement
First I need to measure the true optical power output of the xTool S1 using my optical power meter. The xTool S1 managed to hold the output power well above the specified 40W output which is great! Here our power meter is struggling a bit as it is rated only to 50W and starts overheating quickly and the indicated power starts to drop quickly.

xTool S1 Hands-On Performance Tests
Plywood engraving test pattern
Now let’s start testing the xTool S1 with our standard plywood engraving test.
Our standard plywood test pattern consists of a power scale test which shows how well the laser engraves at different speeds. The interval test shows us how the machine performs at engraving in horizontal and vertical direction. Any difference in performance would suggest a rectangular laser dot. The photo engraving test shows us how well it can engrave photos at different laser power levels.

The power scale test shows a very good contrast even at high speed which indicates good control over the output power across all power percentages. This is great for engraving photos as more contrast can be achieved.
The interval test looks pretty much the same in both directions which means that the laser spot is rectangular. We will measure it later when engraving anodized aluminum.
Photo engraving also looks good, and the details are great.

Compared to the 40W xTool D1 Pro, the pattern looks very similar which is not surprising as the internals of laser diode are probably the same. Both machines also produce very little smoke stains, which is great!
On the photo above you can see how it compares to some other laser engravers. Notice that the 20W and 10W machines use slower speeds for all engravings. Over the years we have tested many laser engravers, feel free to check our other reviews too.
Measuring laser spot size and shape with anodized aluminum test pattern
Next test on the list is the black anodized aluminum engraving test. Laser marking anodized aluminum produces very crisp and detailed engravings which are great for evaluating the machines mechanical performance as well as measuring the laser spot size and shape.

The three squares are engraved at different speeds to see how stable the machine remains at different speeds. The main feature of the test is the interval test in horizontal and vertical direction. It is used for measuring the focus spot size and shape. The result looks good! Let’s check it out with a microscope!
Small text engraving is done at 600mm/min and it looks incredible! xTool S1 is a very precise laser engraver, and the laser spot looks very small! Here is the tip of a ballpoint pen for size comparison. The machine is much more stable than the 40W xTool D1 Pro.

The first square was engraved with 100mm/min, the second one at 1000mm/min and the last one at 10000mm/min. The xTool S1 is much more stable than xTool D1 Pro when dragging diagonal lines although the xTool D1 Pro was already amongst the best in its class.


The interval test shows us that the laser spot size is just under 0.15mm (0.0059″) in both directions. This is an amazing result considering that this is an octa-diode laser module.


Focus distance test
Next test on the list is the focus distance test. First, I measured the ideal focus distance and engraved the first square with 0mm written in it, which represents the optimal focus. Then I raised the laser head by 3mm and engraved the second square. The head was raised 6mm for the third square. For the last bit, the head was raised 9mm in total.
This allows us to see how much the laser spot gets enlarged further away from the optimal focus which happens when you cut thick materials. The larger the laser spot, the worse the cutting performance. The xTool S1 did OK in this test. It was not the best, probably due to the laser module not being as tall as on other machines, as this affects the focal distance. But the result was still more than good enough.


Plywood laser cutting with the xTool S1 40W (3mm, 6mm, 10mm thick)
Now let’s test how well the xTool S1 performs at laser cutting Poplar plywood.
First, I tested laser cutting performance on 3mm (1/8″) and 6mm(1/4″) boards using our standard laser cutting test pattern. This pattern is testing cutting performance at 6 different speeds, 5 different numbers of passes and two power levels, all in one single job. Follow this link if you want to download these test patterns and test you machine too.
Here is how the xTool S1 laser cutter compares to the 40W xTool D1 Pro which we have tested previously. As we can see, the xTool S1 is much better laser cutter for cutting 3mm thick plywood (the left column), but at thicker, 6mm board(the right column), it performed almost the same. This may be an indication that the S1 has a laser beam that is more tightly focused at the optimal focus, but it diverges faster at greater distance.
We have tested a ton of other lasers too. Check our other reviews here.

Let’s see how the xTool S1 performs at cutting 10mm (0.4″) thick plywood. At 300mm/min, it needed 2 passes to cut through. And at 600mm/min, it only needed 3 passes which is still a very good result. The cut is relatively clean with not too much charring.
xTool S1 is a capable 40W enclosed diode laser cutter. It can easily compete with the best laser cutters in its range.


Acrylic cutting with the xTool S1 40W (3mm and 10mm)
Next on the list was the acrylic cutting test. For the 3mm (1/8″) thick black acrylic, it needed only one and a half passes to cut through at 600mm/min. As you can see, the first cut has cut approximately two thirds into the material. This is the same cutting performance as the xTool D1.
I also tested cutting 10mm (0.4″) acrylic and the xTool S1 has cut through in 6 passes, just like the xTool D1 Pro we have previously tested. The cutting result is great, with some white dust on the top due to the air assist but it can be cleaned off.


Cutting VERY thick solid wood with the xTool S1 40W
Now it’s time to cut some thicker stuff with the xTool S1 40W laser cutter. Here is an 18mm (0.7″) thick solid spruce board and it needed just over 5 passes to cut through at 300mm/min. This speed is too slow as it produces a lot of charring and some flames too.
Then I tried to cut through at 600mm/min and it needed a bit less than 7 passes. I also did this cutting test again with the diode laser cutter head lowered by an additional 7mm. Comparing the results, we can see that if you lower the diode laser head, the cut looks a bit cleaner and almost half less passes are needed.
The XCS software also supports automatic lowering of the laser head for cutting operations only, which improves the cutting performance, but does not affect the engraving quality. This is a very cool feature!
On the photos below, the right cut was made with the laser module lowered by 7mm and the left one was done at optimal surface focus:


I also attempted to cut the 38mm (1.5″) thick spruce solid wood, but the cut was not successful. The xTool S1 is not as good at cutting thicker stuff compared to the xTool D1 Pro 40W. But on the other side, it is better at cutting thinner boards which are more likely use scenario for a laser cutter like this.
The top most cut was made with the xTool S1:

Stainless steel engraving test
Then I tried engraving stainless steel. I used a very slow speed of 200mm/min like I used for all machines in this test. I made two engravings. One directly on bare stainless steel and the other side was blackened with a black spray paint which usually helped for lower powered machines. The 40W laser module is a bit too powerful for this very slow speed and it left a very thick marks and it also warped the plate due to the excessive heat.
Because of that, I also tried with higher speed (2000mm/min) and the result was much better. With some more tweaking, a lot better results can be achieved.

High speed scoring test (300mm/s)
I also tried to engrave a vector shape (scoring) with maximum working speed of 300mm/s to see if the xTool S1 stays stable and is performing well at high speed which was not the case for some other laser engravers. I engraved a vector design at 300mm/s which is the maximum speed for vector scoring. The machine remained stable, and you couldn’t tell the difference from slower engravings. Very impressive!
You should watch our YouTube video to see how frickin’ fast this is!

High speed engraving test (600mm/s)
The xTool S1 claims to reach speeds up to 600mm/min. This working speed can be used only for left/right movements which is what you use for filling the vector shapes and engraving photos. You should watch our YouTube video to see how frickin’ fast this is!
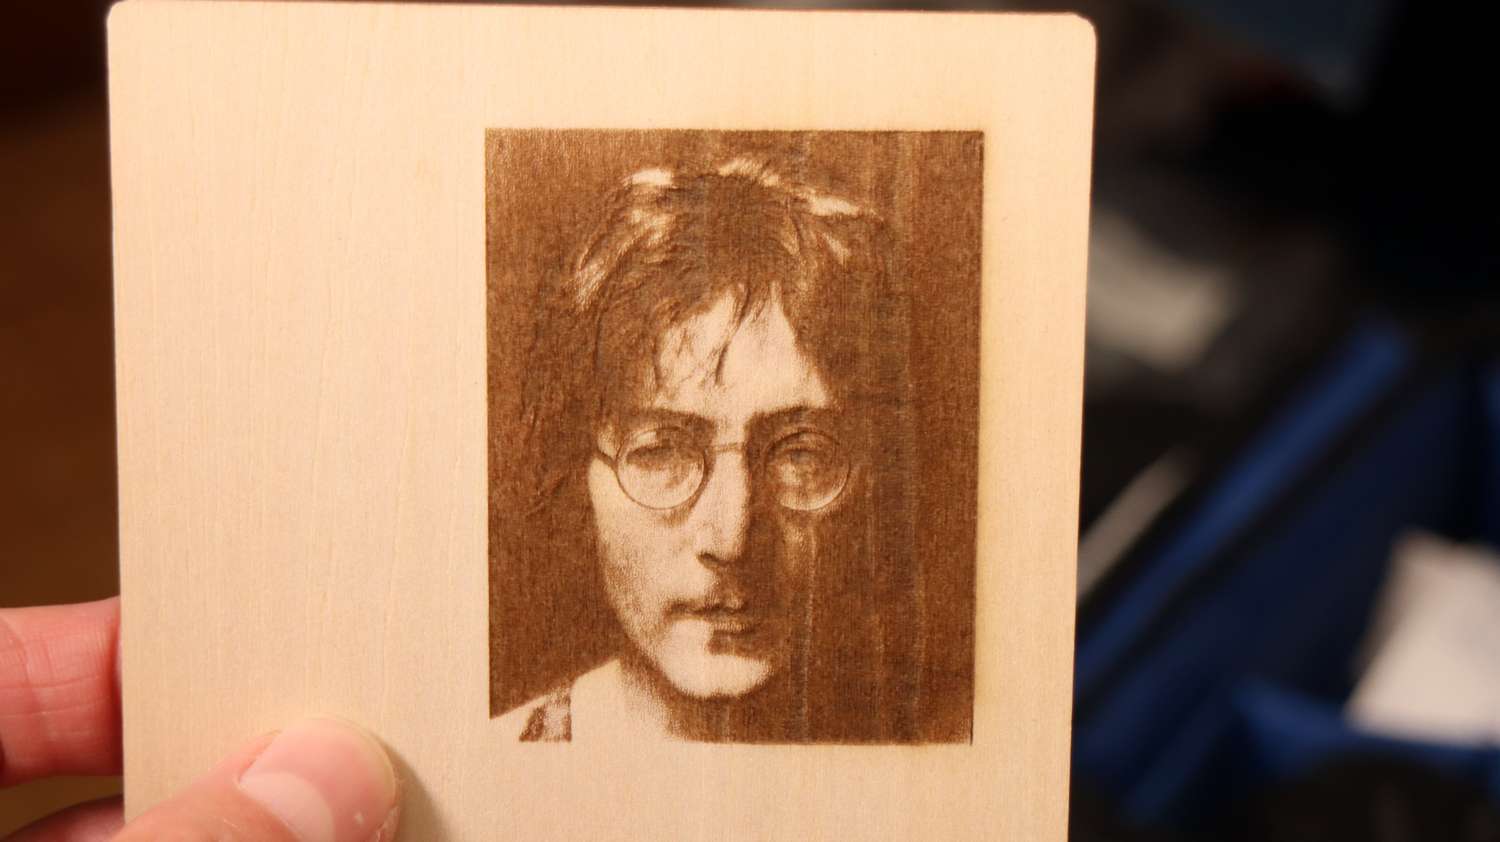
I tested this by engraving a photo at maximum speed to see if there will be any compromise in precision when running the machine this fast. This is a point where you need to have the powerful 40W laser module as you need to set the maximum output laser power to 100% to get the desired engraving effect at this speed. The result looks very nice, with very good details and a nice engraving depth. Again, the working speed is very impressive! Working with high speed will save you a lot of time.

Conclusion

Next-Generation Diode Laser Cutter With A Ton of New Features
Is the xTool S1 Worth It?
In wrapping up our review of the xTool S1 laser cutter and engraver, it's clear that this machine is an absolute standout in the world of laser cutting. Safety is a top priority here, with industry-leading safety systems and the unique advantage of not needing safety glasses, making it user-friendly for all experience levels.
What truly sets the xTool S1 apart is its remarkable versatility. With three laser modules, it's capable of engraving a wide variety of materials, making it a go-to choice for anyone with diverse projects in mind. What's even more impressive is the range of attachments it accommodates, from the RA2 chuck rotary attachment, riser base, fire extinguishing system, conveyor feeder for working with boards larger than the machines working dimensions, smoke purifier which filters out all the harmful smoke and smell and much more.
But it's not just about safety and versatility; the xTool S1 also boasts the kind of stability and precision that's essential for intricate work, thanks to its sturdy industrial mechanics. This machine is adaptable, fitting seamlessly into the workflows of hobbyists, home users, educational institutions, and businesses where laser safety is non-negotiable.
With its innovative features like auto focusing, twin point positioning and curved surface engraving, the xTool S1 is redefining the laser cutting and engraving experience, making it a must-have for anyone seeking a versatile, safe, and high-precision solution. Whether you're a creative hobbyist or a professional looking for top-notch results, the xTool S1 has you covered. It's a game-changer, no doubt about it.
And if you need even more cutting power, then you should check out our review of the xTool P2 55W CO2 laser cutter.
Use our coupon code "xToolJT" to get 10% off your order at xTool!
Buy the xTool S1 here!Buy xTool P2 if you need even mroe powerBe sure to also check out my reviews of newer laser engravers HERE!

This post was written by JT Makes It.
JT Makes It is an engineer, hobbyist, and DIY-er armed with a Master’s degree in Electrical Engineering and over a decade of professional experience in the industry. From an early age, JT Makes It was pushed by an insatiable curiosity, spending countless hours disassembling, understanding, improving, and creating various gadgets and products. This lifelong passion led to a broad spectrum of technical expertise ranging from electronics, woodworking, metalworking, and CNC machinery, with a particular focus on laser engravers.
For the past 9 years, he has shared his expertise through engaging videos on his YouTube channel. With the last three years dedicated to scrutinizing and testing laser engravers, he also created this website and emerged as a recognized authority in the field. His expertise extends across the spectrum of laser technologies, ranging from diode lasers, CO2 lasers, and fiber lasers, paying attention to details and providing practical insights.
With JT Makes It, expect a blend of technical expertise, backed with hands-on experience, and a genuine passion for innovation and creation, making him a trusted source in the realm of DIY and laser engraving enthusiasts alike.