- The xTool D1 Pro 40W Laser Module Review and Test
- The xTool D1 Pro 40W Module Upgrade Kit
- Measuring the true optical output laser power
- Plywood engraving test pattern
- Anodized aluminum engraving, mechanical stability and measuring the true laser spot size
- Plywood cutting test pattern for 3mm and 6mm plywood
- Hardwood cutting test
- Acrylic cutting test
- Stainless steel engraving test
- Cutting stainless steel and titanium with the xTool D1 Pro 40W laser module
- Colored engravings on titanium with the xTool D1 Pro 40W
- Engraving bitmap images and vector designs on stone
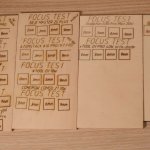
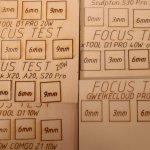
- Focus distance test
- Very thick plywood cutting test
- Cutting VERY thick solid wood with the xTool D1 Pro 40W laser engraver
- xTool D1 Pro 40W Pros and Cons
- Conclusion
- Testing the 10W ComMarker Omni 1: Better Than the 5W Version?
- The LARGEST Diode Laser Cutter? 70W Sculpfun S70 Max Review and Test
- xTool P2S vs xTool P2: Is It Worth the Upgrade? Best Desktop CO2 Laser Review and Test
- ComMarker Titan 1 Review – A Seriously Powerful JPT MOPA Fiber Laser!
- Atomstack Kraft Review – Laser Engraver Full of NEW FEATURES!
- Monport GA60
The xTool D1 Pro 40W Laser Module Review and Test
For the xTool D1 Pro 40W laser engraver, the xTool claims that it is able to cut up to 20mm thick pine wood, 15mm thick black acrylic and plywood and it should even be able to cut 0.1mm thick stainless steel. In this review, we will do a lot of real life tests.
We will try to engrave and cut a lot of materials ranging from simple plywood and hardwoods to acrylic, stainless steel and titanium. We will also run the xTool 40W laser module through our standardized engraving test patterns on plywood and anodized aluminum (coated aluminum plate) where it is easy to measure the true size of the laser dot.
We will also do our standard focus distance test which shows how the laser dot size diverges with distance. This will give us the insight on how well the xTool 40W octa-diode laser module will cut thicker materials. Combining high output power with a small laser focus spot results in high power density and combine that with the advanced stepper motor drivers that the xTool D1 Pro uses, we get a very precise and capable engraving machine.
And we will also test its limits, by cutting some ridiculously thick construction boards!
*The links on this website can be affiliate links. I earn a small commission at no extra cost to you. When you buy through these links you will support this website, which helps me to run this website(which cost money and a TON of time) and provide all these extensive reviews and information to you for free, without any paid membership.

The xTool D1 Pro 40W Module Upgrade Kit
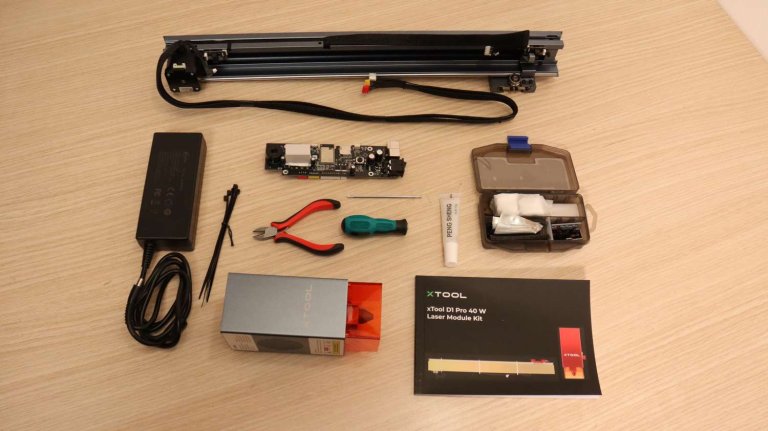
We’ve got the upgrade kit for our existing xTool D1 Pro 20W. It contains the 40W laser module, the upgraded and much more stable X-axis, upgraded control board and more powerful power supply to feed this beast with electricity! You also get upgraded limit switch circuit boards and all the necessary tools needed for the upgrade. The instructions are full of pictures, very clear and easy to follow.
Built-in air assist
The module has a built-in air assist air tubing. This way, it is very easy to connect the air hose from the air assist pump to top of the module.


Replaceable lens
This module also has a replaceable lens, and you get two spare lenses with the kit for keeping the machine operating for a long time. This is a great feature which we already saw with Sculpfun S30 Pro Max a few months ago. The lenses get dirty and usually it is enough just to clean them, but over time, the grime gets baked into it and its performance decreases. This is why it is great to be able to replace it.

Cooling system
The xTool D1 Pro 40W laser module is large and very well built. It has a very good cooling system which is necessary as such a powerful laser module produces a lot of heat which needs to be efficiently extracted. Running the module nice and cool enables it to be run at full power for extended periods of time without having the output power drop because of overheating. Good cooling system also makes sure that the xTool D1 Pro 40W laser module will have a long lifespan and will continue to work for many years.


Focusing method
The xTool D1 Pro 40W laser module has a convenient locking mechanism which holds the module in place. It allows for quick and easy focus adjustments.
Just like previous versions of the xTool D1 laser modules, this module also has a very convenient swivelling focus lever for adjusting the focus. When you need to focus the module, you just need to flip the swivelling arm out and lower the module until the swivelling arm touches the material underneath. At that height, the xTool D1 40W laser module is in perfect focus. Then you just need to tighten the retaining clip and the swivelling lever can be neatly tucked away.

Precise positioning of the engravings using the red crosshair
Just like the xTool D1 Pro 20W and xTool D1 10W machine, this laser engraver module also has a red crosshair which is tremendously useful for positioning the engravings on the workpiece. In Lightburn, you need to adjust the laser pointer offset and you are good to go!

Cutting depth adjustment
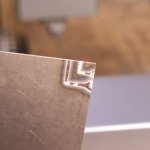
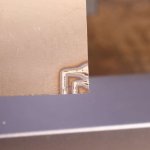
The focusing arm can be further adjusted by raising it up to 4mm. This enables you to lower the module for half the thickness of the material you want to cut with good precision, so that the optimal focus falls in the middle of the material you want to cut. This way the cutting performance should be the best. For example – if you want to cut 8mm thick acrylic, you lower the module for additional 4mm. This means that the laser beam will be the smallest in the middle of the material.

Magnetic light shield
On previous versions of xTool D1 laser modules, the light shield was held in its place by a screw. When you wanted to remove it, you needed to unscrew it which was a lot of work.
But the xTool D1 Pro 40W laser module has the light shield mounted on magnets and together with the built-in air assist routing, the disconnection of the light shield is very easy.

Why would you want to remove the light shield you might ask?
The light shield is a very welcoming part as it provides a good amount of eye protection from the powerful blue light laser beam. During the laser cutting process, the beam can unexpectedly bounce off the surface, and if you combine this with high laser power output, you get a very dangerous retina burning hazard that will make you blind. The light shield, which surrounds the laser beam and sits very low above the material, helps to catch most of these reflected rays, so it is a bit safer to be in the same room when the machine is running. But wearing safety goggles is still obligatory when dealing with such high output power output. Although the machine has additional safety features, you still need to wear safety goggles!
But low hanging light shield can sometimes get in the way when trying to engrave some weird shaped objects. For example if you want to make a small engraving on the inside of the spoon, the light shield will hit the edges of the spoon if you set the focus to the middle part of the spoon. In this case you will be able to quickly remove the light shield when you get in a situation like this.
You can get a good pair of safety googles for a reasonable price HERE. Keep your eyes safe!
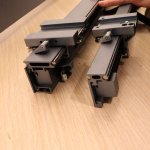
Improved x-axis gantry
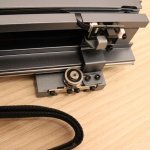
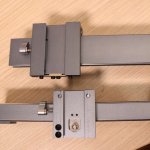
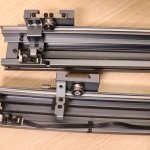
The upgraded x-axis looks much stronger. The biggest upgrade is a tensioner for the rollers. The previous version didn’t have this, and it could become loose over time and you would get more mechanical vibrations..
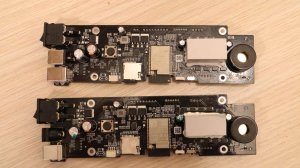
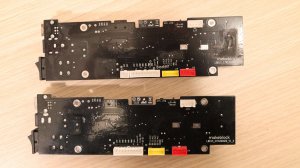
New control PCB board and improved limit switches
The new control board looks almost identical with the addition of another connector which is needed for supplying more current to the laser module. It is still backwards compatible with less powerful laser modules and it is also compatible with the xTool Infrared module we have tested a while ago. The xTool infrared module is great for engraving on all types of metals which blue diode laser modules can’t engrave.
In the xTool D1 Pro 40W laser module upgrade kit you also get the improved limit switches,

Measuring the true optical output laser power
We decided to measure the true optical power output of the xTool D1 Pro 40W laser module. Optical power is a good indicator of the diode lasers performance. A year or two ago, all laser modules were advertised falsely, stating their laser electric power instead of their true optical power (which was 5W or less at that time). Before measuring that, we have decided to clean the lens. The removal process is easy, the lens is held by a small screw. Even though we did a lot of cutting with this module, the lens remained clean. But we cleaned it with a q-tip and isopropyl alcohol.
The measured laser power initially showed over 40W, but it settled slightly lower than 40 watts, at 38W to be exact. That could be due to my meter being near its measuring limit (50W) and the heatsink behind the sensor being quite small for dissipating this amount of power. It the heatsink heats up, it measures a smaller number.
But it still shows that this laser module output power truly is the highest of all the diode laser modules we have measured so far.

Plywood engraving test pattern
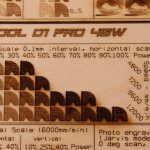
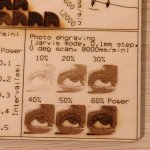
Like with every laser engraver we test, we first did our standard engraving test pattern to see how does this module engrave with different speeds and set intervals and it also tests how well does it perform at photo engraving,
Since the xTool D1 Pro 40W is the first octa-diode laser engraver with 40W of power output, we once again needed to modify our test pattern so the machine does not burn directly through the material. . We modified our existing 20W pattern by simply doubling all engraving speeds since this machine has twice the power.
If you want to download the test files that we use and test your laser engraver, click HERE and you will be able to download our complete set of test patterns that we use for 5W, 10W, 20W and 40W machines. If you have already subscribed, you can again click the download link which you have received when subscribing.

The result looks very impressive! This time we have used a small amount of air assist to get rid of the smoke stains. Compared to the xTool D1 Pro 20W, the 40W module is much better at engraving at low power levels. Note that all speeds are twice as high for the 40W module and four times higher than the ones I used for xTool D1 with 10W module. Compared to other machines, the result is very impressive, and the photo engravings are very detailed.
Anodized aluminum engraving, mechanical stability and measuring the true laser spot size
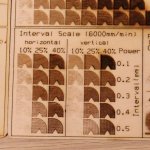
We engraved our standard test pattern on black anodized aluminum plate. Anodized aluminum produces very crisp and detailed engravings which enables us to measure the laser focus spot size and evaluate the machines mechanical stability.


This machine has exceptional mechanical stability! It is a bit better than the non-upgraded 20W xTool D1 Pro, despite the 40 watt module being much bigger and heavier. This means that the upgraded X-axis made a lot of improvement! There are very little mechanical vibrations, and the engravings are very detailed. Even the smallest 1mm text is easily readable!

With these squares you can see how the accuracy changes with speeds from 100mm/min, 1000mm/min and 10000 mm/min.
The main feature of this test is the interval test in vertical and horizontal direction to see if the laser spot is rectangular or square shaped. Let’s see the details with a microscope!
The laser dot is a perfect square, sized 0.15mm. This means its cutting performance will be the same on both axis. This is very impressive!
Plywood cutting test pattern for 3mm and 6mm plywood
We did some cutting tests with the xTool D1 Pro 40W on 3mm and 6mm thick Poplar plywood. Instead of doing the tests at different speeds separately like we did so far, we have designed a new test pattern similar to the one that we used for the CO2 Gweike Cloud. This pattern will show us how many passes are needed to cut through at different speeds. You can download these files HERE.
The xTool D1 Pro 40W laser module cuts plywood like butter. The results for the 3mm plywood look impressive! And the cutting performance with 6mm plywood is also something no one would believe this was possible just one year ago!

On the 6mm board, I have discovered that the lower part of the plywood board had some wood-filler in it which hindered the cutting performance for the highest speed. This is why the results with the fastest speed are not ideal. Watch the YouTube video at the top of this article for more details.
Overall, the cutting results are very impressive for a diode laser. The cutting performance is still about half as good as the Gweike Cloud 50-watt CO2 laser we have tested previously. But the xTool D1 Pro 40W laser module still leaves all other diode lasers way behind.

Hardwood cutting test
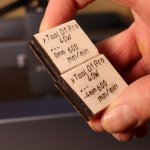
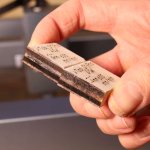
We also did some hardwood cutting test. At 600mm/min, the xTool D1 Pro 40W module was able to cut through all of them with a single pass! Very impressive!

Acrylic cutting test
Next on the list was the black acrylic cutting test. This machine cuts acrylic very well but note that transparent and white colors can’t be cut with any blue diode laser! It works well on black, red, green and yellow acrylic. Transparent, white and blue don’t work because the blue laser beam either bounces off or goes right through.
It was able to cut the 3mm acrylic in approximately 1.5 passes at 600mm/min.
Then I tried to cut 10mm thick acrylic and the xTool D1 Pro 40W laser module was able to cut it in only 6 passes! This is incredible result! For comparison, the 20W xTool D1 Pro module needed 14 passes.
Stainless steel engraving test
We tried two different scenarios for engraving stainless steel with the xTool D1 Pro 40W laser module.
First scenario is engraving directly on the stainless steel and the second is on the stainless steel that was previously blackened with a black spray paint which is beneficial for lower powered machines (it’s not that beneficial for this module, but we did id anyway). We used a very slow speed of 200mm/min and 100% power which showed to be too slow for this ultra powerful laser module as it heated up the plate so much that it bent. The underscore line was done at 1000mm/min to test the effects of speed.
The text is a bit blurry which was caused by setting the speed too low for this amount of power. With this laser engraver you could engrave stainless steel with very high speed. But for this test we kept the slow speed we used for other machines so you can see the difference. The line made at 1000mm/min was looking much better and was still deep enough that you can catch it with a fingernail.


Cutting stainless steel and titanium with the xTool D1 Pro 40W laser module
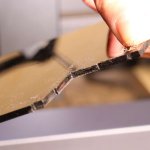
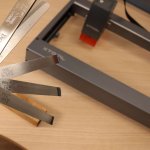
We also tried to cut stainless steel. I tried cutting the feeler gauge to see what is the maximum thickness that can be cut at 100mm/min.
This module was able to cut up to 0.15mm thick steel which is more than what the 20W modules were capable of. The cut was not as clean for the thickest cut though.
I also had some 0.1mm titanium at hand and this machine was able to cut it with ease! For fun,we also tried cutting 0.5mm thick titanium, but it didn’t work.
Colored engravings on titanium with the xTool D1 Pro 40W
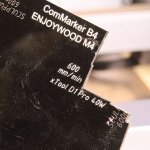
You can also use this laser module to make colored engravings on titanium by heating it to certain temperature which causes colored oxides to form on the surface. The best machines for this job are machines like the ComMarker B4 fiber laser we tested earlier, but the xTool D1 Pro 40W is also powerful enough to do it.
This was my first try. I believe that with some more tweaking you could produce even nicer colors!

Engraving bitmap images and vector designs on stone
You can also engrave stone with the xTool D1 Pro 40W. When engraving stone, the laser beam causes the surface to crack and changing the color of the surface. It produces deep and durable engravings.
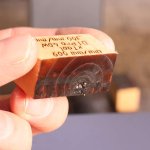
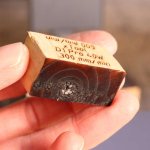
I engraved a vector design and a bitmap photo. You can engrave very fast and with not much power to achieve great results. The engravings on stone are very deep and permanent.
This was done in the first try and the settings are not optimal. The photo engraving could be improved a lot by further adjusting the image properties like contrast, gamma, and brightness inside the Lightburn.

Focus distance test
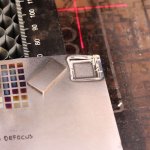
The next test on the list is the focus distance test to see how far the laser beam retains its focus. Focus distance test show us how the size of the laser beam increases further away from the optimal focus. This shows us how big the laser spot will be deeper down in the material when laser cutting. The smaller the laser spot, the faster it will cut as the energy density will be bigger.
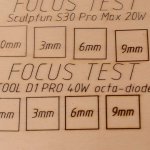
I start by placing three 3mm acrylic sheets on the laser bed and place the wood board on top. Then, I focus the laser optimally and engrave the text and the first square with 0mm written in it. 0mm is the optimal focus. Then, I keep removing the 3mm sheets one by one, without readjusting the focus to see how the laser beam size increases further away from the optimal focus.
Compared to other machines, the xTool D1 Pro 40W laser module has a slightly larger focus spot than the lower powered modules. This is expected since it is harder to focus 8 diodes. But the results are still very good!
Very thick plywood cutting test
10mm Poplar plywood cutting test
Now that we know that this machines is good at retaining tight focus spot at a long distance, we can try cutting come thicker plywood.
We started with the 10mm Poplar plywood board at 600mm/min. The xTool D1 Pro 40W cuts it like butter!
First time we cut it without lowering the focus spot and the second time we lowered the focus spot by 4 millimetres using the scale near the swivelling focusing arm, but it didn’t do much difference as it cut through in two passes both times. Both cuts are relatively clean without significant charring. This is an incredible result! The 20W xTool D1 Pro needed 4.5 passes for this job.
18mm Poplar plywood cutting test
Next, we tried cutting 18mm thick Poplar plywood which the 20W xTool D1 module wasn’t able to cut when we were testing it with an air assist.
But the xTool D1 Pro 40W laser module was able to cut it in 6 passes at 300mm/min.
The problem with plywood this thick is that it contains many layers of glue which is hard to cut. This is why the cut is not nice and clean.

Cutting VERY thick solid wood with the xTool D1 Pro 40W laser engraver
First we tried cutting 17mm thick pine board. It was able to cut through in 4.5 passes at 600mm/min and 2.5 passes at 300mm/min. Both cuts look very clean.
As it cut through that board so easily, we decided to put the xTool D1 Pro 40W laser engraver to its limits.
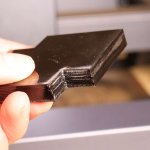
First we tried to cut 36mm thick spruce plank at 300mm/min. We lowered the module as much as we could, put the air assist to the max, and it was able to cut through in only 7 passes! This is incredible! And the cut looks nice and clean.

We also tried cutting it across the thicker side, which is 44mm thick. It was able to cut through in only 9 passes! We couldn’t believe our eyes! This machine retains focus for very large distance! We are sure that it could cut 50mm(2″) material thickness as well!

xTool D1 Pro 40W Pros and Cons
Pros:
- The most powerful laser engraver so far
- very long focus distance
- can cut ridiculously thick materials
- good mechanical stability
- good quality (will last a long time)
- integrated air assist tubing
- replaceable lens
- red crosshair for positioning
- magnetic light shield
- quick and easy focus adjustment
- fixed issues that were present with older models
- almost in the CO2 laser cutting performance category
- not really that much expensive compared to cost of a CO2 laser
- less maintenance and longer life than CO2 laser
- the upgrade kit contains easy to follow instructions for upgrading the xTool D1 Pro laser
Cons:
- cooling system is quite loud, but it needs to be if you want good cooling and long life
- this module could benefit with a stronger air assist pump
- diode lasers can’t cut white or transparent acrylic (but no other diode lasers can either. it is physically impossible due to blue light laser beam)
A budget friendly alternative for fiber lasers
Conclusion
The xTool D1 Pro 40W laser module is truly a breakthrough in diode laser engraver technology. Combining eight individual laser diodes into one tightly focused laser beam is not an easy task. But the guys at xTool did it perfectly! The 40W diode laser module is well thought out, it has a powerful cooling system and well thought out air assist and focusing system. They solved all the problems and issues that were present on the previous model.
It is a machine that is designed to do its job quickly and reliably. With the replaceable lens and good laser module cooling system, you can count on it to stay fully operational for many years.
Don't forget to also check out the review of the xTool D1 Pro 20W laser engraver and our review of the xTool RA2 Pro rotary attachment if you are planning to engrave cylindrical objects.
You can use our coupon code "JTxTool" for a 10% off at checkout! Only for a limited amount of time and for a limited amount of orders!
Be sure to also check out my reviews of newer laser engravers HERE!

This post was written by JT Makes It.
JT Makes It is an engineer, hobbyist, and DIY-er armed with a Master’s degree in Electrical Engineering and over a decade of professional experience in the industry. From an early age, JT Makes It was pushed by an insatiable curiosity, spending countless hours disassembling, understanding, improving, and creating various gadgets and products. This lifelong passion led to a broad spectrum of technical expertise ranging from electronics, woodworking, metalworking, and CNC machinery, with a particular focus on laser engravers.
For the past 9 years, he has shared his expertise through engaging videos on his YouTube channel. With the last three years dedicated to scrutinizing and testing laser engravers, he also created this website and emerged as a recognized authority in the field. His expertise extends across the spectrum of laser technologies, ranging from diode lasers, CO2 lasers, and fiber lasers, paying attention to details and providing practical insights.
With JT Makes It, expect a blend of technical expertise, backed with hands-on experience, and a genuine passion for innovation and creation, making him a trusted source in the realm of DIY and laser engraving enthusiasts alike.
Check out other stuff we have reviewed:
Tags: Diode LaserxTool








Thank you for all of the great information. I downloaded the grid test and it only goes up to 20W, any chance you could send the 40 W?
Appreciate the help,
Jessica
Hi, We have updated the download link. Visit the download page again to download the updated version of the test files.
Do you know when the 40w laser will be available in Europe? Thanks in advance, Laura
You can buy the module and the machine separately from their EU store: https://www.xtool.eu/products/xtool-d1-pro-40w-laser-module?ref=8nM_J_3Zfk8s
Awesome review! I am so excited to try some of the features you’ve mentioned.
I’m wondering if you could help me? I previously had my xtool d1 10w connected to lighburn, but cannot get my 40w to connect for anything! It’s working with xtool creative space & I downloaded the d1 pro lb file from the xtool website, and tried to import as I had previously. Any insight into connecting?
Thank you!!
Hi, This is strange. If it works with creative space, then there is nothing wrong electrically. It should be some kind of driver issue. I had no problems connecting, but if I remember correctly, I needed to add it as a new device and download newer lightburn settings file.
if that doesn’t work, try connecting it to another computer. You can install Lightburn on two computers using one license.
I saw you said that the 40w new board and plate is backwards compatible, but on the Xtool website it says it is not?
Which is true, if i installed the 40w with board n rail etc.. can i swap out my 10w when I need finer laser points?
thanks
C