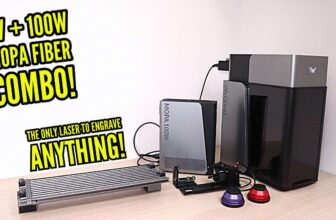
- Atomstack MR20 Upgrade Review and Test
- What's in the box?
- Focusing and using the Atomstack MR20 Fiber Laser
- Measuring Laser Spot Size and Engraving Precision
- Focus Distance Test
- How Does the Atomstack MR20 Compare to Blue Laser Modules When Engraving on Stainless Steel?
- Engraving Raw Aluminum With the Atomstack MR20
- Engraving anodized aluminum
- Engraving black acrylic
- Engraving white plastics
- Engraving stone
- How Does the Atomstack MR20 Fiber Laser Module Perform at Laser Cutting?
- Other uses of the Atomstack MR20
- Is Atomstack MR20 Worth Buying?
Atomstack MR20 Upgrade Review and Test
In this article, I will review a unique kind of an upgrade for a diode laser engraver, the Atomstack MR20, a true 20W fiber laser upgrade kit for Atomstack laser engravers. It produces invisible laser light with 1064 nanometer wavelength light which will allow you to make deep engravings on all types of metal and plastic.
*The links on this website can be affiliate links. I earn a small commission at no extra cost to you. When you buy through these links you will support this website, which helps me to run this website(which cost money and a TON of time) and provide all these extensive reviews and information to you for free, without any paid membership.
What's in the box?
The kit includes a true 20-watt fiber laser source and a laser head. You also get a new control board, fine focus adjustment upgrade and all the needed accessories and cables.
The laser head is permanently connected to the laser source with an optical fiber. The cable is durable and flexible. The laser module is very well made. It has two red laser pointers on the side which are used for finding the optimal focus distance as we will see later.

I will mount this upgrade kit on the Atomstack Maker X30 Pro which I have tested previously. The kit can also be mounted on a majority of the more affordable Atomstack laser engravers like the Atomstack A20, X20 S20 pro, and Atomstack A10 Pro which have all been tested here on this website.

The installation of the MR20 fiber laser upgrade kit is simple. First you need to install the fine focus adjuster. Then you remove the old control board and all the wiring and install the new one.

The upgrade kit is designed so that you will be able to switch between the blue diode and fiber laser with ease. When you want to use blue laser diode, you just need to connect two wires together. When using the fiber laser, you disconnect them and connect the additional wire which goes to the laser module.


The thing that bothers me is that the additional wire harness is not well thought out and looks like a quick fix. The USB connector attaches to the fiber laser source and the other side goes to the laser module directly. All other cables go to the motherboard. The cable management is poor, and the harness might even get in the way of the laser beam if you are not careful. I wish this would be better, but you can still mitigate this issue by doing some modifications yourself.

With the kit, you get very cheap green safety glasses which I don’t trust for this laser source as it produces invisible laser light of very high intensity. This is why I rather use these laser safety glasses which provide at least 10 times better protection for your eyes.


Focusing and using the Atomstack MR20 Fiber Laser
Focusing the module is easy. Quick focus adjustment is done by releasing two thumb screws. The focus is perfectly adjusted when two red dots align on the surface. Then you can fine tune the focus with the fine focus adjustment screw. This type of focusing method is very convenient and precise.

The red laser beam is also very handy for framing your work area to see where engravings will be positioned on your object.
With this rotating knob on the fiber laser source, the pulse frequency can be adjusted from 30 to 60kHz which changes the engraving effect. We will test this effect later.

Measuring Laser Spot Size and Engraving Precision
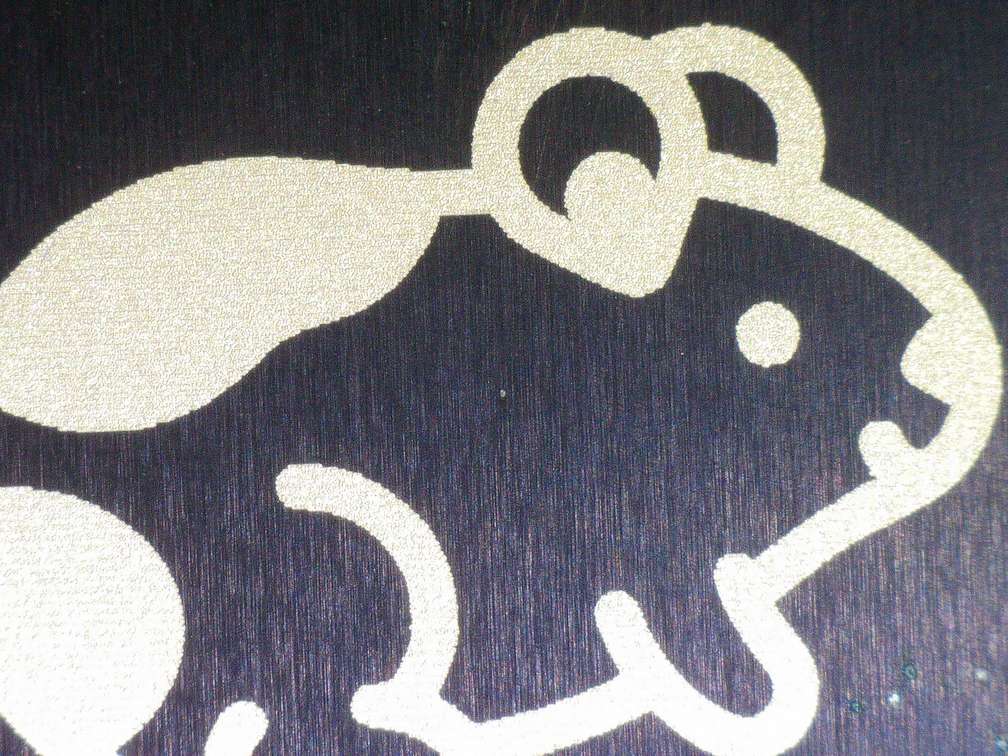
I engraved my standard test pattern with the Atomstack MR20 on anodized aluminum to measure the focus spot size and test how well it performs at small text engraving. Test pattern also contains three squares that are engraved at different speeds ranging from 100 to 10000mm/min to see how the speed affects the engraving performance. The main feature of the test pattern is the interval test, which is used to measure the laser spot size and shape by filling the shapes in vertical and horizontal directions with each shape having different fill density. I also engraved a hamster to see how well it performs with a more practical engraving task.
If you want to download this test pattern and test your machine, subscribe to our mailing list and you will get a download link for all the test files that are used on this site.

Looking at the results, we can see that the laser beam is very thin(under 0.05mm) and is able to produce very small details. The only problem is that my Atomstack X30 Pro frame lacks mechanical precision(maybe belt tension should be adjusted a bit better) and because the laser spot size is very small this is much more noticeable.

If we compare the results to the same test done on this machine with a blue laser module on the same frame, we can clearly see the difference:
-

- Atomstack X30 Pro

Looking at the squares engraved with different speeds, we can see that the speed doesn’t have a big effect on the engraving brightness like it has with blue laser modules. Fiber lasers are capable of engraving at very high speeds without loosing the engraving effect. Here is a square which was engraved at 10000mm/min and it looks perfect!

Looking at the interval test, we can see that the laser spot size is approximately in the range of 0.05mm, but because the machine lacks mechanical stability, the lines are unevenly spaced, which will cause problems when trying to do consistent fills.


When looking at the engraving of a hamster, the mechanical precision issue is even more present. In this case I shouldn’t have traced the outlines of the vectors. With the big laser spot that a blue laser module produces, we wouldn’t notice these problems, but with the thin laser beam of the Atomstack MR20 the issue is clearly visible.

This effect can be corrected by enabling scanning offset in the Lightburn software. I experimented a bit with the settings, until I was able to produce better engraving results. Here is the before and after:


Focus Distance Test
Next, I went to see how well the laser module retains its focus further away from its optimal focus distance.
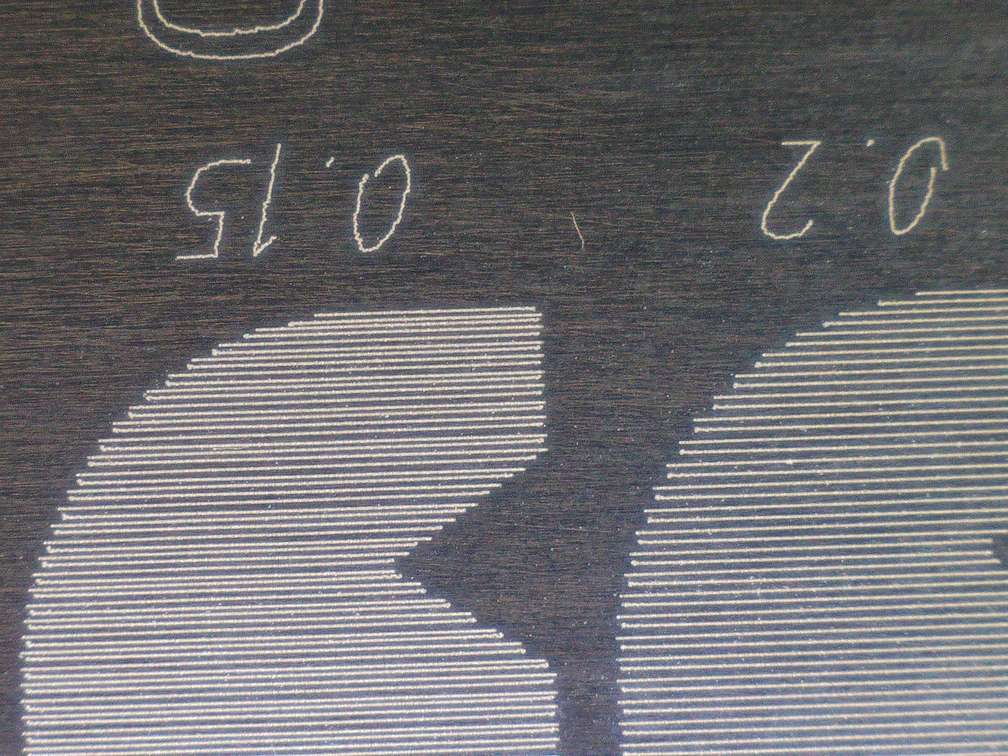
First, I engraved a square at optimal focus. Then I removed one 3mm-thick acrylic board from underneath and engraved it again without readjusting the focus. The engraving was much weaker than before, so I increased the power and engraved it again. I tried again with full power. Then I removed another plate to test it at 6mm, and the laser was barely able to engrave the text as it is not meant to work at such high amount of de-focus.

If we look at the results under the microscope, we can see that the laser spot size is still relatively small at 3mm.


You can use de-focus to your advantage. I have also engraved a hamster at 3-millimeter de-focus (without vector outline tracing) and the engraving came out much nicer thanks to the larger focus spot size.
How Does the Atomstack MR20 Compare to Blue Laser Modules When Engraving on Stainless Steel?
This laser module is great for engraving stainless steel. It produces much thinner lines and can engrave much faster. Here you can see how it compares to blue diode lasers. The important thing to know is that blue lasers can’t engrave brass, copper, or aluminum at all, but this MR20 module can.

I also engraved my logo on a half a millimeter thick stainless-steel plate at full power and the Atomstack MR20 fiber laser engraver was powerful enough for the text to stick out at the other side of the plate because the steel warps due to the heat. This is a powerful module!

Engraving Raw Aluminum With the Atomstack MR20
I did some experiments on raw aluminum to see the effects of the frequency settings on the laser module. First, I engraved my JT Makes It logo with 30kHz, which is the lowest frequency setting. The second time I tried with 60kHz and with this setting the beam was not marking the surface. Only when I decreased the frequency to around 45kHz in the middle of engraving, did the beam start marking the surface again.
The frequency parameter doesn’t produce vastly different results on raw aluminum. The higher frequency reduces the energy of the individual laser pulses, allowing you to engrave more delicate materials like plastics.
Then I tried engraving raw aluminum with the recommended settings that come in the manual (10000mm/min, 30kHz, 80% power). The result came out quite well, but it isn’t dark like pictured in the manual. It is important to note that it is almost impossible to make dark engravings on aluminum.


Engraving anodized aluminum
Thanks to the tightly focused beam, this machine can produce very intricate engravings on anodized (or coated) aluminum keychains.

Engraving black acrylic
Fiber lasers are also great for engraving on black acrylic. Fiber laser will produce white engravings which are deep, very durable and look great.

Engraving white plastics
Compared to galvo fiber lasers, this machine struggles a bit with more delicate engravings on some plastics. Because it is a gantry machine it is slower and therefore it is more difficult to control the depth of engraving in some plastics as it can quickly melt.
I tried a few different power and frequency settings, but I didn’t find the perfect combination for this type of plastic.

Engraving stone
The Atomstack MR20 also works great on stone. It leaves a good-looking white engraving which is slightly brighter compared to what blue diode lasers produce.

How Does the Atomstack MR20 Fiber Laser Module Perform at Laser Cutting?
Laser cutting 0.5mm thick aluminum plate
Now let’s see how well the Atomstack MR20 performs at laser cutting. First, I tried to cut half a millimeter thick aluminum plate, but it didn’t go through. It has left a very deep engraving that is visible from the other side of the plate, but the letters didn’t pop out.

Laser cutting 0.1mm thick titanium
Then I tried to cut a 0.1mm (0.004″) thick titanium sheet and it went through in the first pass. Cutting titanium and stainless steel will leave discolored edges since the metal changes color when heated.

Laser cutting 0.1mm aluminum business card
But cutting thin (0.004″) aluminum like this metal business card will leave a nice and clean edge because aluminum doesn’t get discolored due to the heat.

Trying to laser cut 1.5mm thick brass with the Atomstack MR20
For fun I tried to cut a 1.5mm (0.06″) thick brass plate to show you what are the problems when trying to cut thicker stuff.
I have let it run for 50 passes with slow speed and full power. As we have seen earlier, a fiber laser produces a very thin laser beam which has very high energy density which melts the metal easily.
But because the beam is very thin, the molten metal melts back together behind the beam as the gap is very small. Because of that, the deeper you cut, the more noticeable this effect becomes.
With galvo fiber lasers this effect can be mitigated by enabling beam wobble parameter which runs the beam in very small circles which produce wider cut. But with a gantry machine this is very difficult to do as it is not as precise or fast as the galvo system.
Looking at the result we can see that the engraving is sticking out of the surface instead of being recessed. With each pass, the molten brass was welding back together. This is why it was unable to cut through.

Lastly, I wanted to give the Atomstack MR20 another chance at laser cutting.
First, I tried to cut a 0.2mm-thick(0.008″) feeler gauge at 300mm/min. The cutting progress was slow, and it was able to cut through in around 30 passes.
Then I tried again with a much higher speed of 1500mm/min and despite needing more passes, the overall duration of cutting time was significantly lower.

Other uses of the Atomstack MR20
Rust removal
This machine can also be used to effectively remove rust from precision parts. Thanks to its long focus distance, it can effectively remove it from more textured surfaces too.
It can also be used to clean grime from old coins and make them shiny as new!

Marking tools
Since it can mark all types of metal, it is a great machine for marking tools and other belongings.

Fits a very specific purpose
Is Atomstack MR20 Worth Buying?
In conclusion, the Atomstack MR20 is a unique type of laser engraver attachment. It can expand the usability of your diode laser engraver.
Compared to galvo fiber lasers, it has some weaknesses as it lacks the speed and precision, but it can make up for that by providing you a much larger work area. It also costs less than buying a separate galvo fiber laser.
If you want only the expanded engraving performance which is offered by the infrared beam (engraving on all metals and plastics), but don't want to spend so much money, then you should check out the Atomstack R30 V2 the upgraded infrared module. It costs less, but it also has only 2W of optical output power which should be enough for engraving purposes.
You can use my coupon code “JTAtomstack” for 7% off site-wide at atomstack.com!
Buy the Atomstack MR20 upgradeBuy Atomstack infrared moduleBe sure to also check out my reviews of newer laser engravers HERE!

This post was written by JT Makes It.
JT Makes It is an engineer, hobbyist, and DIY-er armed with a Master’s degree in Electrical Engineering and over a decade of professional experience in the industry. From an early age, JT Makes It was pushed by an insatiable curiosity, spending countless hours disassembling, understanding, improving, and creating various gadgets and products. This lifelong passion led to a broad spectrum of technical expertise ranging from electronics, woodworking, metalworking, and CNC machinery, with a particular focus on laser engravers.
For the past 9 years, he has shared his expertise through engaging videos on his YouTube channel. With the last three years dedicated to scrutinizing and testing laser engravers, he also created this website and emerged as a recognized authority in the field. His expertise extends across the spectrum of laser technologies, ranging from diode lasers, CO2 lasers, and fiber lasers, paying attention to details and providing practical insights.
With JT Makes It, expect a blend of technical expertise, backed with hands-on experience, and a genuine passion for innovation and creation, making him a trusted source in the realm of DIY and laser engraving enthusiasts alike.